

Arena Breakout Mobile S11 introduces a refined reinforcement spawn system with events triggering every 15 minutes at fixed intervals (15, 30, 45, 60-minute marks), allowing up to 4 events per raid. The critical call-back window—the period before reinforcement lock activates—offers 5-minute exploitation opportunities with 15-25% higher rare item rates. Understanding spawn timing, audio cues, and the 5-minute raid-end lockout prevents wasted respawn costs while maximizing loot efficiency.
S11 Reinforcement Spawn System
S11 implements predictable 15-minute interval spawns at 15, 30, 45, and 60-minute marks. Each raid supports up to 4 events, with one teammate respawn per raid at Koen cost. This makes timing critical—calling reinforcements too early wastes opportunities, while waiting too long risks hitting the reinforcement lock.
For consistent Koen reserves across sessions, Arena Breakout Mobile bonds top up through BitTopup ensures you maintain currency for optimal call-back exploitation.
S11 Changes: Fixed Intervals Replace Randomness
S11 replaced S10's variable 10-20 minute spawn windows with fixed 15-minute intervals, eliminating guesswork. Players now set timers at raid start to anticipate exact spawn moments.
The spawn lock mechanism prevents reinforcement calls when less than 5 minutes of raid time remains, stopping last-second respawn abuse near extraction points.
The Call-Back Window: 60-90 Second Golden Opportunity
The call-back window represents the first 60-90 seconds after event spawn—reduced resistance while accessing high-value containers. Events contain 3-5 marked containers and 1-2 unmarked jackpot caches with 15-25% higher rare item rates. Tier-3 and Tier-4 items appear at 40%+ rates.
Audio cues precede events by 3 seconds. Timely Support uses helicopter sounds (100+ meter range), Easy Pickings features container clanging. Execute 180-degree scans within 3 seconds to identify spawn direction.
Why Timing Matters
Reinforcement events contribute 30-40% of total raid points. Each event offers 200-1000 bonus points, with total potential reaching 1400-2600 per raid. Missing one event significantly reduces profitability.
The first 10-15 seconds after spawn represent peak vulnerability. Establishing ambush positions 2-3 minutes before spawn times allows eliminating reinforcements immediately upon arrival.
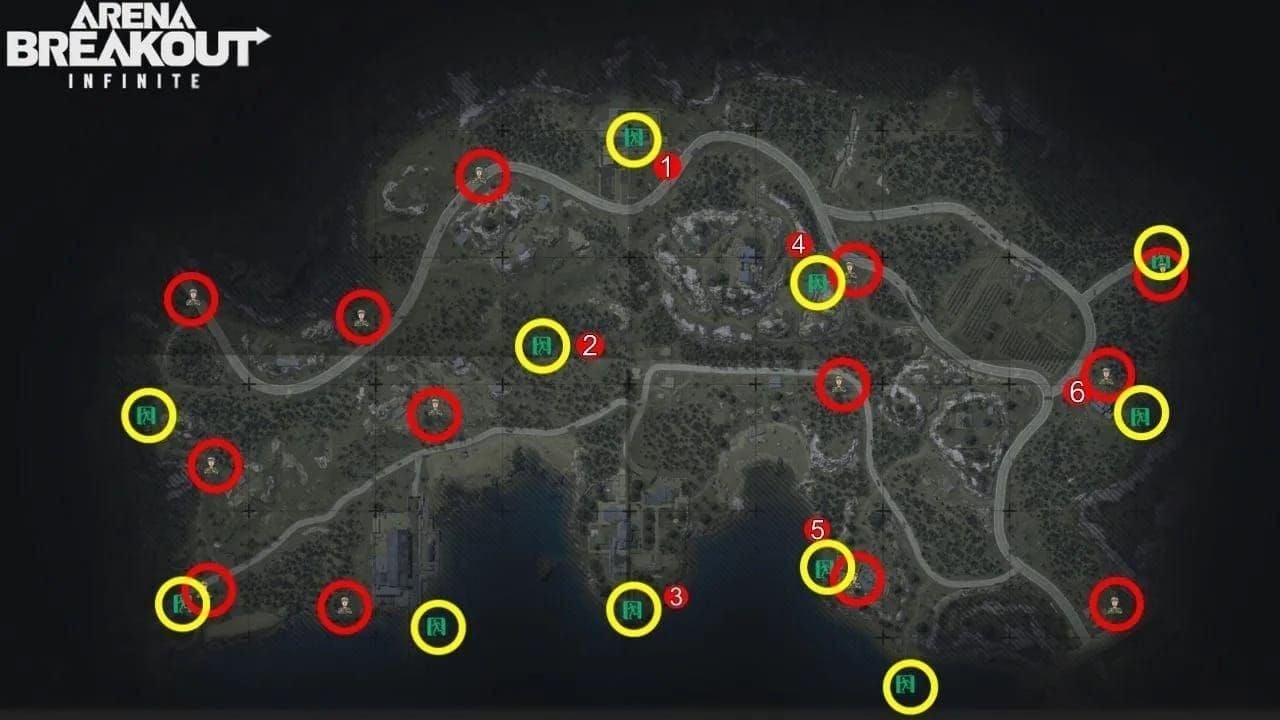
Exact Spawn Timing Per Map
Each map features 3-6 primary spawn zones. Understanding map-specific variations optimizes routes and positioning.
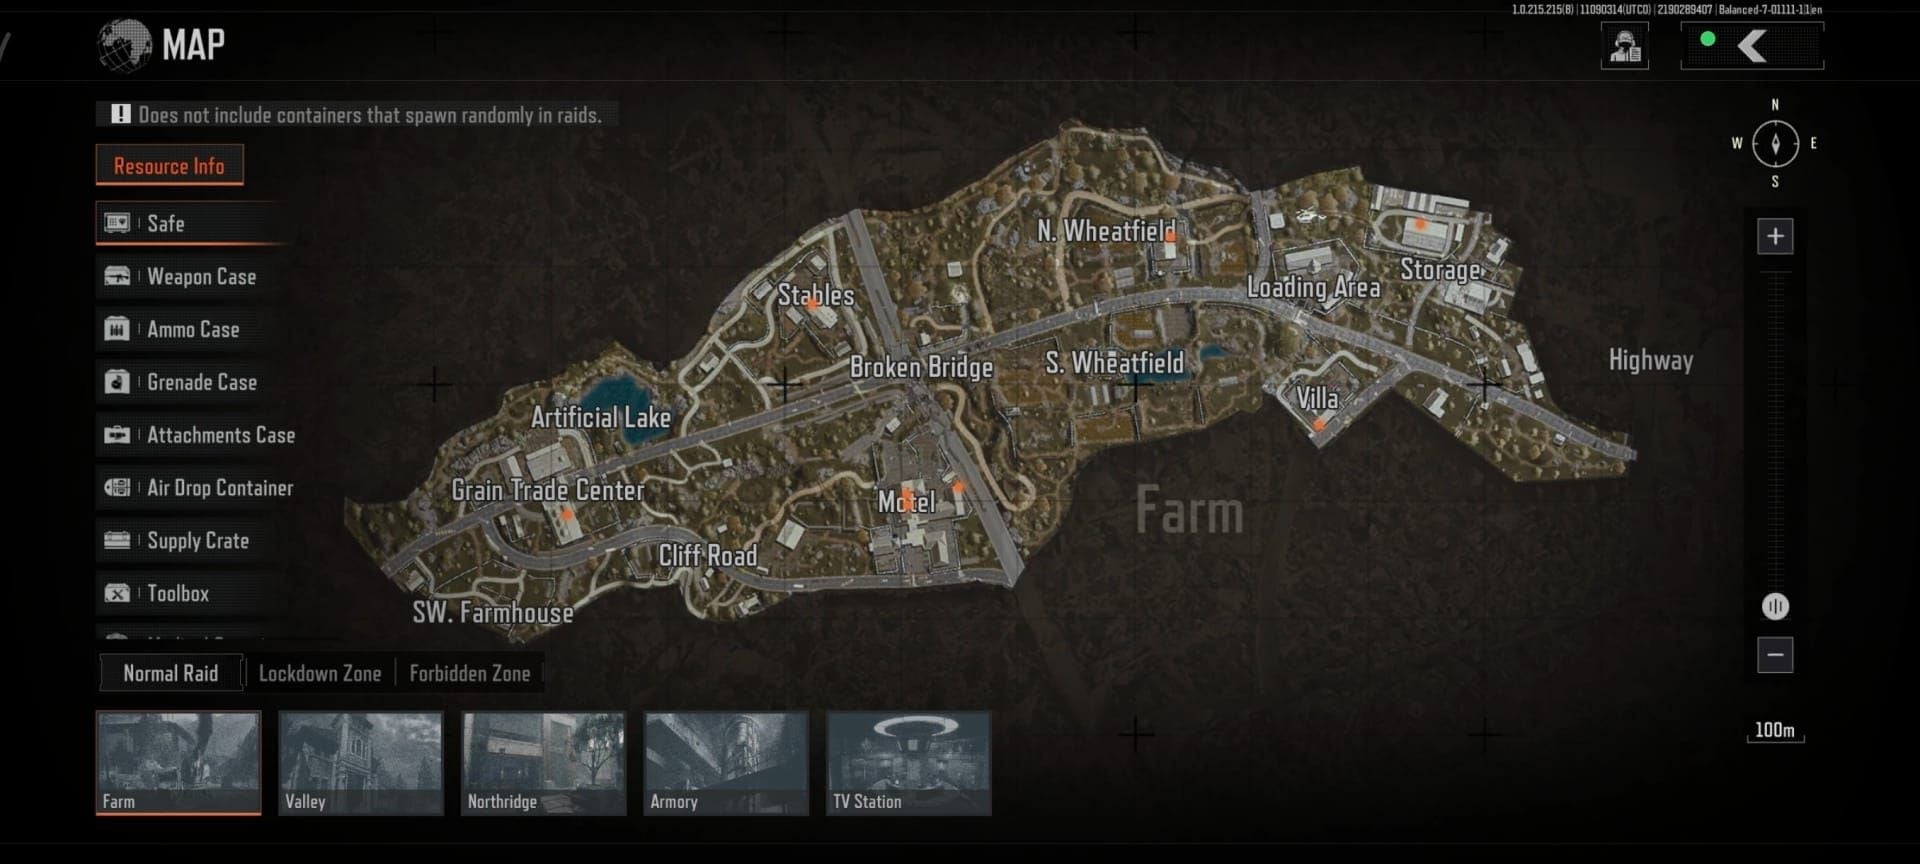
Farm Map: Extended Exploitation
Farm offers longest call-back windows due to open terrain. Barn Repair Shop event (15 or 30-minute mark) provides 5-8 minutes of safe looting if you secure southern barn's elevated position immediately. Two-barn configuration creates natural chokepoints.
Field Hospital events last 6 minutes, guarantee medical supply spawns. Interior corridors favor close-quarters loadouts.
Farm's open sightlines allow monitoring multiple spawn locations simultaneously. Position centrally between Barn Repair Shop and Field Hospital for rapid response to either event.
Northridge: Compressed Windows
Northridge features most compressed call-back windows—dense urban terrain creates intense 2-3 minute windows where multiple squads compete.
Residential sweep route passes through 2-3 event zones while maintaining extraction proximity. Multi-story buildings provide overwatch positions but expose you to counter-attacks from adjacent buildings.
Identifying Call-Back Windows: Audio & Visual Cues
Audio cues remain primary indicators:
Timely Support: Helicopter sounds, 100+ meter range
Easy Pickings: Container clanging
Field Hospital: Medical equipment beeping, radio chatter
Item Exchange: Trader voice lines
Shooting Range: Gunfire, target impacts
The 3-second audio precursor creates critical decision windows. Visual indicators include UI notifications and container highlights visible from 30-40 meters.
Pre-Lock Warning Signs
Reinforcement lock timer activates at 5 minutes remaining, displaying clear UI warning. Track both 15-minute event intervals and overall raid timer.
Server population affects AI patrol intensity but not spawn timing. High-population servers spawn additional AI around events, compressing effective windows.
Call-Back Window Exploitation Guide
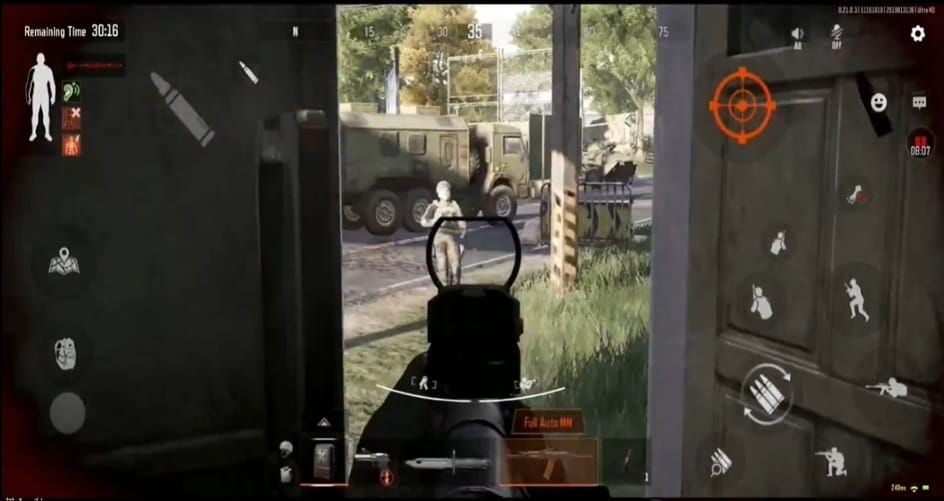
Phase 1: Secure Spawn Area (0-90 Seconds)
First 10-15 seconds represent maximum vulnerability. Execute 180-degree scan, move to hard cover with sightlines on multiple containers. Establish defensive perimeter covering 2-3 containers.
Use first 90 seconds to eliminate nearby AI patrols. AI follows predictable routes—clearing them prevents mid-looting interruptions.
Phase 2: High-Value Loot Rush (90-180 Seconds)
Begin container interactions at 90-second mark. Prioritize marked containers first (15-25% higher rare item rates). Each interaction takes 3-5 seconds—clear 3-4 marked containers within 60-second defend window.
Unmarked jackpot caches spawn in 1-2 locations per event. Allocate 30-40 seconds to systematic searching after clearing marked containers. Common locations: underneath stairs, behind equipment, shadowed alcoves.
Monitor defend timer continuously. If below 20 seconds while looting, immediately transition to extraction positioning.
Phase 3: Extraction Positioning (180+ Seconds)
Move toward pre-planned extraction route when defend timer expires. Avoid lingering near event zones as AI patrol density increases post-event.
For consistent loadout quality across raids, buy Arena Breakout Mobile bonds recharge online through BitTopup's secure platform.
Position along extraction routes passing through potential subsequent event zones if time permits. Decline reinforcement calls if less than 5 minutes remains—use final window for rapid extraction.
Advanced Tactics
Pre-Emptive Positioning
Position 2-3 minutes before spawn times for area control. Occupy elevated positions overlooking event zones before activation prevents competitors from establishing superior positions.
Aggro Reset Mechanics
Break AI line of sight for 15-20 seconds to reset patrols. During events, pull AI away from containers then break aggro to create temporary safe zones. Requires map knowledge of aggro break locations—corners, doorways, large obstacles.
Shooting Range events reduce AI detection ranges by ~30% due to environmental gunfire. Field Hospital events increase AI density but allow pulling multiple patrols simultaneously for larger cleared areas.
Optimal Loadouts
Budget (Under 50K Koen)
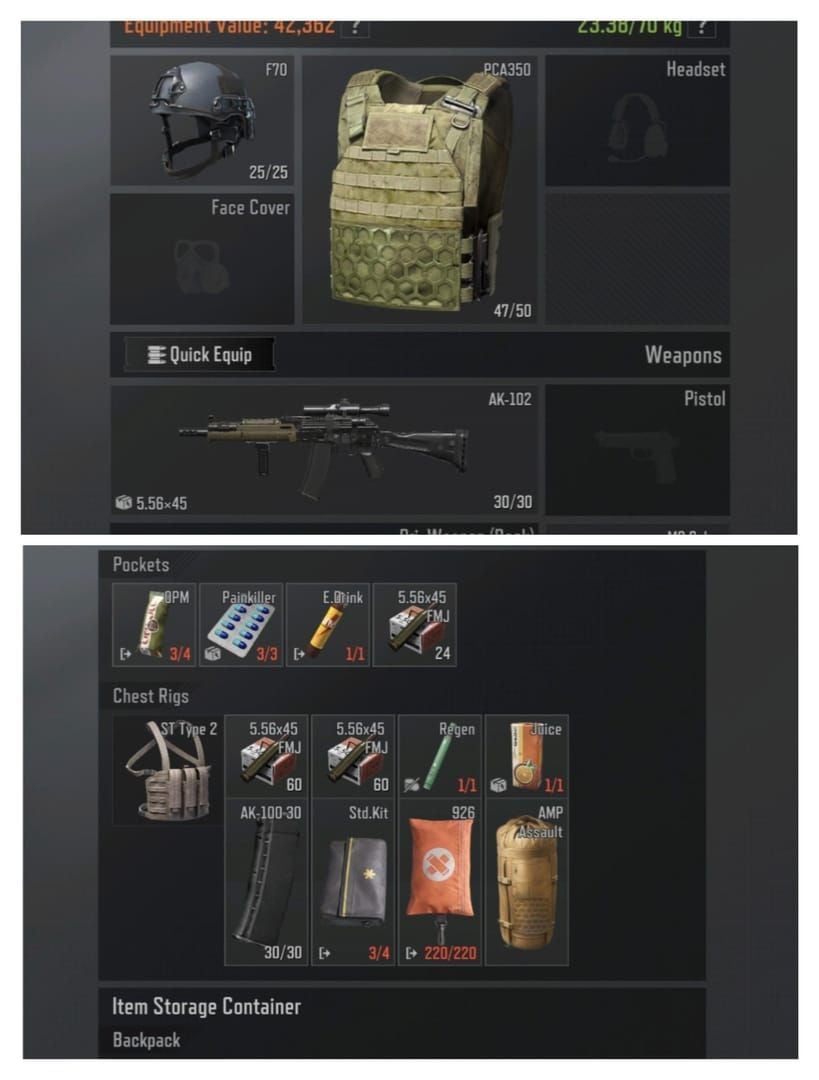
Weapons: M4A1 or AKM variants for 40-60m engagements
Armor: Level 3-4
Medical: 2-3 bandages, 1 medical kit
Backpack: 30-40 slot capacity (balances loot vs. mobility)
Goal: Maintain positive profit margins. Events generate 75-150K Koen value from successful container clears.
Premium (200K+ Koen)
Armor: Level 5-6 withstands most ammunition
Ammunition: High-penetration rounds
Attachments: Suppressors (reduce audio), optics (faster acquisition), foregrips (recoil control)
Medical: 2-3 surgical kits, painkillers, hemostatic agents
Enables aggressive event domination through superior firepower and sustained combat capability.
Map-Specific Routes
Farm: Barn-to-Warehouse Route
Covers three event zones (Barn Repair Shop, Field Hospital, Temporary Stash) within 400 meters. Start southern barn at 15-minute event, advance to warehouse for 30-minute event. Maintains northern extraction access throughout.
Northridge: Residential Sweep
Circular pattern intersects four event zones. Southern apartments → central courtyards (Gas Station) → medical facilities (Field Hospital) → northern residential (Item Exchange). Complete across 15 and 30-minute intervals for maximum points.
Armory: Medical Wing to Server Room Sprint
250-meter interior corridor route connects Field Hospital (medical wing) and Timely Support (server room) events. Works best at 15 and 45-minute intervals. Use stairwells as defensive chokepoints controlling vertical movement.
Common Mistakes
Misconception 1: Killing all AI extends call-back windows. Reality: AI spawn rates remain constant. Excessive AI hunting reduces container looting time.
Misconception 2: Solo players get longer windows. Reality: Event timing and duration identical for all squad sizes. Solo players benefit from reduced detection, not extended timeframes.
Misconception 3: Server population affects spawn timing. Reality: 15-minute intervals constant across all populations. Population influences competition intensity only.
Performance Metrics
Loot-Per-Minute Tracking
Efficient players achieve 50-75K Koen per minute during events vs. 20-30K during standard looting—2.5x multiplier. Calculate by dividing extracted item value by time spent in event zones.
Event point bonuses (1400-2600 total per raid) add 15-25% to base earnings. Track average points-per-event to identify best event types for your playstyle.
Koen Efficiency
True profit = extracted loot value - loadout costs × survival rate.
Example: 150K loadout extracting 400K loot = 250K profit per success. At 60% survival: (0.6 × 250K) + (0.4 × -150K) = 90K expected value per raid.
Budget alternative: 50K loadout extracting 300K = 250K profit. At 70% survival: (0.7 × 250K) + (0.3 × -50K) = 160K expected value.
Track across 20-30 raids for reliable baselines.
FAQ
What is the call-back window in S11? The 60-90 second timeframe after event activation when you can access high-value containers with reduced AI resistance. Events spawn every 15 minutes at fixed intervals with 3-second audio warnings.
How long does each event last? Timely Support: 5 minutes, Easy Pickings: 8 minutes, Field Hospital: 6 minutes. 60-second defend timer activates upon first container interaction.
When does reinforcement lock activate? When less than 5 minutes of raid time remains. Prevents further reinforcement calls. Track both event intervals and overall raid timer.
What are the best audio cues? Timely Support: helicopter sounds (100+ meters), Easy Pickings: container clanging, Field Hospital: medical beeping/radio chatter, Item Exchange: trader voices, Shooting Range: gunfire.
Do events offer better loot? Yes—15-25% higher rare item rates, Tier-3/Tier-4 items at 40%+ rates. Events contain 3-5 marked containers, 1-2 unmarked jackpots, plus 200-1000 bonus points each.
Can positioning manipulate spawn timing? No—events spawn at fixed 15-minute intervals regardless of player actions. However, positioning 2-3 minutes early allows pre-emptive area control and superior tactical advantage.
Master S11 call-back windows with premium loadouts funded through consistent Koen reserves. BitTopup offers secure Arena Breakout Mobile bonds top-up with instant delivery, competitive pricing, and 24/7 support. Visit BitTopup now for fast, reliable recharge solutions.