

Operation Unbound launched March 12, 2026 — wiping Koens, stashes, trader reputation, and map progress. Your Bonds, blueprints, and secure container contents survived. That distinction matters more than most players realize, because it completely changes how you should spend.
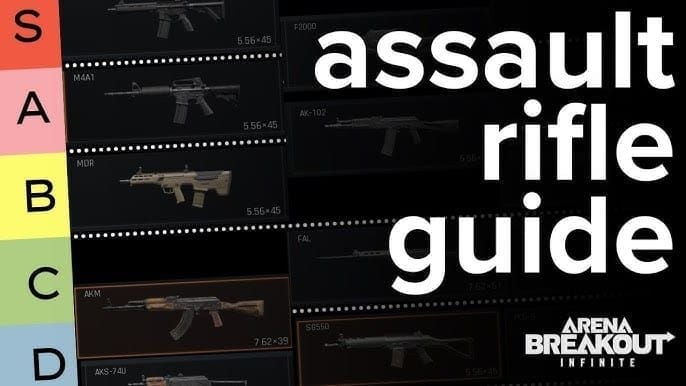
These seven loadouts are ranked by performance-to-Bonds-cost ratio for the current meta. Not hype, not pro endorsements. Community consensus and confirmed patch data both point the same direction: T3-4 armor dominates weeks 1-2, mid-pen ammo is king, and overgearing early is the fastest way to go broke.
Why Operation Unbound Rewrote the Meta
The wipe compressed the gear economy. High-tier armor is scarce in the first two weeks, and that scarcity directly determines which weapons and ammo types are actually efficient right now.
Community testing consistently shows 90% of early encounters involve T3-4 armor. That single data point invalidates a lot of expensive decisions. T5+ ammo costs significantly more per round and delivers diminishing returns when opponents simply aren't wearing the armor it's designed to defeat. Allocate 60-70% of your Koens budget to Level 3+ ammo — not premium rounds — for weeks 1-2.
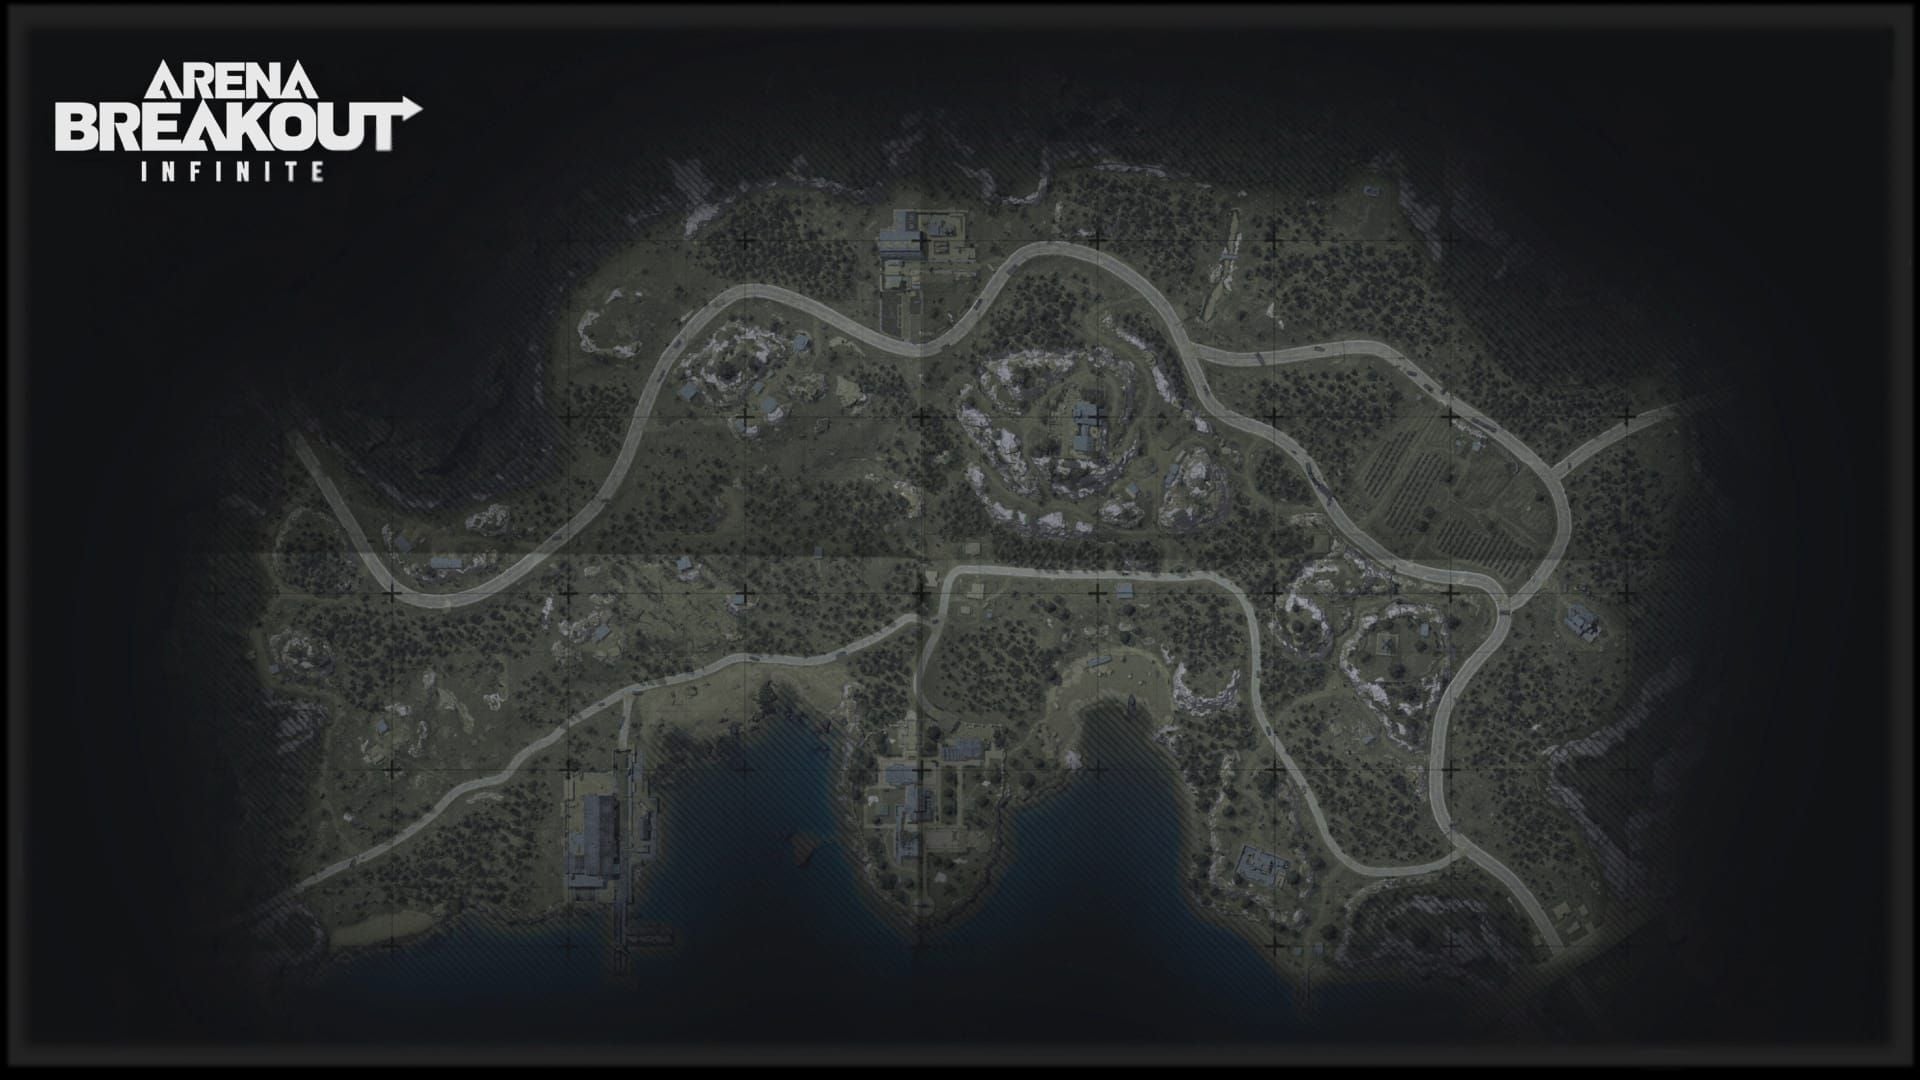
Map changes matter too. Valley expanded 1.5x with 700+ resource points, unlocking at Level 8 — a loot-dense environment that rewards mid-to-long range play. Armory remains a CQC meat grinder where anything below 850 RPM struggles. Ration Road sits firmly in the sub-60m bracket. A loadout that dominates Armory will get you killed on Valley's open sightlines. These aren't subtle differences.
Transparency note: Wipe mechanics, Valley expansion, and blueprint costs are confirmed from official patch notes. Weapon tier rankings and T3-4 armor dominance window are community-observed and widely validated — not developer-stated. I'll flag which is which throughout.
How These Loadouts Were Evaluated
One metric drives every ranking: performance relative to Bonds cost, not raw damage numbers.
A loadout costing 600 Bonds that wins 70% of T3-4 fights beats a 1,500-Bond loadout winning 75% of the same fights — the delta doesn't justify the investment post-wipe. Each build was also weighted by map viability across Valley, Armory, Northridge, and Ration Road, and by playstyle coverage for aggressive, passive, and squad players.
Loadout #1: AK102 — S-Tier All-Rounder (Best Overall Investment)
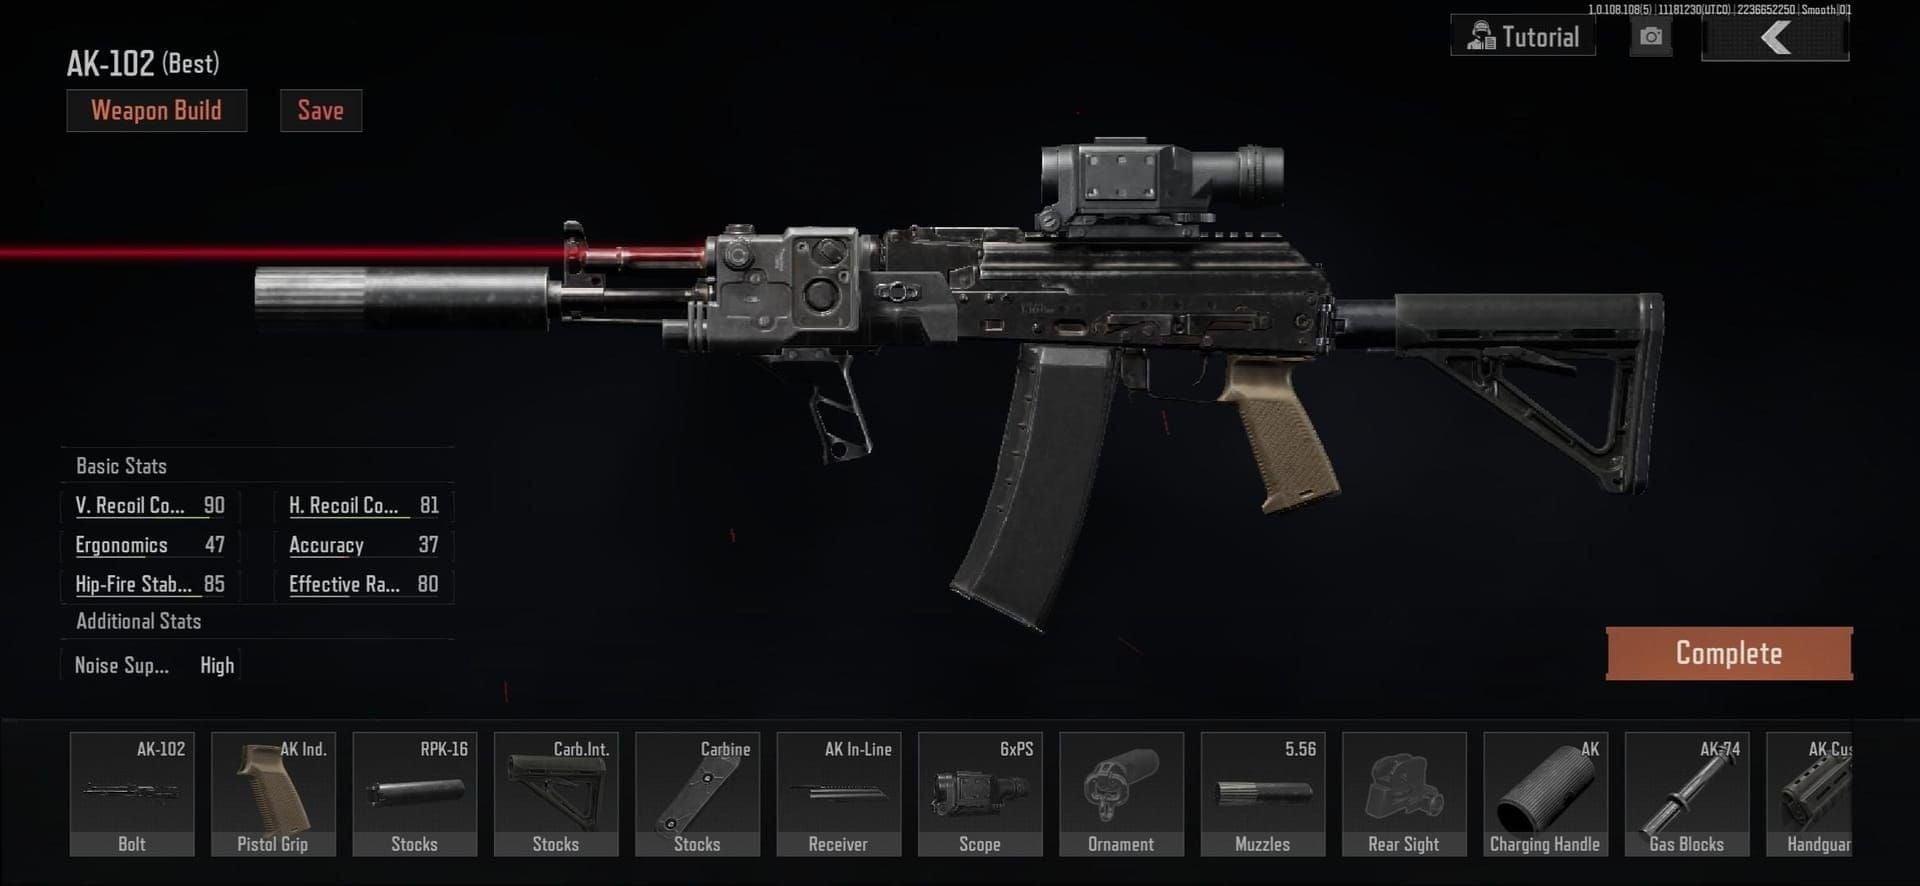
Community consensus places the AK102 in S-tier for Season 2 versatility, TTK efficiency, and cost-per-raid on Valley and Northridge. Build around this if you have moderate Bonds and want the highest floor across all maps and skill levels.
Bonds Cost: No dedicated blueprint listed in current patch data Map Fit: Valley, Northridge, mixed-range
The AK102's strength isn't any single stat — it's the absence of weaknesses. Community testing confirms it handles the 40-120m engagement range Valley's expanded layout demands, while staying controllable enough for Armory's tighter corridors. SEK T4 armor at 15,000-25,000 Koens is the right call: durable enough for most post-wipe engagements without burning your reserves.
Best for mid-to-veteran players who want a reliable workhorse that doesn't punish mistakes as hard as high-recoil alternatives.
Loadout #2: MPX Blueprint — Best SMG Investment (600 Bonds, Highest ROI)
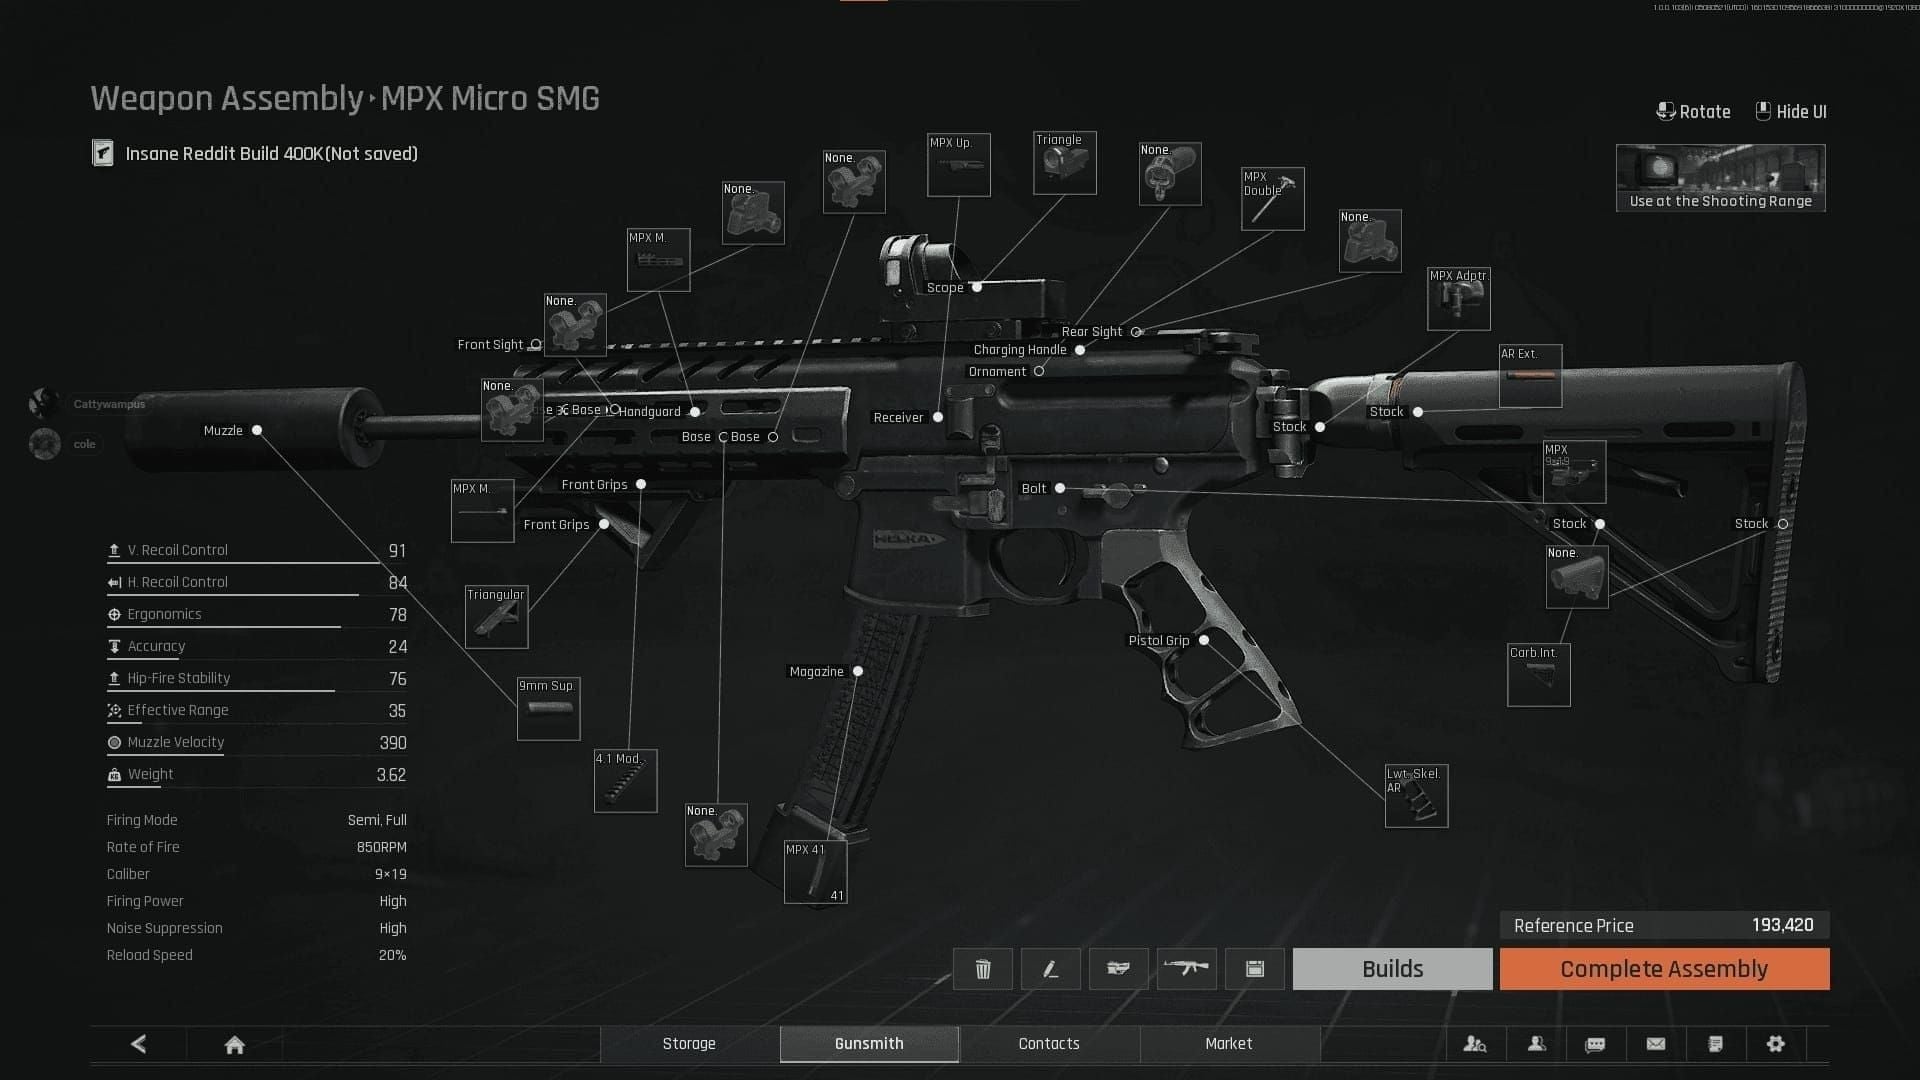
The MPX blueprint at 600 Bonds is the single highest-ROI purchase in Season 2. Community experience is unambiguous: it pays off within the first week on Ration Road and Armory against the T3-4 armor dominating early lobbies.
Bonds Cost: 600 (blueprint) Map Fit: Ration Road (primary), Armory (strong), Valley interiors
850 RPM plus 81 ergonomics makes the MPX the most forgiving SMG for players still rebuilding recoil control post-wipe. At 57m effective range, it's purpose-built for Ration Road and Armory — the two maps where sub-60m fights are the norm.
One honest caveat: there's a genuine tier conflict in the community. Some testing groups (S1/S3/S12) rate MPX S-tier for budget and close-range. Others (S2/S4/S16) drop it to B-tier for sustained high-rank fights when opponents start wearing T5+ armor in weeks 3-4. Both are valid. The MPX is a week 1-2 weapon that loses value as the meta hardens. Buy the blueprint now, extract profit early, then reassess.
If you're planning multiple blueprint purchases this season, it's worth securing Bonds before the meta window closes. You can buy Arena Breakout Bonds online through BitTopup without grinding daily quests for three weeks.
Loadout #3: MCX — Best Zero-Bonds Budget Build
You don't need to spend Bonds to be competitive in weeks 1-2. The MCX is the strongest zero-Bonds option in Season 2, and it's not close.
Bonds Cost: 0 Map Fit: Northridge, mixed-range, Valley (moderate)
The MCX's 80 ergonomics is the highest in its class — above the HK416 (73) and nearly matching the MPX (81). That advantage translates directly to faster ADS and better recoil recovery, which matters when you're rebuilding muscle memory after a wipe. The 700 RPM is lower than the MPX, but the stability trade-off makes it more consistent at 60-100m where Northridge fights frequently happen.
The limitation is real though: MCX struggles past 100m and won't carry you into week 4 when T5 armor becomes common. Treat it as a Koen-accumulation vehicle for the first two weeks, then reinvest into a blueprint weapon.
Loadout #4: FAL — Best Mid-Range Powerhouse (Northridge Specialist)
The FAL rewards patience. Not the highest RPM, not flashy — but at 124m effective range with T4 M80 ammo, it punishes anyone playing aggressively at distance in post-wipe lobbies.
Bonds Cost: No dedicated blueprint listed; Koen-funded Map Fit: Northridge (primary), Valley open areas
441 penetration on T4 M80 is overkill against weeks 1-2 opponents in T3-4 armor — but it future-proofs the loadout into weeks 3-4 when T5 armor starts appearing. The 124m effective range is the correct answer for Northridge's longer sightlines, where the MCX and MPX run out of steam.
The 135,000 Koen budget is higher than the MPX build, but no blueprint purchase is required. That's a meaningful distinction for players preserving Bonds for the Composite Case or Elite Subscription.
Loadout #5: SVD / G28 — Best Solo Rat Build (1,000 Bonds, Maximum Extraction Rate)
Solo players have a different success metric than squads: extraction rate, not kill count. The SVD and G28 are built around minimizing engagements and maximizing the value of every raid you survive.
Bonds Cost: 1,000 (SVD blueprint) Map Fit: Northridge (primary), Valley (secondary)
Sharing 7.62x51mm ammo between SVD and G28 is a genuine logistical advantage — one ammo type, simplified inventory, lower per-raid cost. Community experience confirms these are the best solo weapons for players who want to avoid engagements and extract consistently on Northridge or Valley.
Valley's extraction mechanics add complexity worth knowing: Helipad requires a Valley Boss Token, Supply Van requires an uninterrupted 20-second Toolbox interaction, and Tactical Helipad requires faction medallions. A sniper-focused solo build that avoids unnecessary fights is perfectly suited to farming those resources without drawing attention.
This is NOT for squad players. In a squad context, redirect that 1,000 Bonds to the Tactical AK-74M blueprint instead.
Loadout #6: Tactical AK-74M — Best Squad Support Build (800 Bonds)
Squad play in Season 2 rewards role specialization. The Tactical AK-74M blueprint at 800 Bonds is built for the utility-focused support role — suppression, flanking, creating space rather than hunting kills.
Bonds Cost: 800 (blueprint) Map Fit: Armory (primary), Valley (coordinated squad play)
When your squad has a designated fragger (AK102 or MPX) and a sniper (SVD/G28), the support player controls space and enables pushes. The AK-74M gives you a reliable platform for that role without overspending on a weapon that doesn't need to win 1v1 duels.
Coordination note: the AK-74M support player should be calling positions and managing extraction timing — especially on Valley where the Supply Van requires 20 uninterrupted seconds. That's a support role job, not the fraggers'.
Loadout #7: HK416 — Best Armory Specialist
The HK416 is Armory's native weapon. Community stats confirm 860 RPM and 910 muzzle velocity — the highest RPM of any AR in the current meta — making it the correct answer for Armory's sub-60m corridors.
Bonds Cost: No blueprint listed; Koen-funded Map Fit: Armory (primary), Ration Road (secondary)
The lower ergonomics (73 vs. MPX's 81) is a real trade-off — less forgiving on ADS speed. But the 910 muzzle velocity means bullets arrive faster at target, which matters in the snap-shot duels that define Armory gameplay. Community consensus places HK416 alongside MPX as the two dominant weapons for Armory and Ration Road specifically.
Unlike the MPX, the HK416 doesn't fall off as hard in sustained fights because the RPM advantage compensates for the ergonomics gap. Strong through weeks 1-3 on Armory; viable into week 4 if you're running it there exclusively.
Quick-Reference Comparison
How to choose: Solo on a Bonds budget → MCX week 1, MPX blueprint week 2. Squad → AK102 fragger + AK-74M support + SVD solo. Northridge specialist → FAL or SVD. Armory grinder → HK416 or MPX.
What NOT to Spend Bonds On
Most loadout guides skip this. It's where players lose the most Bonds.
T6 armor in weeks 1-2. The most common expensive mistake in Season 2. When 90% of opponents wear T3-4 armor, T6's cost premium delivers zero additional survival benefit over SEK T4. You're paying 3-5x more for protection against threats that don't exist yet. Use SEK T4 at 15,000-25,000 Koens and reinvest the difference into ammo.
Copying pro loadouts in week 1. Pro players have Bonds reserves, established trader reputations, and risk tolerances that don't apply to a fresh wipe. High-end loadouts week 1 lead to faster gear loss than your replacement rate can sustain. Wait for meta stabilization in weeks 2-3 before committing to expensive configurations.
T5+ ammo before week 3. With opponents in T3-4 armor, that penetration advantage is wasted. Allocate 60-70% of your ammo budget to Level 3+ rounds and save premium ammo for when the armor meta catches up.
Cosmetic purchases before securing your Composite Case, Elite Subscription, and at least one weapon blueprint. Skins don't extract loot.
How to Maximize Your Bonds Budget
Priority Spending Order
Composite Case — 1,000 Bonds (3x2 grid, 6 death-protected slots, one activation per raid, 30-day duration). Your insurance policy. Every raid with an active Composite Case is a raid where your best loot survives death.
Elite Subscription — 500 Bonds (inventory expands from 350 to 500 grids, 300 weekly Market listings, 8 simulation listings). The inventory expansion alone pays for itself in loot capacity within the first week.
MPX Blueprint — 600 Bonds (highest weapon ROI, pays off week 1 on Ration Road and Armory).
Minimum competitive investment: 2,100-2,500 Bonds (Composite Case + Elite Sub + one blueprint).
F2P Earning Rate
F2P players earn 70-120 Bonds weekly: daily logins (10-20), 7-day streak bonuses (50-100), daily quests (10-20), weekly quests (50-100). Accumulating 2,100 Bonds takes roughly 4-5 weeks of consistent play — meaning players who didn't save pre-wipe start Season 2 at a structural disadvantage for the first month.
Battle Pass Math
Premium Battle Pass costs 2,600 Bonds but returns 2,000-3,000 Bonds over 30 days. If you're playing consistently through Season 2, it's net-neutral to net-positive — effectively free if you complete it. Only invest after securing your Composite Case and Elite Subscription first.
Solo vs. Squad Allocation
Solo players should prioritize secure containers over weapon blueprints. A 2x3 (400 Bonds, 6 protected slots) or 3x3 (800 Bonds, 9 protected slots) secure container protects your best loot on every death — which happens more when you're playing without squad backup. Squad players can reverse this priority since teammates can recover dropped gear.
For players who want to hit the ground running without waiting weeks on F2P earning, you can top up Arena Breakout game currency via BitTopup — fast delivery, competitive rates, and you stay focused on the meta window that matters most right now.
FAQ
What's the single best loadout in Season 2? For overall meta viability, community consensus puts the AK102 in S-tier alongside the M110. For pure Bonds ROI, the MPX blueprint at 600 Bonds is the strongest single purchase in weeks 1-2. There's no universal answer — it depends on your map, playstyle, and squad situation.
Are premium loadouts worth it in Season 2? In weeks 1-2, no — not for armor or ammo. Budget loadouts at 88,000-135,000 Koens outperform expensive kits because 90% of opponents aren't wearing armor that justifies premium ammo. Weapon blueprints are worth it because they're permanent. T6 armor and T5+ ammo become worth it in weeks 3-4 when the meta hardens.
How often does the meta shift? Three distinct phases: weeks 1-2 (budget builds, T3-4 armor dominance), weeks 2-3 (stabilization, tier lists solidify), week 4+ (T5 armor common, 440+ penetration required). Update your loadout if extraction rate drops below 50% over five consecutive raids, you're running negative Bonds profit, or you're consistently losing armor fights you should be winning.
Can I be competitive with zero Bonds? Yes — specifically in weeks 1-2. The MCX holds up well through Northridge and mixed-range scenarios. The honest limitation: zero-Bonds builds don't scale into week 4. Use the early weeks to accumulate Koens and Bonds, then invest in a blueprint weapon before the meta hardens.
What's the minimum Bonds to start competitively? 2,100-2,500 Bonds: Composite Case (1,000) + Elite Subscription (500) + one weapon blueprint (600-1,000). Below that threshold, you're leaving meaningful structural advantages on the table.
Should solo players buy weapon blueprints or secure containers first? Secure containers first. A 2x3 (400 Bonds) or 3x3 (800 Bonds) container protects your best loot on every death — which happens more frequently when you're playing solo. Once secured, then invest in weapon blueprints. Squad players can reverse this priority since teammates can recover dropped gear.
Meta data current as of Operation Unbound launch, March 12, 2026. Weapon tier rankings reflect community consensus from Season 2 testing — not developer-confirmed balance statements. Re-evaluate all loadout rankings at the first mid-season balance patch or at Season 3 launch.