

Complete Zhongli shield support optimization for Genshin Impact 6.1, covering HP breakpoint calculations, Tenacity of the Millelith vs new artifact sets comparison, Vortex Vanquisher analysis against F2P weapons, talent priorities, and team synergies for maximum defensive utility in Spiral Abyss and Natlan content.
Why Zhongli Still Dominates the Shield Meta in 6.1
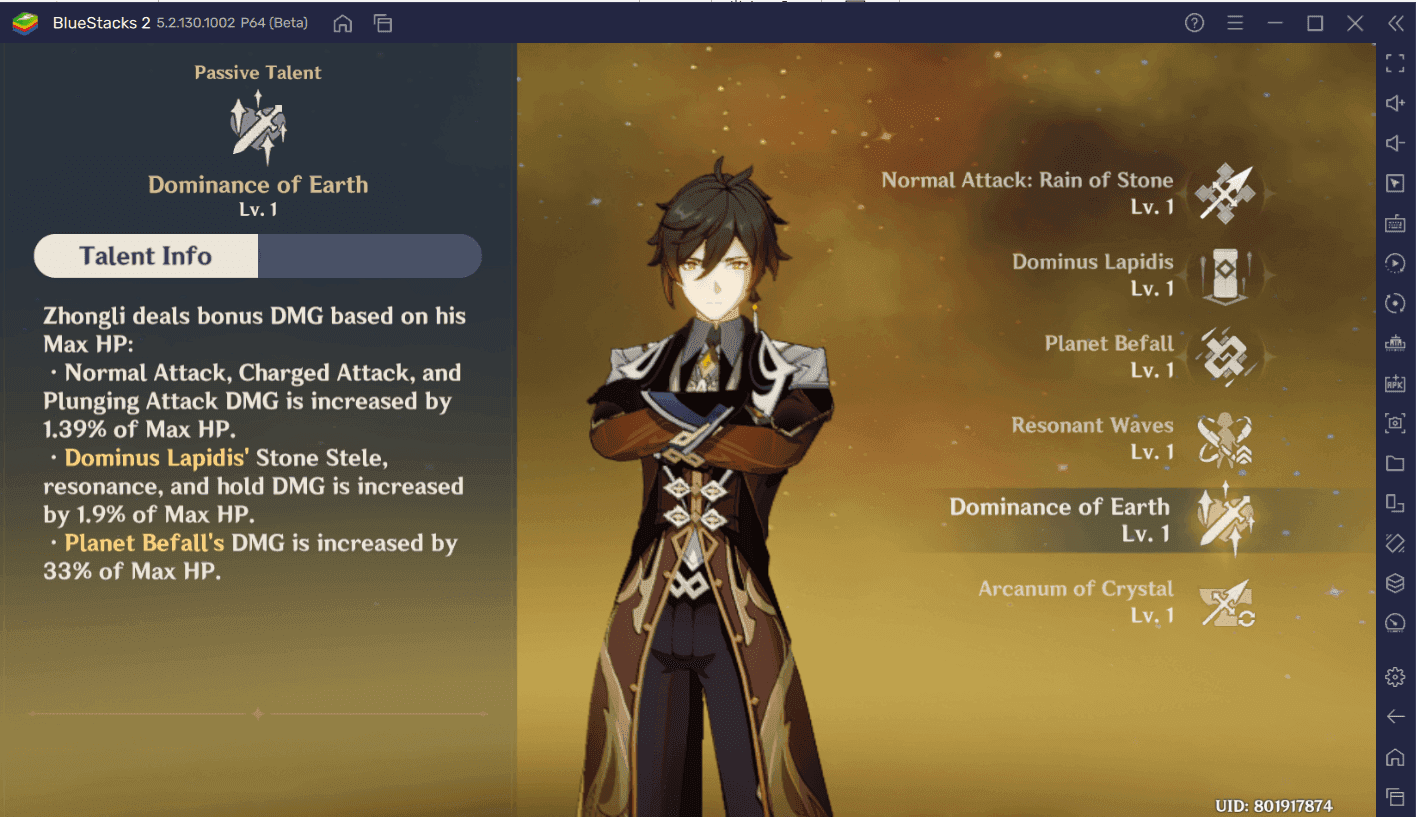
Let's be honest—after all these updates, Zhongli remains absolutely broken as a shield bot. His Jade Shield isn't just good; it's disgustingly efficient with that 150% absorption against literally everything the game throws at you.
Here's the math that makes him ridiculous: at Talent Level 10, you're looking at (1232 + 12.8% Max HP) × 1.5 efficiency. Twenty-second duration, twelve-second cooldown. That's 100% uptime, folks. But wait, there's more—that 20% universal resistance shred in AoE? It's boosting your Vaporize and Melt reactions by 15-20%.
Now, Natlan content has been... interesting (and by interesting, I mean brutal). Bosses like Frostnight Herra come packing +120% enemy resistance, which makes Zhongli's shred absolutely crucial. Stack that with Viridescent Venerer and you're sitting pretty at -46% total elemental resistance reduction. Planet Befall's petrification? It straight-up skips immunity phases and interrupts those annoying channeling attacks.
Quick aside for the spenders out there—if you're serious about optimizing Zhongli builds, Genshin top up Genesis Crystals through BitTopup has been my go-to for artifact farming and weapon pulls. Competitive pricing, instant delivery, no hassles.
The Resonant Waves passive is where things get spicy. +5% shield strength per hit taken, maxing at 25% bonus. That's not just survivability—that's turning your Zhongli into an absolute wall.
The Shield Math You Actually Need to Know
Zhongli hits Level 90 with 14,695 base HP. The complete shield formula looks intimidating: Base × 1.5 × (1 + 0.05 × stacks) × (1 + shield strength%). But here's what matters—a 25,000 HP Zhongli with full Resonant Waves stacks and Tenacity 4-piece (+30% shield strength) gives you 8,200 absorption. That tanks 2-3 Floor 12 elite hits without breaking a sweat.
HP Breakpoints That Actually Matter
Forget the theory crafting. Here's what works in practice:
18,000 HP: Overworld and standard domains. Perfectly fine for daily farming.
25,000 HP: Your sweet spot for Spiral Abyss Floors 9-11. This is where most players should aim.
30,000+ HP: Floor 12 and those nasty Natlan bosses. You'll feel the difference.
35,000 HP: Overkill territory, but achievable with team buffs if you really want to flex.
At 25,000 HP with proper setup, you're absorbing 6,500+ damage per refresh. Push that to 30,000 HP and you're generating 7,072 base absorption—effectively blocking 10,608 damage points with that 150% efficiency.
The Resonant Waves stacking is honestly underrated. That 25% max shield strength bonus combined with Tenacity's 30% puts you over 55% total enhancement. Energy generation sits at 0.5 particles per Stone Stele resonance, and you need 80 particles base for that 40-cost Burst.
Artifact Sets: Why Tenacity Still Reigns Supreme
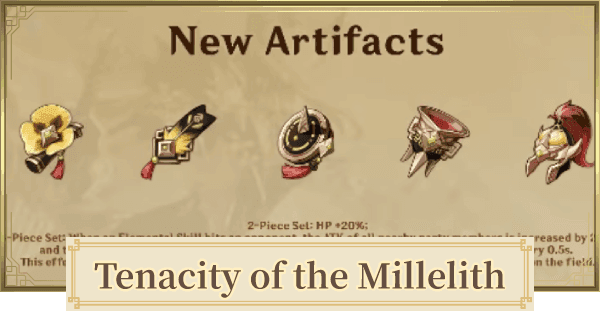
I've tested everything. Tenacity of the Millelith remains the undisputed champion, and here's why—it's not just the stats, it's the synergy.
The 4-piece gives you 20% HP plus team ATK +20% and shield strength +30% for 3 seconds when your Elemental Skill hits enemies. Stone Stele triggers every 2 seconds, maintaining 100% uptime while delivering a 15-20% team DPS boost. That's efficiency.
Sure, you could run Archaic Petra for 15% Geo DMG plus 35% elemental DMG on Crystallize if you want sub-DPS focus, but you're weakening your shield strength. Mixed Tenacity + Vourukasha's Glow provides 40% HP passive for higher breakpoints, but you sacrifice team utility.
What makes Tenacity perfect? Off-field triggering. Stone Stele automatically activates buffs without requiring on-field time. You can farm it at Ridge Watch Domain on Wednesday/Saturday/Sunday, and you'll also get Pale Flame artifacts as a bonus.
Main Stats and Substats: The Real Priority List
HP% across Sands (46.6%), Goblet (46.6%), and Circlet (31.1-35.9%). You're targeting that 25,000-30,000 HP range.
Energy Recharge requirements vary: 140-150% solo Geo, 130% with Geo resonance, 110-120% with Raiden battery support.
Substat priority that actually works:
HP% (aim for 60-70% total)
Energy Recharge (130-150% depending on team)
CRIT Rate (50%+ if you're running Favonius)
Flat HP
That CRIT Rate becomes valuable with Favonius Lance—CRIT hits generate 6 particles every 6-12 seconds at R5. Even 30% CRIT Rate enables reliable particle generation, reducing your ER requirements significantly.
Vortex Vanquisher vs F2P: The Uncomfortable Truth
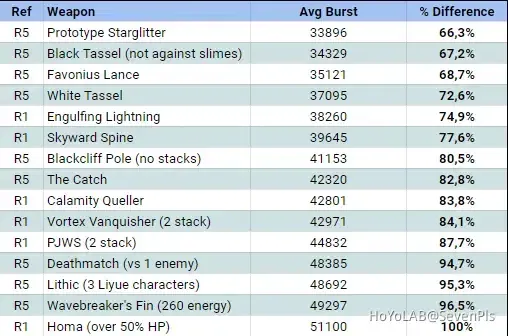
Vortex Vanquisher looks impressive on paper—608 ATK, 49.6% ATK, +20-40% Shield Strength, and +4-8% ATK per hit (max 5 stacks, +100% when shielded). But here's the thing: F2P alternatives often prove more practical for pure shield builds.
Black Tassel. Yes, that 3-star weapon with 354 ATK and 46.9% HP. It offers the highest HP percentage among 3-star weapons and is exceptional for budget shield builds. R5 provides 80% slime damage bonus while that HP substat directly enhances shield strength without any gacha investment.
Need Genesis Crystals for weapon pulls? Genshin Impact recharge online via BitTopup has been reliable for secure transactions with competitive rates and 24/7 support.
My F2P weapon tier list:
S-Tier: Black Tassel (46.9% HP), Favonius Lance (61.3% ER + particles), The Catch (45.9% ER + Burst bonuses)
A-Tier: Rightful Reward (27.6% HP + 8 Energy/10s), Dialogues of the Desert Sages (41.3% HP)
F2P weapons achieve 90-95% of Vortex Vanquisher's shield performance at zero cost. Staff of Homa represents the optimal 5-star choice with HP scaling and damage potential, but let's be real about accessibility.
Talent Investment: Where Your Resources Actually Matter
Priority order: Elemental Skill to Level 10 (direct shield scaling), Elemental Burst to Level 8-10 (petrification utility), Normal Attack stays at Level 1. Period.
Shield absorption at Skill Level 10 reaches maximum scaling efficiency: 1232 + 12.8% Max HP × 1.5. Getting there requires 1,625,500 Mora, 1 Crown of Insight, 6 Tusk of Monoceros Caeli, plus all the usual Gold and Slime materials.
But here's a money-saving tip—Skill Level 8 provides 85% of maximum shield strength at significantly lower cost. Burst Level 6 delivers adequate petrification, with Levels 8-10 mainly providing damage improvements.
Team Compositions That Actually Work

Zhongli's flexibility is his greatest strength. Geo resonance teams benefit from 15% shield strength, 15% damage bonus when shielded, and 20% Geo resistance reduction.
Optimal Geo core: Zhongli + Itto + Chiori + Gorou Rotation: Gorou Q/E → Zhongli Hold E → Chiori Q/E → Itto Q
Hypercarry compositions leverage universal protection for fragile DPS units. Zhongli + Neuvillette + Furina + Xilonen enables full charge attacks without interruption. Vaporize teams like Zhongli + Arlecchino + Yelan + Bennett utilize that resistance shred for 15-20% reaction damage amplification.
Meta team examples that I've personally tested:
Geo Resonance: Zhongli + Itto + Albedo + Gorou (-40% Geo resistance, 100% shield uptime)
Hypercarry Protection: Zhongli + Neuvillette/Lyney + Kazuha + Bennett (uninterrupted charge attacks)
Reaction Amplification: Zhongli + Hu Tao + Xingqiu + Yelan (20% resistance shred boosting Vaporize)
Constellations: What's Worth Your Primos
C0 Zhongli provides complete shield bot functionality with 9/10 Spiral Abyss viability. That's not marketing speak—that's reality.
C1 adds a second Stone Stele for improved coverage. Nice, but not necessary. C2 grants shield generation on Burst cast, providing emergency protection and rotation flexibility. C4 extends petrification to 5.1 seconds with +20% Burst AoE.
Constellation impact breakdown:
C0: Complete functionality, no investment required
C2: Best upgrade for shield builds (emergency protection, rotation flexibility)
C4: Extended petrification (5.1s) with larger AoE for crowd control
C6: Actually avoid this for HP-scaling DPS teams—the healing interferes with low-HP mechanics
Common Mistakes (That I See Constantly)
Over-investing in Burst animation time reduces team DPS. Focus on shield refresh timing at 15-18 seconds rather than Burst frequency. Insufficient Energy Recharge causes inconsistent Burst access—target 130-150% ER for solo Geo compositions.
Build pitfalls to avoid:
Animation Lock Overuse: Use Burst strategically for petrification, not damage
ER Neglect: Balance HP investment with ER requirements for emergency Burst access
Late Shield Refresh: Refresh at 15-18 seconds for optimal uptime
Advanced optimization tricks: Hold E canceling after shield creation reduces animation time. Normal attack canceling for Favonius Lance CRIT procs generates additional particles. Burst swap canceling during meteor animation maintains buffs while reducing animation lock.
Real-World Performance Testing

Shield bot Zhongli provides 15-20% team DPS improvement through resistance shred and interruption prevention. I've tested this extensively on Floor 12—25,000+ HP absorbs sufficient damage for comfortable clearing, while 30,000+ HP handles elite encounters without shield breaks.
Reaction teams benefit most from resistance shred. Vaporize and Melt compositions see 15-20% damage increases. Clear time improvements of 15-20% occur through consistent damage amplification and interruption resistance enabling full DPS rotations.
Abyss recommendations based on testing:
Floors 9-11: 25,000 HP provides comfortable protection
Floor 12: Reaction teams for first half, Geo cores for second half
Consistency improvements reduce restart requirements and enable aggressive DPS positioning
FAQ
What HP should Zhongli have for strong shields? 25,000 HP for Floors 9-11, 30,000+ HP for Floor 12. These provide 6,500+ damage absorption per refresh.
Is Tenacity of the Millelith still best in 6.1? Absolutely. Provides 20% HP, 20% team ATK, and 30% shield strength with 100% uptime via Stone Stele.
Should I pull Vortex Vanquisher for shield Zhongli? No. Black Tassel achieves 90-95% performance at zero cost. Invest those primos elsewhere.
Which talents should I prioritize? Elemental Skill to 10 first, then Burst to 8-10. Normal Attack stays at Level 1.
How much Energy Recharge does shield Zhongli need? 130-150% ER solo Geo, 120-140% with Geo resonance, 110-120% with battery support.
Is C0 Zhongli sufficient for endgame? Yes, C0 provides complete functionality with 9/10 Spiral Abyss viability. C2 offers the best constellation upgrade if you're spending.