This guide covers optimal builds for Sparkle and Ruan Mei, achieving sub-6 cycle clears in Memory of Chaos with 57% meta dominance.
Sparkle & Ruan Mei Overview: The Ultimate Support Duo
Here's the thing about HSR's support meta – it's been completely dominated by this particular pairing for months now. And honestly? There's a good reason for that.
Character Roles and Synergies

Sparkle's your quintessential turn manipulator. This 5-star Quantum Harmony unit brings some serious firepower to the table with her 50% action advance and CRIT damage scaling that actually matters. Her base stats at Level 80 (HP 1397, ATK 523, DEF 485, SPD 101) might look modest, but don't let that fool you. The real magic happens with her +2 max SP capacity and that sweet 4 SP recovery per Ultimate.
Ruan Mei? She's the damage amplification queen. Base ATK of 659 and SPD 104 tell only part of the story. What really counts is that 32% ally damage boost for 3 turns, the +50% Break Efficiency that makes break teams sing, 25% RES penetration (which is rarer than you'd think), and a +10% team SPD boost that affects everything.
Their synergy is where things get interesting. Sparkle handles the immediate gratification – turn manipulation with SP economy that actually works. Ruan Mei brings the sustained damage amplification with break efficiency that scales multiplicatively. Together? They enable SP-hungry DPS characters in ways that other support combinations simply can't match.
For consistent character upgrades, Honkai Star Rail account recharge through BitTopup offers competitive rates, fast delivery, and secure transactions for HSR currency needs.
Meta Performance Data
November 2025 Memory of Chaos data tells a compelling story. Sparkle maintains a 16.76% usage rate with 5.79 average cycles – that's impressive for a character who's been around this long. Ruan Mei appears in 34.94% of clears with 7.98 cycles, which honestly undersells her impact since she's often paired with slower, more methodical teams.
Combined usage reaches 56.78%. That's more than half of all successful clears using this duo. The Firefly synergy sits at 82.92%, which is just... absurd, really.
Core advantages break down into three categories: SP Economy (Sparkle's +2 max SP and 4 SP recovery paired with Ruan Mei's 3-turn skill duration), Multiplicative Damage (48% CRIT DMG buffs × 32% damage boost × 25% RES penetration – the math gets scary fast), and Turn Optimization (50% action advance + 10% team SPD creates some wild possibilities).
Investment Requirements
Let's be real about what you need here. Sparkle demands 200%+ CRIT DMG for maximum buff scaling – anything less and you're leaving damage on the table. 160+ SPD for hyperspeed setups, though 134 works for most compositions. 30%+ Effect RES keeps her functional against debuff-heavy content.
Ruan Mei's requirements are different but equally important: 160%+ Break Effect minimum (180% with A6 trace for optimal performance), 143+ SPD for turn priority, and 124.4% Energy Recharge for those crucial 3-turn Ultimate cycles.
Sparkle Complete Build Guide
Best Relic Sets

Sacerdos' Relived Ordeal 4-piece remains the gold standard. 6% SPD plus 18% CRIT DMG to allies on Skill/Ultimate, stacking twice for 36% maximum. The 45.76% usage rate with 9.25 average MoC cycles speaks for itself – this set just works.
Messenger Traversing Hackerspace 4-piece offers an alternative approach. 6% SPD plus 12% ally SPD on Ultimate for 1 turn provides team utility, but lacks the direct CRIT amplification that makes Sparkle special. I'd only recommend this for very specific speed-focused compositions where you're already hitting CRIT DMG targets through other means.
Main stats are pretty straightforward: Body CRIT DMG (non-negotiable), Feet SPD, Sphere HP%/DEF%, Rope Energy Recharge. Substats follow a clear priority: CRIT DMG > SPD > Effect RES > HP%. You're targeting 53.15% additional CRIT DMG from substats, which sounds like a lot but becomes achievable with dedicated farming.
Light Cone Rankings

Past Self in Mirror dominates with 51.92% usage and 7.71 average cycles. The 60% CRIT DMG, Mask effects, and +1 Radiant Flame per SP consumption create perfect synergy with SP-heavy rotations. This is Ruan Mei's signature, but honestly? It might be better on Sparkle in many compositions.
Earthly Escapade (Sparkle's actual signature) provides 32-60% CRIT DMG scaling with Mask mechanics. 16.75% adoption with 9.62 cycles suggests it's theoretically powerful but practically limited by accessibility. The performance gap isn't as wide as you'd expect.
F2P options aren't terrible. Meshing Cogs (32% damage boost, 6.06% usage) and But the Battle Isn't Over (18% ERR, +1 SP every 2 Ultimates, 11.51% usage) both provide meaningful value.
Stat Targets
CRIT DMG: 210%+ for optimal performance, 175% minimum. This combines Body main stat (58.3%) with aggressive substat hunting. SPD: 160+ for hyperspeed strategies or 134 for -1 SPD relative to your DPS. Effect RES: 30%+ prevents debuff disasters. HP: 4000-4500+, DEF: 800-1000+ for basic survivability.
Speed breakpoints matter more than most guides admit: 134 SPD gets 2 turns in 1st/3rd cycles, 143 SPD extends to 1st/2nd/4th cycles, 160 SPD covers 1st/2nd/3rd/5th cycles. Plan accordingly.
Eidolon Priority
E2 is the crown jewel – Talent stacks ignore 8% DEF each (24% total), effectively providing an 11% baseline damage increase. That's massive. E1 provides +1 turn Cipher duration and +40% ATK to Cipher allies, which is nice but not game-changing. E0 remains highly functional with proper equipment, so don't feel pressured to pull duplicates unless you're really committed.
Ruan Mei Optimization Guide
Optimal Relic Sets

Iron Cavalry of Set Aflame 4-piece leads with 47.97% usage. 16% Break Effect plus 30% team Break Effect on Ultimate for 2 turns maximizes break-focused compositions. If you're running any break DPS, this is probably your answer.
Messenger Traversing Hackerspace 4-piece works when Break Effect requirements are met through other sources. The 6% SPD plus 12% ally SPD on Ultimate can be valuable, but it's definitely a secondary choice.
Main stats: Body HP%/DEF%, Feet SPD, Sphere HP%/DEF%, Rope Energy Recharge. Substats prioritize BE > SPD > Effect RES/HP/DEF, targeting 71.4% additional Break Effect. That's a lot of Break Effect to hunt for, but it's what separates good Ruan Mei builds from great ones.
Light Cone Options
Past Self in Mirror continues to dominate. 60% Break Effect, 24% ally damage post-Ultimate for 3 turns, +1 SP at ≥150% BE, and +10 Energy per wave. S1 provides exactly 124.4% Energy Recharge for 3-turn cycles – the math works out perfectly.
Memories of the Past (4-star) deserves serious consideration. 28% Break Effect and +4 Energy per attack at S5 guarantees 3-turn Ultimate consistency and often outperforms 5-star alternatives. Don't sleep on this one.
Meshing Cogs (F2P) provides +4 Energy per attack/hit, enabling Ultimate uptime without Break Effect sacrifice. Sometimes the simple solutions are the best ones.
Build Variants
Standard build: 160-180%+ Break Effect with 143+ SPD. Ensures A6 trace activation (36% damage at 180% BE) while maintaining turn priority. This covers most use cases.
Hyperspeed variant: 160+ SPD for wheelchair strategies, maintaining minimum 160% Break Effect. Demands superior relic substats but enables some truly wild team compositions.
Energy Recharge focus: 124%+ ERR for 3-turn Ultimate cycles, utilizing A4 Days Wane (+5 Energy per turn) and proper light cone selection. More consistent but requires specific equipment choices.
Turn Cycle Mechanics
Action Value Manipulation
The math here gets technical, but it's worth understanding. Base AV = 10000 / SPD determines turn order. Sparkle's 50% action advance cuts target AV in half. Ruan Mei's 10% team SPD reduces all allies' base AV by roughly 10%.
Advanced timing consideration: Sparkle advances DPS immediately while Ruan Mei's SPD boost affects subsequent turns. Proper sequencing ensures maximum actions under buff windows – and trust me, the difference is noticeable.
Speed Tuning Strategies
Hyperspeed Sparkle (160+ SPD) enables wheelchair strategies for slow DPS and provides frequent advances. The -1 SPD tuning places Sparkle 1-2 SPD below DPS for immediate follow-up actions – this is often more practical than hyperspeed builds.
Ruan Mei targets 143+ SPD for turn priority over DPS while remaining below Sparkle. This ensures proper buff order: Ruan Mei applies Overtone → Sparkle advances DPS → DPS acts under both buffs. Mess up this sequence and your damage plummets.
Skill Point Management
Sparkle brings +2 max SP capacity, 4 SP recovery per Ultimate, and SP-positive basic rotations. Her Talent stacks provide 6% damage per stack (maximum 3) when allies consume SP – this adds up faster than you'd think.
Ruan Mei stays SP-neutral through 3-turn Skill duration. Her Technique provides free Skill activation at battle start, which is a small but meaningful advantage. Optimal rotation: Sparkle Ultimate every 2-3 turns, Ruan Mei Skill every 3 turns.
Best Team Compositions
Premium Meta Teams

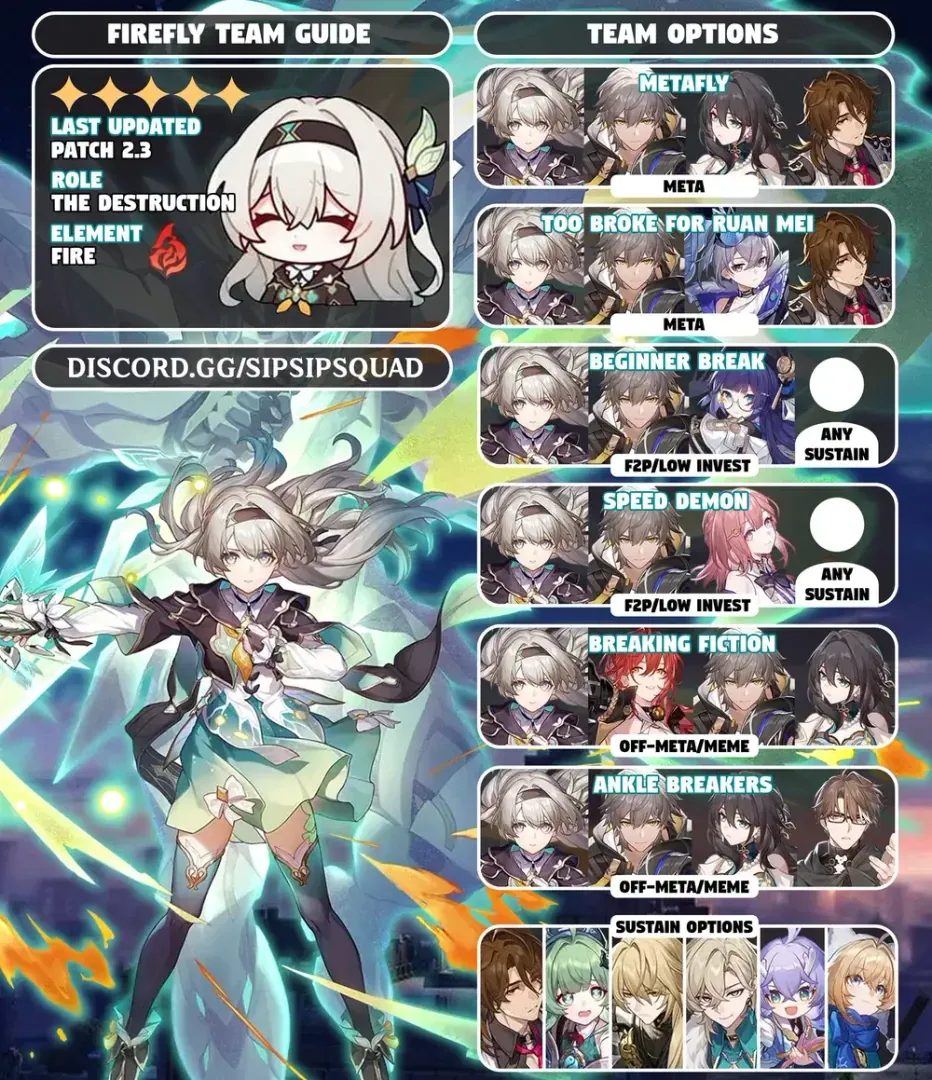
Firefly + Sparkle + Ruan Mei + Gallagher averages 8.71 MoC cycles with 2.24% appearance rate. Sparkle provides SP economy for Enhanced Skills while Ruan Mei amplifies Super Break damage. It's a beautiful synergy when it works.
Acheron + Sparkle + Ruan Mei + Pela hits 7.85 average cycles with 0.91% appearance rate. This leverages CRIT buffs and SP generation for Ultimate spam, plus universal damage amplification. Expensive but effective.
F2P Options
Qingque + Sparkle + Ruan Mei + Lynx leverages SP consumption for Talent stacks and requires only standard banner characters. Not meta, but surprisingly functional.
March 7th (Imaginary) + Trailblazer (Imaginary) + Ruan Mei + Gallagher focuses on Super Break with F2P characters. The damage ceiling is lower, but the investment requirement is manageable.
When building teams, top up Honkai Star Rail wallet through BitTopup ensures access to premium equipment with secure transactions and competitive pricing.
Element-Specific Synergies
Mono-Quantum maximizes Sparkle's A6 trace (+15% ATK plus Quantum extras). Break-focused teams utilize Ruan Mei's core identity with Boothill, Rappa, and Xueyi. DoT teams pair with Kafka/Black Swan using break delays for extended DoT windows – though this is more niche than the other applications.
Equipment Analysis
Relic Performance Data
Sacerdos leads Sparkle options with 45.76% usage and 9.25 cycles, providing up to 36% CRIT DMG bonus. Iron Cavalry dominates Ruan Mei builds at 47.97% usage through 16% personal plus 30% team Break Effect.
Mixed 2-piece combinations work too. Sparkle can use 2pc Sacerdos + 2pc Messenger for CRIT/SPD balance. Ruan Mei combines 2pc Iron Cavalry + 2pc Messenger for Break Effect/SPD optimization when you can't get good 4-piece sets.
Light Cone Value Assessment
Past Self in Mirror provides dual utility – 51.92% Sparkle usage (7.71 cycles) and optimal Ruan Mei performance. The versatility makes it a premium investment choice that pays dividends across multiple characters.
Memories of the Past dominates F2P Ruan Mei builds. S5 refinement genuinely competes with 5-star options, which is rare for 4-star light cones. Meshing Cogs offers universal F2P utility for both characters when you're starting out.
Investment Priorities
Premium builds achieve 15-20% performance improvements over F2P alternatives. That's significant but not game-breaking. Mid-tier builds using Past Self in Mirror provide 90%+ premium performance at reduced cost – often the sweet spot for most players.
Farming priority: Sacerdos domain for Sparkle, Iron Cavalry for Ruan Mei. Past Self in Mirror for dual utility, followed by character-specific signatures if you're really committed to optimization.
Advanced Strategies
Skill Rotation Optimization
Advanced rotations maximize buff overlap through A4 trace (extends Skill buffs to next turn) and 3-turn Skill duration flexibility. Cipher stack management requires strategic Ultimate timing before major DPS phases – don't waste those stacks on trash mobs.
Energy rotation considers 110 energy (Sparkle) and 130 energy (Ruan Mei) costs. Proper ERR investment enables consistent 3-turn cycles, but the math has to work out perfectly.
Buff Timing and Stacking
Multiplicative stacking is where the magic happens. Ruan Mei's 32% damage plus 25% RES penetration multiplied by Sparkle's CRIT DMG buffs creates exponential growth. Duration management ensures maximum uptime through proper sequencing – and this is where manual control becomes essential.
Situational Adaptations
Manual control prevents AI from making suboptimal decisions in complex rotations. The AI just doesn't understand the nuances of buff timing. Sustain-less compositions leverage break delays and damage mitigation through offensive strategies – risky but rewarding when executed properly.
Common Mistakes
Build Errors
CRIT DMG neglect kills Sparkle's potential. She needs 200%+ CRIT DMG for optimal buff scaling – anything less is leaving damage on the table. Break Effect errors plague Ruan Mei builds; she needs 160-180% with A6 activation at 180%. Speed tuning mismatches disrupt rotation synchronization more than most players realize.
Team Composition Issues
SP drain teams conflict with optimal duo rotations. Element mismatch reduces Sparkle's A6 trace value significantly. Sustain neglect leads to survivability issues in aggressive compositions – don't get so focused on damage that you forget to stay alive.
Resource Investment
Eidolon over-investment prioritizes marginal upgrades over new characters. Light cone misallocation spreads resources instead of focusing on high-impact options like Past Self in Mirror. Sometimes the best investment is the one you don't make.
Performance Analysis
Endgame Results
Memory of Chaos shows the duo achieving 56.78% combined usage in successful clears. Pure Fiction averages 25,750 scores with Firefly compositions. Apocalyptic Shadow hits 3,555 average scores with 71.84% Firefly usage. These numbers don't lie.
Alternative Comparisons
Robin + Bronya offers FUA focus but requires higher SP investment. HMC + Ruan Mei specializes in Super Break but lacks turn manipulation. The duo's universal utility ensures continued relevance across meta shifts – something that can't be said for more specialized combinations.
Future-Proofing
Power creep resistance comes through multiplicative scaling and unique mechanics that are hard to replicate. Investment longevity favors broad applicability across team archetypes. Turn manipulation and RES penetration provide irreplaceable utility that newer characters struggle to match.
FAQ
What's the light cone priority between their signatures? Past Self in Mirror (Ruan Mei's signature) provides superior value due to dual utility. Works excellently on both characters while Ruan Mei gets optimal performance. If you can only get one signature light cone, this is it.
What's Ruan Mei's minimum Break Effect requirement? 160% minimum, 180% optimal for A6 trace activation. Beyond 180% provides diminishing returns – prioritize SPD and ERR after reaching this threshold. Don't chase perfect Break Effect at the expense of everything else.
How do I fix speed tuning issues? Use -1 SPD strategy: set Sparkle 1-2 SPD below DPS for immediate follow-up actions. Hyperspeed alternative: 160+ Sparkle, 143+ Ruan Mei, 134 DPS. The math matters here.
Is this duo worth it for F2P players? Absolutely. Both are effective at E0 with 4-star light cones. Ruan Mei will be free during Version 3.2-3.4, which makes the investment even more attractive. Universal utility provides long-term value across multiple teams.
Which eidolons should I prioritize? Sparkle E2 for DEF ignore (highest value), Ruan Mei E1 for universal DEF shred. Both E0 versions are fully functional – only invest after securing other team members. Don't fall into the eidolon trap early.
Can this duo work in auto-battle? Manual control is strongly recommended for optimal performance. Auto-battle mismanages SP economy and advance timing, reducing effectiveness significantly. The AI just doesn't understand the complexity of their rotations.

