

Here's the deal with the Radiant Moonfly – it's one of those world bosses that'll make you rethink your entire team comp. Tucked away in Nod-Krai's underground caverns, this 40-resin fight isn't just about raw damage. You're dealing with debuffs that can cripple your entire party, form changes that shift the battlefield, and yeah, unavoidable nuke attacks. But here's the kicker: it's your only source for Lauma's ascension materials.
What You're Actually Fighting
The Radiant Moonfly follows standard world boss rules – beat it, wait three minutes, teleport out and back to reset. Pretty straightforward, except for the part where it introduces entirely new mechanics to the game.
We're talking Lunar Reactions and the Moonsign system here. If you've got Lauma on your team (and honestly, why wouldn't you for this fight?), these mechanics can turn the tide with party-wide buffs. The new Night Of The Sky's Unveiling artifact set plays into this beautifully – more CRIT Rate and Lunar Reaction damage when you're running Nod-Krai characters.
Quick aside: farming this boss consistently means burning through resin fast. Welkin Moon purchase online through BitTopup keeps those daily primos flowing – competitive pricing, instant delivery, and you won't have to worry about maintaining your farming momentum.
Finding This Thing (It's Not Where You'd Expect)
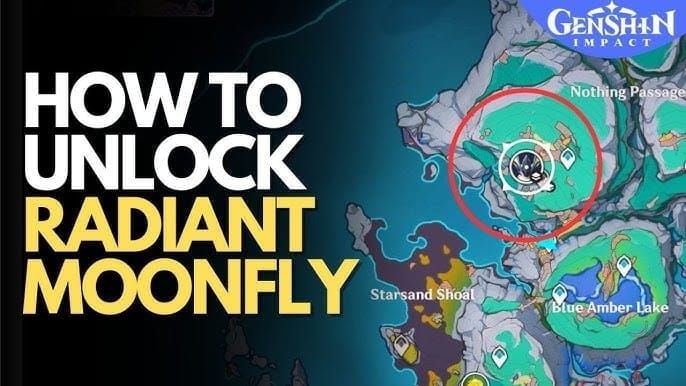
Forget surface-level exploration. The Radiant Moonfly lives underground on Lempo Isle, specifically north of Blue Amber Lake.
Start from Nasha Town – head north along the eastern edge of Blue Amber Lake. You're looking for cave entrances on the western coast, right before you hit the Nothing Passage landmark. The main entrance sits northwest of the lake, marked by some pretty distinctive rock formations that you honestly can't miss once you know what to look for.
Here's a pro tip that'll save you headaches later: activate that Teleport Waypoint near the boss chamber the second you find it. Also, if you haven't already, hit up the Statue of the New Moon behind Nasha Town's Adventurer's Guild. It'll light up your Lempo Isle map and make navigation infinitely easier.
Combat Breakdown (Three Forms, Three Headaches)
This boss doesn't mess around with simple attack patterns. You're dealing with a three-form system that fundamentally changes how you approach the fight.
Initial Melee Form keeps things relatively simple. Wings stay retracted, attacks are close-range physical damage. Flying Kicks, Projected Blade Slashes, Swift Double Kicks – all telegraphed with green flash indicators. Manageable stuff.
Then it transforms.
Green Butterfly Form is where things get interesting.
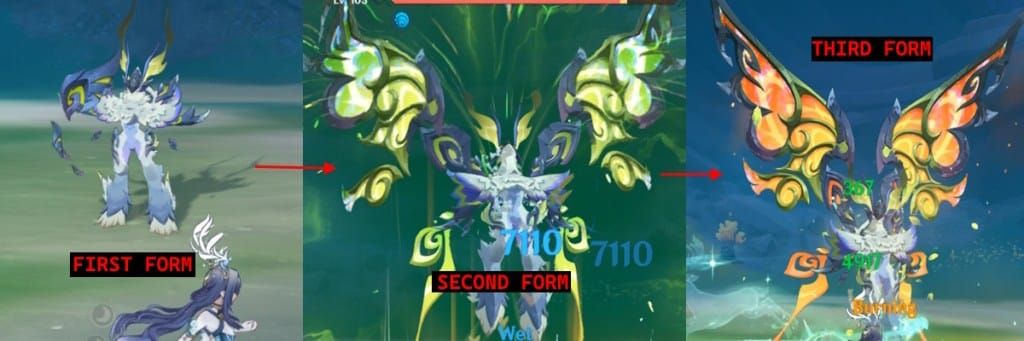
The transformation itself hits hard – spinning roundhouse kick, rising uppercut, shockwave. Once those green wings spread, you're dealing with Dendro-based AOE energy balls, swirl attacks, and here's the tricky part: Feather Barrage. Counter-intuitive dodge timing here – dash into the boss, not away from it.
Orange Butterfly Form cranks up the heat. Literally. Orange wings mean Pyro damage, persistent burning fields, and burn status gets applied to other attacks. The arena becomes significantly more dangerous.
But here's the real kicker – and this is where most teams fall apart. Those ranged butterfly phases apply a debuff that's absolutely devastating. We're talking HP drain based on your Max HP, plus -40% Damage Dealt, -40% Incoming Healing, and -100% Crit Rate.
The counter? Heal any character to full HP. Removes the debuff completely and flips it into a buff: +15% Crit Rate and +50% Damage Dealt. This mechanic alone dictates your entire team composition.
Elemental Resistances (Spoiler: Your Pyro DPS Won't Work)
70% resistance to Pyro and Dendro. Let that sink in.
Your Hu Tao, Diluc, Yoimiya builds? They're going to struggle. Hard. Meanwhile, everything else – Hydro, Electro, Cryo, Anemo, Geo – sits at a comfortable 10% resistance. Physical damage also faces just 10% resistance.
This resistance profile stays consistent across all forms, so you can't just wait it out. You need to commit to non-Pyro/Dendro damage sources from the start. Neuvillette, Childe, Raiden Shogun, Keqing, Ayaka, Ganyu – these are your heavy hitters for this fight.
Team Compositions That Actually Work
Lunar Bloom Meta: Lauma + Nilou + Kokomi + Nahida
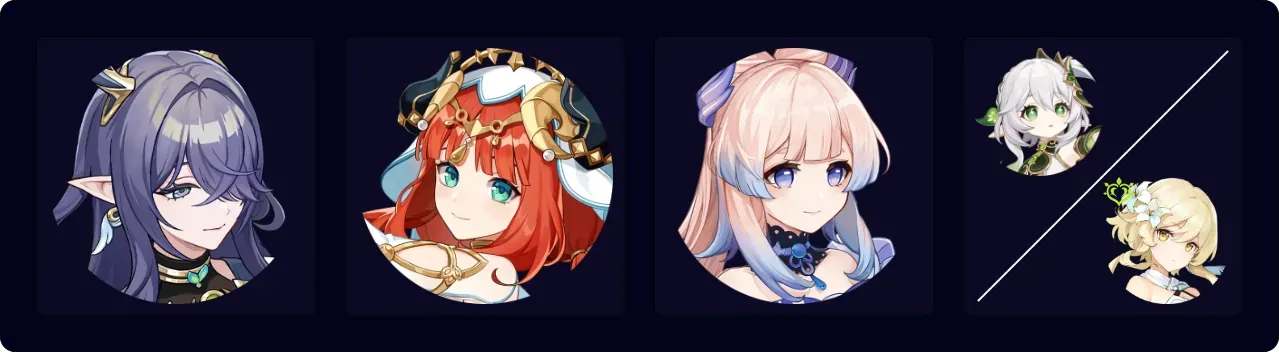
This is the new hotness. Maximizes those fresh elemental mechanics while Kokomi handles the essential healing requirements. Nilou's Hydro application synergizes beautifully with the Lunar Reaction system.
High-Damage Lunar: Lauma + Neuvillette + Kokomi + Baizhu
Higher risk, higher reward. You're running dual healing sources here because Neuvillette's self-damage combined with the boss's HP drain can get dicey fast. But the damage output? Chef's kiss.
Standard Hyperbloom: Raiden Shogun + Yelan + Nahida + Baizhu
Sometimes you stick with what works. Established elemental synergies, reliable damage, solid survivability.
F2P Strategy: Geo Traveler + Noelle + Barbara + flex slot
Look, not everyone's got the latest five-stars. This comp prioritizes staying alive over raw damage. Geo Traveler provides ranged damage, Noelle handles shielding and Geo Resonance, Barbara keeps everyone healthy.
Speaking of character acquisition – Genshin Impact Welkin top up through BitTopup ensures you've got the primos for those crucial pulls. Secure payment processing, 24/7 support, and you won't miss limited banners.
Character-Specific Strategies
Healers Are Non-Negotiable
Kokomi's your gold standard here. Her Elemental Skill provides consistent off-field healing, and her Burst can rapidly restore anyone to full HP for debuff removal. Barbara works as an accessible alternative with similar party healing capabilities, though she lacks Kokomi's damage contribution.
Shielding for Survival
That unavoidable nuke attack? You're not dodging it. You're tanking it. Noelle provides the most comprehensive solution – shield generation, healing, and Geo Resonance benefits all in one package. Baizhu offers an alternative if you need healing integration elsewhere.
DPS Timing Windows
Here's where fight knowledge pays off: the boss enters a stun phase right after that nuke attack. This is your primary damage window. Save your Elemental Bursts for this moment. If you're running Neuvillette, align your charged attack timing with these stun phases while keeping an eye on your HP.
Debuff Management Protocol
Keep your party above 80% HP whenever possible. The moment that debuff hits, you want immediate cleansing capability. The resulting buff state provides massive damage amplification for your next attack phase.
Equipment That Makes a Difference
Artifact Optimization
Night Of The Sky's Unveiling is tailor-made for Nod-Krai compositions. The CRIT Rate and Lunar Reaction damage bonuses are substantial. For Kokomi specifically, Ocean-Hued Clam maximizes both her healing contribution and damage output.
Healer Builds
Kokomi wants Ocean-Hued Clam 4-piece with HP%/HP%/Healing Bonus main stats. Prioritize HP% and Energy Recharge in substats. Barbara can use either Maiden Beloved 4-piece or Ocean-Hued Clam with similar stat priorities.
Weapon Considerations
Kokomi's Everlasting Moonglow is optimal, but Prototype Amber works fine for F2P players. Noelle benefits from Whiteblind for DEF scaling or Serpent Spine if you're optimizing for damage.
What You're Farming For
Lightbearing Scale-Feathers. That's it. That's the whole reason you're here.
Lauma needs 46 total pieces for complete ascension: 2 for Level 40, 4 for Level 50, 8 for Level 60, 12 for Level 70, 20 for Level 80. This boss is your only source.
You'll also get Nagadus Emerald and Agnidus Agate gems across all rarity tiers, plus standard artifact drops. But let's be honest – you're here for those Scale-Feathers.
40 Original Resin per fight, 3-minute respawn timer. Drop quantities scale with World Level, but that resin cost stays constant. Plan accordingly.
Advanced Tactics
Speed Running Approach
Focus burst damage during those post-nuke stun phases. Maintain just enough healing to survive the debuff, then capitalize on the buff state. Requires high-investment characters and precise timing, but cuts farming time significantly.
Co-op Advantages
Multiplayer lets you specialize roles. One player focuses on healing, another on shielding, dedicated DPS players can go all-out. Boss HP scales with player count, but coordinated teams clear faster than solo attempts.
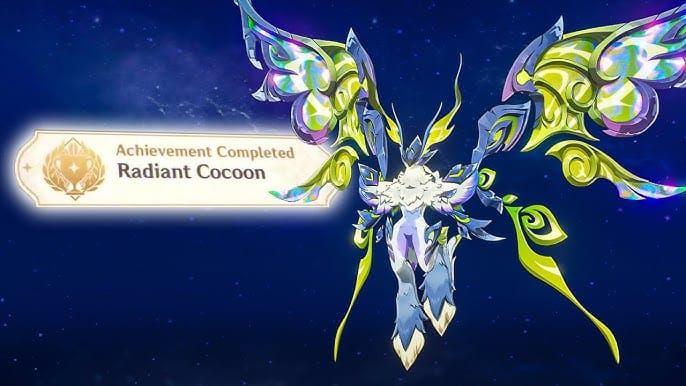
Mechanical Exploitation
That Radiant Cocoon ability? Countering it through healing creates additional stun opportunities beyond the standard post-nuke window. Advanced players can leverage this for extended damage phases.
FAQ (The Stuff Everyone Actually Asks)
Where exactly is this boss? Underground cavern on Lempo Isle. North of Blue Amber Lake, near Nothing Passage. Cave entrances on the western coast, northwest of the lake. There's an underground Teleport Waypoint that makes farming much more convenient.
What teams actually work? Lauma + Nilou + Kokomi + Nahida for optimal Lunar Bloom mechanics. Raiden Shogun + Yelan + Nahida + Baizhu for reliable Hyperbloom. Budget option: Geo Traveler + Noelle + Barbara + flex. All require strong healing.
What does it drop? Lightbearing Scale-Feathers (you need 46 total for Lauma), Nagadus Emerald and Agnidus Agate gems, standard artifacts. Costs 40 resin, 3-minute respawn.
How do I deal with that debuff? HP drain plus -40% damage/healing and -100% crit rate. Heal any character to full HP to remove it and get +15% Crit Rate and +50% Damage Dealt instead. Party-wide healers like Kokomi or Barbara are essential.
What about elemental resistances? 70% Pyro and Dendro resistance. Everything else is 10%. Don't bring Pyro or Dendro DPS characters – they'll underperform significantly.
That unavoidable attack? Don't try to dodge it. Shield up and tank it. Noelle's your best bet for shield strength. The boss goes into stun mode afterward – that's your main damage window.