

Master Rondo Stadium end-circles through strategic elevation control, destructible cover management, and coordinated team positioning. This guide covers terrain manipulation, EMP zone adaptations, and advanced utility sequencing for consistent final zone victories.
Understanding Rondo Stadium End-Circle Dynamics
Let's be honest—Rondo Stadium isn't your typical PUBG finale. This venue throws everything you think you know about end-circles out the window.
Map Layout and Zone Characteristics
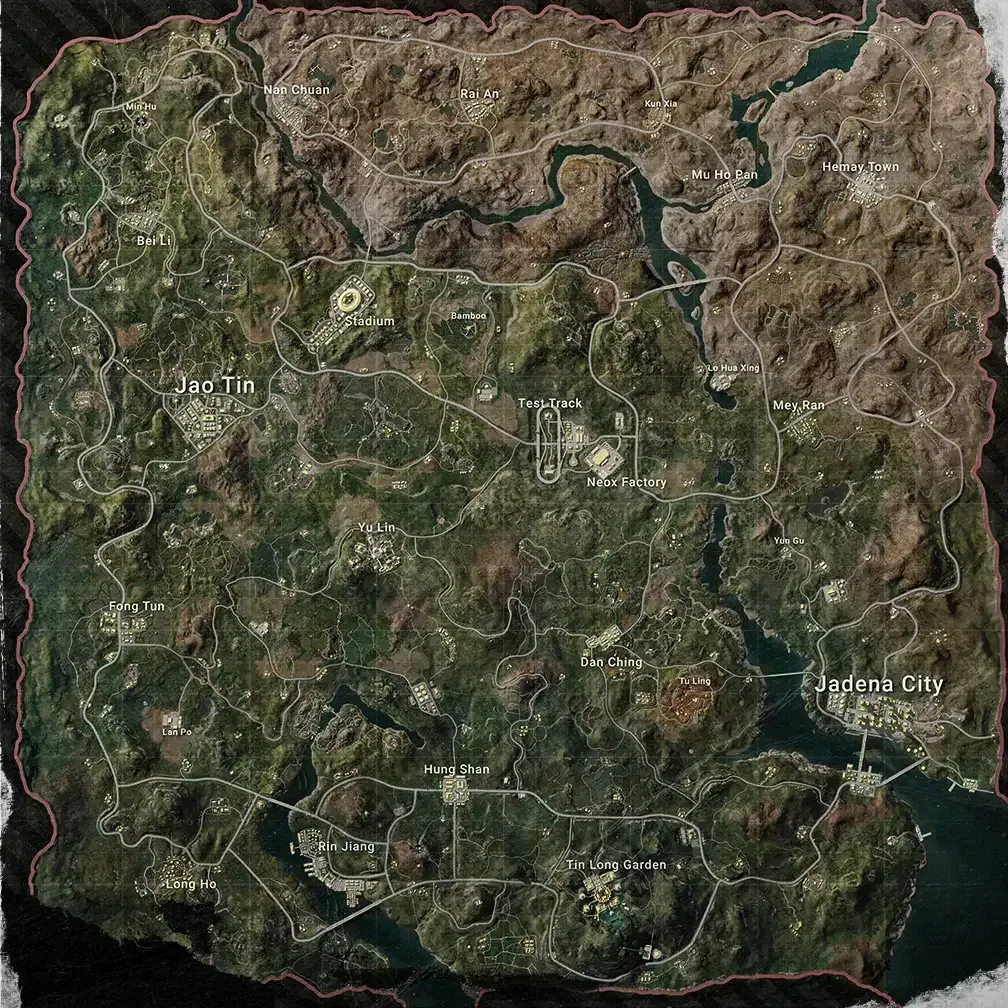
The Stadium's got three distinct levels that'll make or break your game: the ground field (where dreams go to die), elevated bleacher sections (the real estate everyone's fighting for), and rooftop areas (sniper heaven, if you can hold it). This 8x8 km battlefield packs 100 players into natural chokepoints through bleacher corridors and those claustrophobic under-structure passages.
Here's what I've noticed after countless Stadium matches: the venue actively punishes campers. Multiple entry and exit routes mean you can't just lock down one spot and call it a day. Dynamic positioning isn't just recommended—it's survival.
Stadium end-circles break down into three main patterns, and knowing these percentages has saved my squad more times than I can count:
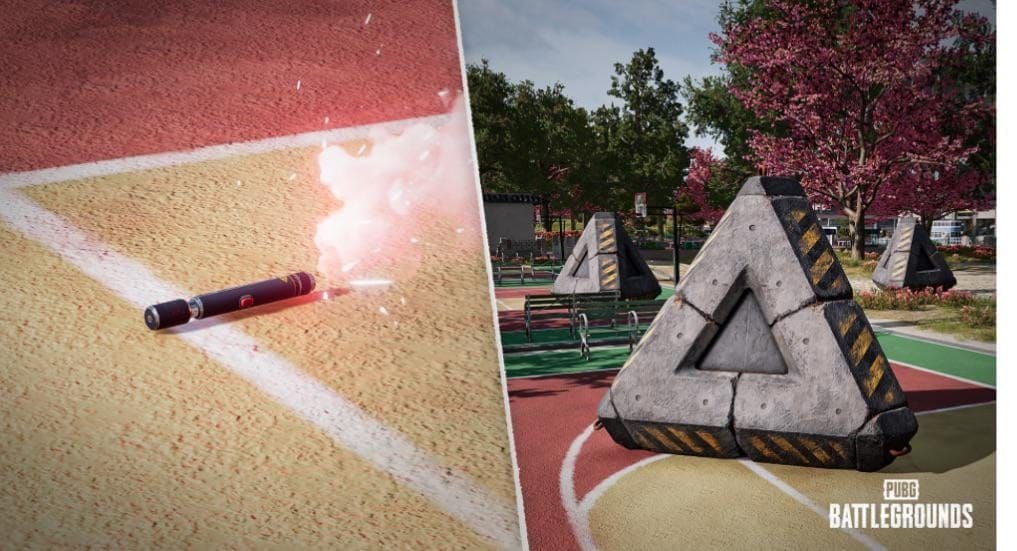
Field-centered circles (40%): Open combat chaos where Emergency Cover Flares become your best friend
Bleacher-weighted zones (35%): Height advantage wars that reward smart positioning
Perimeter circles (25%): Rotation nightmares around the Stadium's outer ring
Field-centered finales? That's where things get spicy. You'll need those Emergency Cover Flares and some serious terrain manipulation skills.
For players looking to maintain their competitive edge, PUBG Mobile UC global top up through BitTopup ensures you have the resources needed for premium cosmetics and battle passes. BitTopup offers competitive pricing with instant delivery, making it the preferred choice for serious players who want reliable UC top-ups without delays.
Terrain Advantage Analysis
Not all cover is created equal in Rondo Stadium. Some of it's going to crumble under pressure—literally.
Destructible zones include the outer field perimeter, those nicely landscaped sections around bleacher bases, and select interior corridors. Pro tip: you can reshape these areas using pickaxes, grenades, or (my personal favorite) vehicle explosions to create new angles or completely deny enemy positions.
The permanent stuff? Main bleacher framework, rooftop surfaces, and core building elements made from concrete, cement, or stone. These aren't budging no matter how many grenades you throw at them.
Quick identification trick that's saved me countless times: soil and mud surfaces look darker with organic textures, while concrete and stone show up lighter with those clean geometric patterns. One pickaxe strike tells you everything—destructible terrain shows damage and debris, permanent surfaces just laugh at you.

Destructible Cover Assessment and Management
Cover Health Indicators and Destruction Timing
Testing cover durability without giving away your position? Light weapon fire reveals destructible surfaces through visible damage buildup. Permanent structures just absorb your bullets like they're nothing. Advanced players (and you should be one of them) use pickaxe testing for immediate material verification without wasting ammo or compromising position.
Strategic cover destruction works in two phases. First, preemptive clearing—eliminate enemy cover during early circle phases when you've got breathing room. Second, reactive demolition—respond to immediate threats with grenades or vehicle explosions when enemies think they're safe.
The golden rule? Optimal timing happens when enemies commit to positions behind destructible cover. They think they're protected, but you know better. Just remember: Emergency Cover Flare deployment must immediately follow destructible cover elimination. Nobody likes being caught with their pants down.
Alternative Cover Planning
Here's something most guides won't tell you: backup positioning strategies aren't optional—they're essential. The Stadium's elevation diversity actually works in your favor here. Field teams can retreat to bleacher bases, bleacher teams reposition to higher tiers, and rooftop teams use interior corridors for emergency extraction.
Each position tier offers distinct advantages and escape routes. Smart teams always have a Plan B.
Elevation Control and Positioning Strategy
High Ground Advantages and Elevation Cut Techniques
Those bleacher positions aren't just for show—they give you 15-20 degree angle advantages over field-level opponents. That translates to significantly better hit probability and damage output. Math doesn't lie.
Optimal elevation control requires splitting your squad (I know, it feels wrong, but trust me). One element anchors high bleacher positions for broad area denial, while another maintains mid-level positions for close-range threat response. It's like having your cake and eating it too.
Elevation cuts—systematic denial of enemy height advantages—follow a specific sequence that works every time:
Smoke deployment for visual denial
Stun Gun application on exposed enemies
Immediate position advancement using cover flares
Coordinated elimination of stunned targets
Destructible terrain manipulation creates approach angles that bypass traditional chokepoints. Sometimes the best way up is through.
Counter-Elevation Tactics
Stuck on the low ground? Don't panic. Defending against elevation disadvantages requires constant movement between available cover. Keep enemies from establishing sustained firing solutions—make them work for every shot.
Smoke cycling creates temporary visual parity using 3-4 smoke grenades in overlapping patterns. This maintains visual denial for 45-60 seconds while your team repositions or executes flanking maneuvers. It's not permanent, but it's enough.
Zone Reading and Rotation Planning
Zone Prediction Methods
Stadium zone prediction isn't rocket science, but it does require pattern recognition. When the second-to-last circle encompasses 70% or more of the Stadium structure, final zones favor interior positions. Translation: elevation control strategies become critical.
Circles covering less than 50%? Those typically conclude in perimeter areas where rotation timing matters more than positional control.
EMP Zones throw a wrench in everything. They appear with advance warning and disable electronic equipment until after the third Blue Zone. Your team needs to adapt positioning strategies for iron-sight engagements and vehicle-free rotations. Historical data shows Stadium finales follow predictable patterns, but EMP zones change the game entirely.
Safe Rotation Routes
Stadium rotation planning prioritizes covered approaches. Those bleacher under-structures and interior corridors provide overhead protection while maintaining advancement toward optimal final positions. It's like having a highway system built into the map.
Perimeter rotations around the Stadium's exterior offer alternatives when interior passages become contested. Timing is everything here—too early and you're exposed, too late and the Blue Zone gets you.
For seamless gaming experiences and quick UC top-ups, PUBG Mobile UC email receipt confirmation through BitTopup provides instant transaction verification. BitTopup's automated system ensures immediate UC delivery with email confirmations, supporting players who need reliable top-up services during competitive seasons.
Emergency repositioning? Signal Jammer Backpack for Blue Zone immunity. This enables zone-edge positioning for tactical advantages. The sequence that works:
Smoke deployment for initial visual cover
Emergency Cover Flare activation for hardcover creation
Coordinated team movement using cover-to-cover advancement
Stun Gun deployment for enemy threat neutralization
Equipment and Loadout Optimization
Weapon Selection and Utility Priorities
The JS9 Submachine Gun absolutely dominates Stadium end-circle engagements. Superior close-to-mid range performance and exceptional recoil stability make this Rondo-exclusive weapon a game-changer. It uses 9mm ammo and features a stock-less design that optimizes mobility in those tight bleacher corridors.

My go-to loadout? JS9 for close-range dominance paired with assault rifles or DMRs for mid-range threats. This combination covers every engagement scenario you'll face.
Emergency Cover Flare ranks as highest priority utility—instant hardcover creation in open field scenarios can't be overstated. Each flare deploys two triangular bunkers offering protection from multiple angles. The Stun Gun provides unmatched crowd control, temporarily immobilizing enemies for easy elimination.
Smoke grenades? You need 3-4 units for comprehensive visual denial capabilities. Don't cheap out here.
Iron sight proficiency becomes critical during EMP Zone overlap when electronic reticles get disabled. Practice with weapons that have clean iron sight pictures and develop ADS-free engagement techniques. Battle Ready Kits offer instant full health and maximum energy restoration for those clutch Stadium end-circle moments.
Team Coordination in Final Zones
Communication Protocols and Role Distribution
Stadium end-circle communication requires specific callouts that everyone understands:
Field for ground-level areas
Low Bleachers for first-tier seating
High Bleachers for upper seating sections
Roof for building top positions
Directional callouts use clock positions relative to the Stadium's center, with 12 o'clock representing the main entrance facade. Simple, effective, no confusion.
Squad role assignments emphasize specialized responsibilities:
Anchor players: Maintain elevation control and provide overwatch
Fraggers: Execute close-range clearing with JS9 weapons
Utility players: Manage smoke deployment and Emergency Cover Flares
Scouts: Provide enemy movement intelligence
The recommended team split? Divide squads between Field Control and Bleacher Control elements. It works.
Synchronized Movements
Coordinated utility sequencing maximizes team effectiveness through this proven sequence:
Smoke deployment for visual denial
Stun Gun application for enemy immobilization
Emergency Cover Flare activation for hardcover creation
Coordinated advancement with JS9 weapons for close-range elimination
Split-team coordination requires precise timing to maintain crossfire advantages while preventing friendly fire incidents. Practice this until it becomes muscle memory.
Common End-Circle Mistakes and Solutions
Positioning and Timing Errors
Rooftop camping without split coverage? You're asking for trouble. Multi-angle attacks from bleacher and field positions will end your game fast. Solution: maintain split-team positioning with crossfire capabilities.
Over-reliance on destructible cover without backup positioning leads to elimination when enemies destroy your primary protection. Always identify secondary positions within immediate rotation distance.
Premature Emergency Cover Flare deployment wastes critical utility. Wait for circle lock confirmation before deploying flares—patience pays off.
Vehicle reliance during EMP Zone overlap creates mobility disadvantages when electronic systems become disabled. Transition to foot-based rotations and iron sight engagements before you're forced to.
Resource Mismanagement
Ammunition conservation becomes critical during extended Stadium engagements, particularly for JS9 weapons using 9mm rounds. Prioritize body looting and ammunition sharing to maintain sustained combat effectiveness.
Healing item depletion during early engagement phases compromises late-game survivability. Resource management requires rationing healing items for final circle scenarios. Don't blow everything in the first fight.
Advanced Tactics and Pro Strategies
Competitive Meta Analysis
Professional Stadium end-circle strategies emphasize aggressive positioning over passive defensive play. The current meta favors teams that combine elevation control with rapid repositioning capabilities—static play gets punished hard.
EMP Zone adaptation represents a crucial competitive skill. Teams must maintain effectiveness during electronic equipment disruption, and frankly, most casual players aren't prepared for this.
Terrain manipulation through coordinated destruction creates tactical advantages unavailable on other maps. Professional teams use synchronized explosive deployment to eliminate enemy cover while immediately replacing protection through Emergency Cover Flare activation.
Pro Player Techniques
Chaos control techniques combine multiple utility items in sequence: Stun Gun application for enemy immobilization, Emergency Cover Flare deployment for instant hardcover, followed by JS9 sweeps on neutralized targets. It's brutal but effective.
Advanced smoke cycling maintains visual denial for extended periods using 4-5 smoke grenades in overlapping patterns. This creates 60-90 second visual denial windows—enough time to completely reposition or execute complex flanking maneuvers.
AI disguise utilization from premium store encounters enables advanced positioning strategies, allowing teams to approach Stadium perimeters without immediate enemy recognition. Zone edge positioning using Signal Jammer Backpacks enables extended Blue Zone play for tactical advantages.
Practice Drills and Improvement Methods
Training Mode Exercises
Destructible terrain identification drills develop rapid material assessment skills through systematic testing of Stadium surfaces. Use pickaxe strikes and visual inspection until identification becomes instinctive.
Emergency Cover Flare deployment practice focuses on optimal positioning and timing for maximum protection value. Emphasize safe deployment distances and angle optimization—getting caught in your own flare's impact damage is embarrassing.
Iron sight engagement training prepares teams for EMP Zone encounters where electronic reticles become disabled. Practice with various weapon types and engagement ranges until you're comfortable fighting without electronic assistance.
Custom Room Practice and Performance Tracking
EMP simulation exercises recreate electronic equipment disruption scenarios, forcing teams to adapt positioning and engagement strategies without vehicles or electronic optics. This separates good teams from great ones.
Elevation control scenarios practice coordinated utility deployment for height advantage acquisition and denial. Multi-team finale simulations prepare squads for complex final circles involving 3-4 teams in compressed Stadium areas.
Track these metrics:
Positioning success rates
Utility usage efficiency
Elimination-to-death ratios during Stadium finales
Zone prediction accuracy
Emergency Cover Flare deployment success
Smoke cycling efficiency
Stun Gun application timing
Frequently Asked Questions
How do you identify destructible vs permanent cover in Rondo Stadium? Destructible cover consists of soil and mud surfaces with darker, organic textures that show visible damage when struck with pickaxes. Permanent cover includes concrete, cement, and stone materials with lighter, uniform coloration that remain unmarked when tested.
What's the optimal team positioning strategy for Stadium end-circles? Split squads between Field Control and Bleacher Control elements. Field Control teams establish hardcover positions using Emergency Cover Flares, while Bleacher Control teams secure elevation advantages and deny rooftop access.
How should teams adapt when EMP Zones overlap Stadium final circles? Switch to iron sight weapons, plan foot-based rotations without vehicles, and prioritize throwable utility over electronic equipment. Electronic reticles, vehicles, stores, and recall towers become disabled until after the third Blue Zone.
When is the optimal timing for Emergency Cover Flare deployment? Deploy after circle lock confirmation when caught in open field positions or when destructible cover becomes compromised. Position flares offset from team locations to prevent impact damage.
What weapons work best for Stadium end-circle engagements? The JS9 Submachine Gun dominates through superior close-to-mid range performance and mobility optimization. Pair with assault rifles for engagement range versatility and prioritize weapons with clean iron sight pictures.
How do you counter enemies with elevation advantages in Stadium? Use smoke cycling for visual denial, Emergency Cover Flare deployment for hardcover creation, and coordinated utility sequencing. Combine Stun Gun application with immediate position advancement using cover flares.