

Quick Answer: EMP Zones disable electronic scope reticles and engine-powered vehicles without dealing damage. Success requires iron-sight weapons (M416, AKM, JS9), utility items (smokes, Emergency Cover Flare), and aggressive close-quarters tactics using strafing and audio awareness.
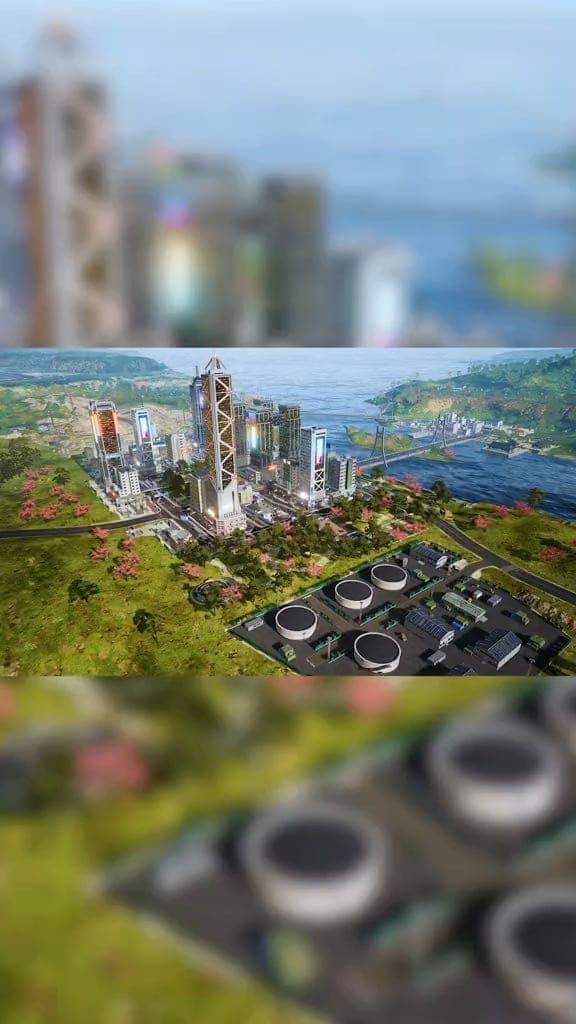
Here's something that'll mess with your head: PUBG Mobile's Version 3.7 drops us into Rondo, an 8×8 km map where 100 players duke it out—but with a twist that changes everything you think you know about positioning and loadouts.
EMP Zones. They're not your typical Red Zone that'll blow you to smithereens. Nope, these things are sneakier. Zero physical damage, but they'll turn your fancy 6x scope into expensive paperweight and leave your ride dead in the water faster than you can say chicken dinner.
For enhanced Rondo experience with UC purchases, PUBG Mobile UC purchase with PayPal offers convenient payment through BitTopup's secure platform with competitive pricing and quick delivery.
EMP Zone Mechanics
Equipment Effects
When that EMP hits? Your electronic scope reticles go dark. Completely. Engine-powered vehicles just... stop. Markets shut down, Recall Towers become fancy decorations, and those Signal Jammer Backpacks you've been hoarding? They're about as useful as a chocolate teapot.

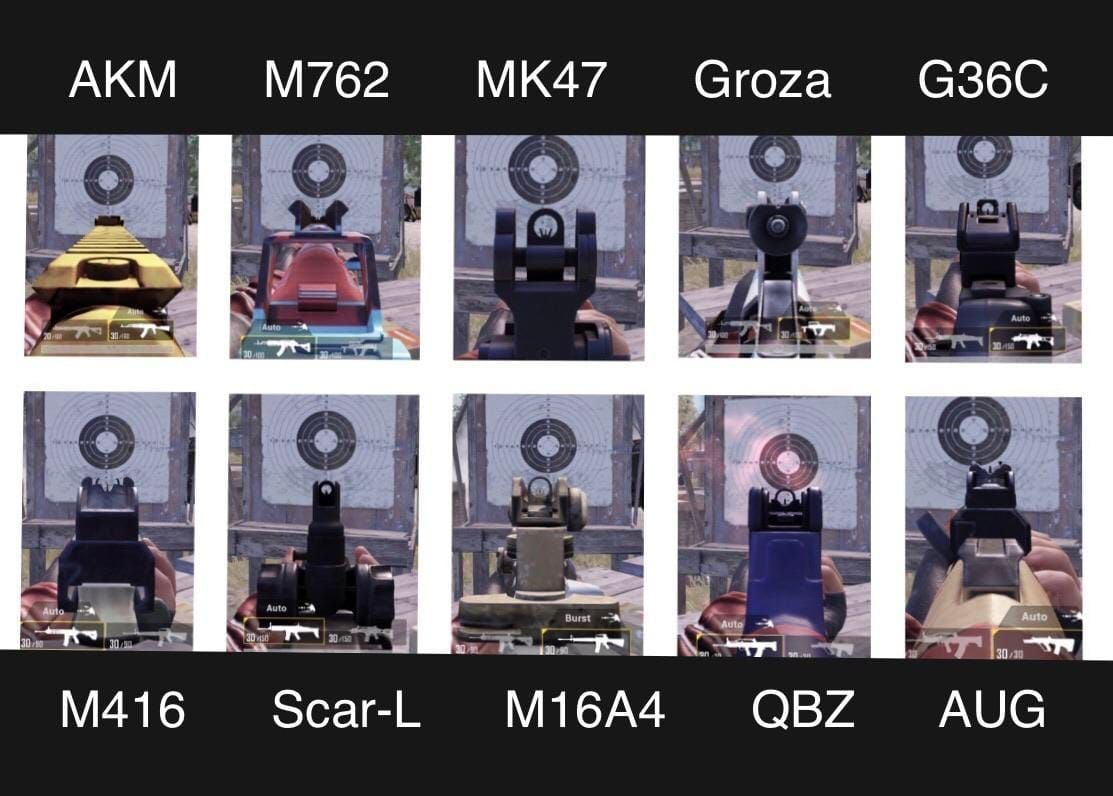
But here's the kicker—iron sights work perfectly fine.
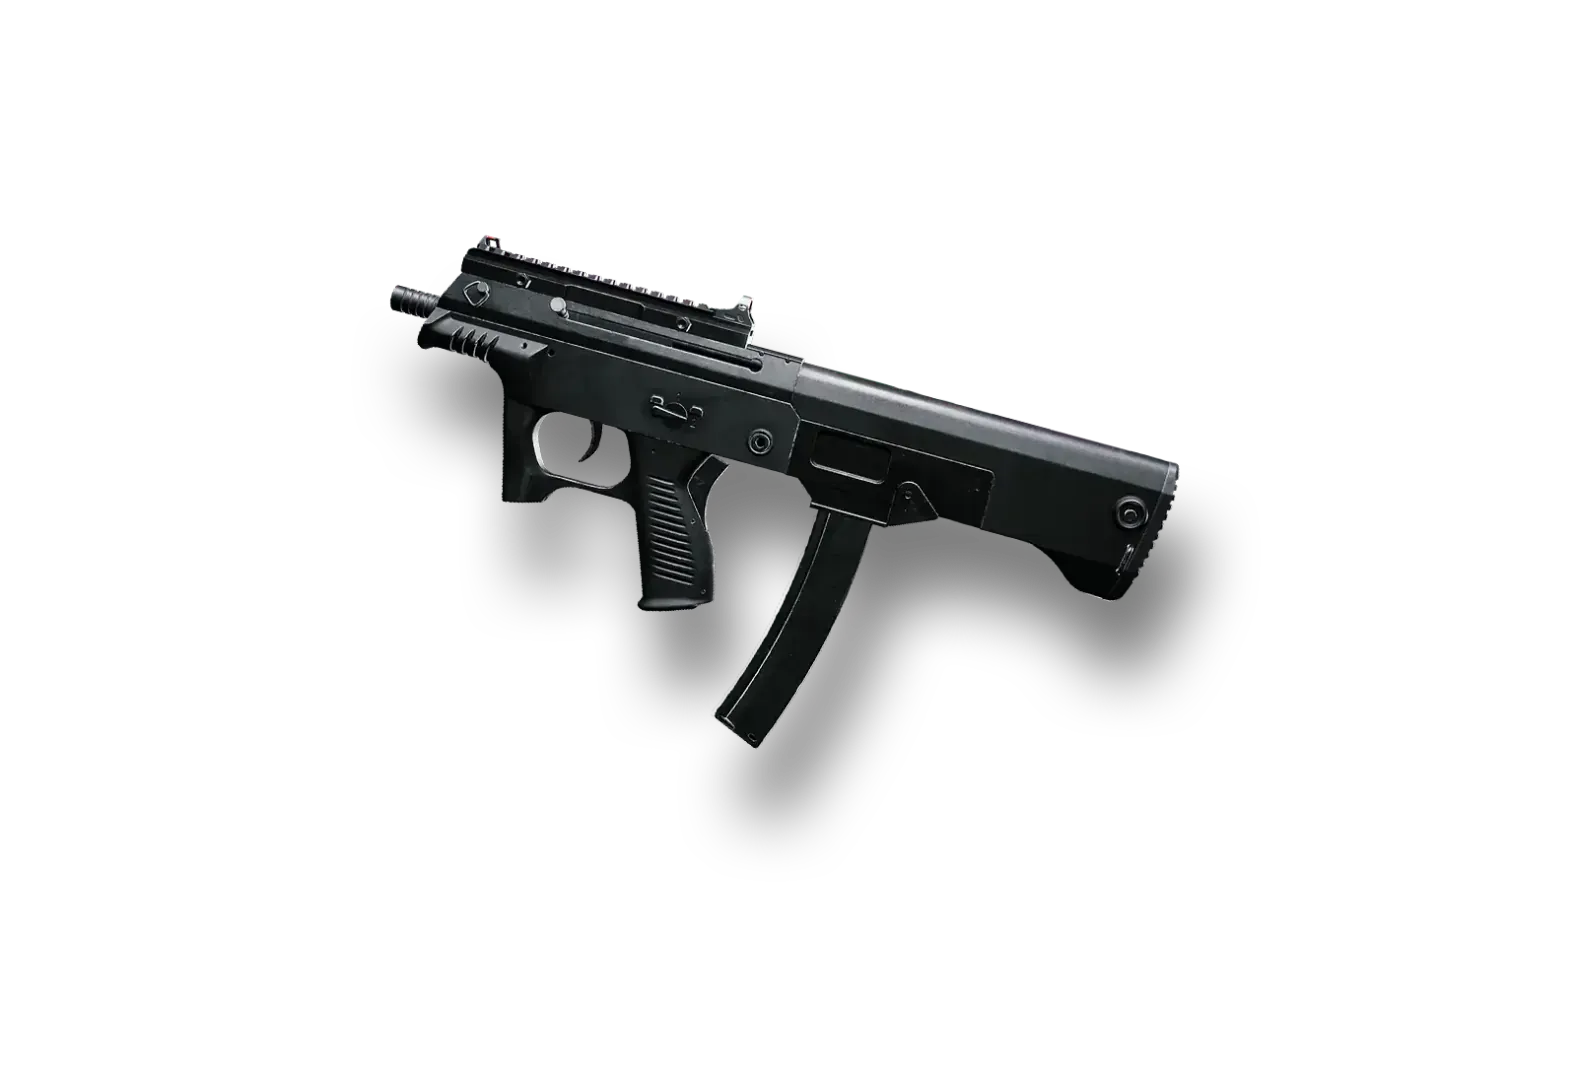
This is where weapon choice becomes absolutely critical. M416, AKM, DP-28, UMP45, and that underrated JS9 SMG suddenly become your best friends. Hip-fire accuracy? Totally unaffected. Laser sight attachments go from nice to have to absolutely essential real quick.
Your Signal Jammer Backpack loses that sweet 100 Blue Zone damage absorption too. So you're dealing with equipment failure AND potential Blue Zone exposure. Double whammy.
Duration and Timing
The good news? These zones don't just appear out of nowhere like some cosmic prank. You get advance warnings, and they show up on your map before activation. (Thank goodness for small mercies, right?)
Community intel suggests the effects vanish after the third Blue Zone phase, though I'm still waiting for official confirmation on that timing. What I can tell you is that pre-activation visibility gives you precious seconds to plan alternative routes using foot paths, escalators, and those moving walkways.
Get caught mid-rotation when the EMP hits? You're in for a world of hurt.
Rondo EMP Locations
After dozens of matches, I've noticed patterns. Jadena City and Stadium areas seem to be EMP magnets—probably because of all those Markets crammed together. The multi-level architecture actually works in your favor here, giving you escalators and walkways as backup movement options.
Those Advanced Markets with NPC guards? They're sitting ducks for EMP interference. NEOX Factory and Test Track areas will leave Pico Bus and Blanc SUV users stranded and vulnerable.
Pre-EMP Preparation
Weapon Loadout
Iron-sight proficiency isn't just helpful anymore—it's survival. The M416 gives you excellent visibility with recoil that won't make you want to throw your phone. AKM hits like a truck for those crucial single-tap eliminations. But the JS9? That's my secret weapon. Stable recoil, 6x scope compatibility when you need it, and devastating close-range potential.
Don't sleep on laser sights. When precision aiming goes out the window, hip-fire accuracy becomes your lifeline.
Extended quickdraw magazines are non-negotiable. Reload vulnerabilities in EMP zones can get you killed faster than a third-party in Pochinki.
DBS shotgun and S12K provide room-clearing potential when your usual precision goes to hell. And those Rondo-exclusive Stun Guns? Three guaranteed uses for easy eliminations. That's not just useful—that's game-changing.
Attachment Strategy
Here's where most players mess up: they go all-in on high-magnification optics early game. Big mistake in Rondo. Carry both iron-sight weapons and scoped alternatives, but don't over-invest in those 8x scopes when there's a decent chance they'll become useless.
The JS9's 6x scope capability makes it perfect for dual-purpose loadouts. Compensators and flash hiders? They work regardless of EMP status, so prioritize those.
Vehicle Backup Plans
Escalators and moving walkways become your mechanical movement lifeline—EMP can't touch 'em. I've spent hours memorizing cover chains that connect buildings, walls, even bamboo groves.
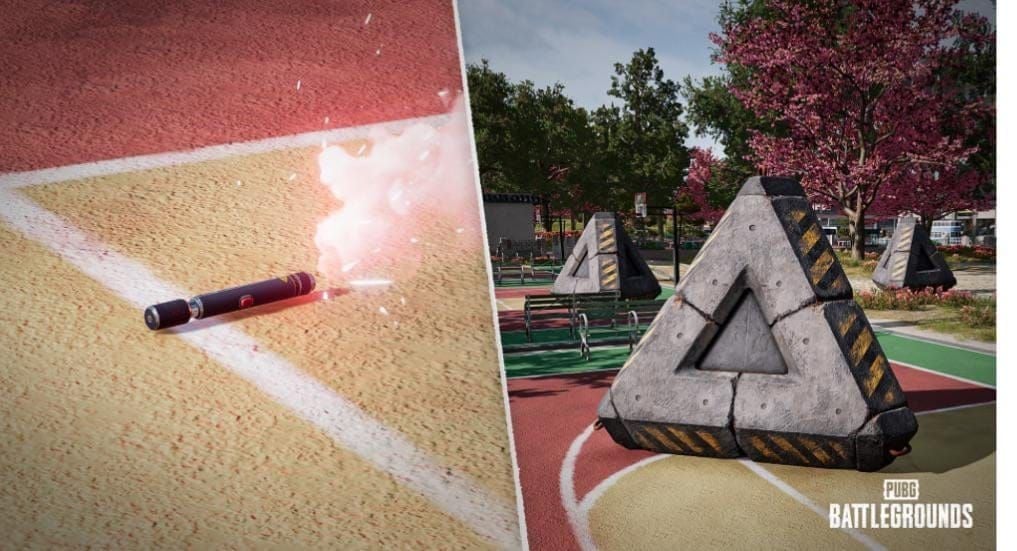
Emergency Cover Flare deployment points for open-ground crossings? Plan them now, not when you're getting shot at with iron sights.
Start your zone rotations before EMP activation. Those last-minute vehicle rushes that work on other maps? They'll get you killed here.
Combat Tactics Without Scopes
Iron Sight Techniques
Target selection changes completely. Head and upper-chest shots become your bread and butter because precision takes a nosedive. Controlled burst firing for medium ranges, single-tap with AKM or M416 for reliable damage.
Muscle memory for weapon-specific recoil patterns isn't optional anymore—it's mandatory. Iron sights excel within 50-100 meters but struggle beyond 150. Plan your engagements accordingly.
Hip Fire Optimization
Laser sight attachments aren't just helpful—they're transformative for bullet grouping on SMGs and assault rifles. JS9 and UMP45 have excellent hip-fire characteristics that most players never explore.
Integrate strafing while shooting. Jump shots, drop shots—anything to disrupt enemy tracking when everyone's dealing with reduced accuracy.
Pro tip: Set your no-scope ADS sensitivity around 100% and gyroscope at 300%. Trust me on this one.
Close-Range Strategies
When everyone's dealing with scope limitations, aggressive positioning becomes your advantage. Those Stun Guns create guaranteed eliminations (remember, only 3 uses though). Smoke grenades enable pushes that would be suicide on other maps.
Audio awareness becomes absolutely paramount. Footsteps, door sounds, reload cues—these become your primary intelligence sources when visual precision fails.
Movement Without Vehicles
Alternative Transportation
Jadena City's escalators provide instant vertical repositioning that no EMP can touch. Moving walkways let you maintain combat readiness while traveling horizontally.
Pickaxes destroy soil and mud surfaces, opening alternative approaches most players never consider. Emergency Cover Flare creates two triangular bunkers—temporary safe zones that can save your life in open ground.
On-Foot Positioning
Cover chains become your highway system. Strafe-peeking and crouch-peeking create unpredictable exposure patterns that mess with enemy tracking. Vertical positioning using bridges, elevated walkways, building rooftops—these become strategic gold mines.
Escalator control? That's not just positioning—that's power.
Zone Rotation
Start earlier. Period. Reduced travel speed means those last-second rotations that work on Erangel will leave you dead in the Blue Zone on Rondo.
Signal Jammer Backpacks still provide 100 Blue Zone damage absorption outside EMP zones. Battle Ready Kits restore 100% health and energy after 8 seconds—emergency recovery that can turn fights around.
Map-Specific EMP Hotspots
High-Risk Areas
Jadena City tops the list for EMP probability. All those Markets crammed together make it a prime target. Stadium areas with their open design leave you exposed when the interference hits.
Advanced Market raids become high-risk, high-reward scenarios. Those NPC guards don't care if your scope works—they'll still melt you if you're not careful.
Strategic Positions
Elevated positions gain massive value during EMP activation. Building rooftops, bridge positions—anywhere you can look down on the chaos below.
Escalator control points become strategically critical. Control the escalator, control the engagement terms.
Cover-rich environments with dense building clusters favor defensive positioning when everyone's struggling with iron sights.
Loot Priorities
Safe locations adjacent to EMP zones provide optimal risk-reward ratios. Gold bar safe locations become priority targets for Market currency generation.
Utility items gain massive importance. Smoke grenades, frags, Molotovs—these become essential for EMP combat success.
Team Coordination
Communication
Clear, concise callouts become life-or-death important. Stairs, hall, left room—no fancy descriptions when everyone's dealing with equipment malfunctions.
Announce EMP activation immediately. Duration estimates, equipment status changes—your team needs this intel fast.
Audio intelligence sharing compensates for reduced precision. Footstep counts, door sounds, reload cues—share everything.
Role Distribution
Your entry fragger needs JS9 or UMP45 with Stun Gun backup. Close-quarters effectiveness becomes paramount.
Support player focuses on utility deployment—smokes, Emergency Cover Flares, frags. These items win EMP fights.
Overwatch transitions from sniper support to area control using automatic weapons. The role changes, but it's still crucial.
Mutual Support
Simultaneous multi-angle attacks when opponents struggle with scope malfunctions. Emergency Cover Flare deployment creates instant hard cover for teammate revival.
Redistribute ammo and utility to optimize collective combat effectiveness. Individual loadouts matter less than team synergy in EMP zones.
Weapon Selection Priorities
Best Iron Sight Weapons
M416 demonstrates superior performance with excellent visibility and manageable recoil. Tactical stock compatibility improves handling for rapid target acquisition.
AKM provides exceptional single-tap damage for medium-range combat—when you can't spray and pray, make every shot count.
JS9 offers unique versatility with 6x scope mounting and 900 RPM fire rate. It's the Swiss Army knife of Rondo combat.
Quick Switching
Keep assault rifles or SMGs in primary slots during EMP exposure. Carry backup red dot sights for quick restoration when the interference ends.
Practice weapon-specific sensitivity configurations. Seamless transitions can mean the difference between elimination and chicken dinner.
Shotgun integration provides devastating close-quarters alternatives. DBS and S12K excel in room clearing when precision fails.
For maximizing Rondo performance through premium content, PUBG Mobile UC credit card checkout provides secure transactions through BitTopup's reliable platform with competitive rates and instant delivery.
Advanced Combat Techniques
Predictive Positioning
Establish positions with multiple escape routes before electromagnetic interference begins. This isn't just good practice—it's survival.
Create custom cover using Pickaxe destruction combined with Emergency Cover Flare deployment. Most players never think to combine these tools.
Control key escalator positions to dictate engagement terms and prevent enemy repositioning. Vertical control wins fights.
Engagement Timing
Strike immediately after EMP activation when opponents struggle with scope malfunctions. That confusion window is your opportunity.
Break contact and reposition when engagements extend beyond quick elimination potential. Prolonged fights favor whoever adapts fastest to iron sights.
Deploy smoke grenades before aggressive pushes. Frags clear suspected positions when you can't precisely aim to confirm targets.
Exploiting Failures
Identify struggling opponents through erratic movement patterns and increased reload frequency. These tells become obvious once you know what to look for.
Control high-ground positions forcing enemies into open-ground movement. When everyone's accuracy suffers, positioning becomes everything.
Sustained utility pressure through smoke and frags creates panic responses. Exploit that panic.
Common Mistakes
Equipment Over-Reliance
Don't over-invest in high-magnification optics early in matches. I've seen too many players get caught with 8x scopes and no backup plan.
Never rely exclusively on motorized transportation. Plan alternative movement or get stranded.
Avoid Premium Store raids during EMP activation when Advanced Markets become inaccessible. Risk-reward calculation changes completely.
Poor Positioning
Getting caught in exposed positions during EMP activation without escape options? That's a death sentence.
Utilize escalators and elevated positions for tactical advantages. Vertical positioning becomes even more critical when precision aiming fails.
Don't hoard utility items. Use those smokes and frags for aggressive plays when the opportunity presents itself.
Panic Management
Pre-configure sensitivity profiles for iron-sight combat. Don't let equipment malfunctions disrupt your tactical thinking.
Establish clear weapon priority hierarchies before EMP exposure. Decision-making under pressure improves with preparation.
Maintain calm, clear callouts during equipment malfunctions. Communication breakdown kills teams faster than any EMP.
Post-EMP Recovery
Equipment Restoration
Quickly reattach optics and verify functionality when EMP zones deactivate. Those precious seconds of restored capability can turn fights around.
Check Pico Bus battery levels and Blanc SUV engine status immediately. Vehicle mobility restoration opens new tactical options.
Prioritize Market visits for Emergency Cover Flares, Battle Ready Kits, and tactical items. Restock while you can.
Strategic Repositioning
Secure elevated positions with superior sightlines for scoped combat. Take advantage of restored precision capabilities.
Use restored vehicle mobility for rapid positioning to superior defensive locations. Speed becomes your advantage again.
Rapidly rotate to optimal circle positions using functional vehicles. Make up for lost time during EMP exposure.
End Game Preparation
Balance EMP-resistant equipment with traditional combat tools for final circles. You never know when another EMP might hit.
Stockpile Emergency Cover Flares for final circle positioning when natural cover becomes limited.
Maintain multiple fallback positions to ensure survival regardless of electromagnetic interference. Adaptability wins chicken dinners.
Frequently Asked Questions
What happens to your equipment in PUBG Mobile EMP zones? EMP zones disable electronic scope reticles and engine-powered vehicles completely. Markets, Recall Towers, and Signal Jammer Backpacks cease functioning. Iron sights remain functional, and zones cause zero health damage.
How long do EMP effects last in PUBG Mobile Rondo? EMP zones appear before activation with clear notifications. Effects may disappear after the third Blue Zone phase, though official confirmation is pending. Use in-match map notifications as authoritative timing sources.
Can you still use iron sights when scopes fail in EMP zones? Yes, iron sights remain fully functional. M416, AKM, DP-28, UMP45, and JS9 provide excellent visibility. Hip-fire accuracy is unaffected, making laser sights valuable for close-range combat.
What are the best weapons for EMP zone combat? M416 offers superior iron-sight visibility with manageable recoil. AKM provides exceptional single-tap damage. JS9 demonstrates versatility with stable recoil. DBS and S12K excel in close-quarters. Stun Gun provides guaranteed target immobilization.
How do you navigate Rondo when vehicles break down? Use escalators and moving walkways for mechanical movement. Memorize cover chains connecting terrain features. Deploy Emergency Cover Flares for open-ground movement. Initiate early rotations before EMP activation.
Which Rondo areas have the most EMP activity? Jadena City shows highest probability due to Market concentration. Stadium areas demonstrate consistent activity. Advanced Markets experience regular targeting. NEOX Factory and Test Track present vehicle vulnerabilities.