

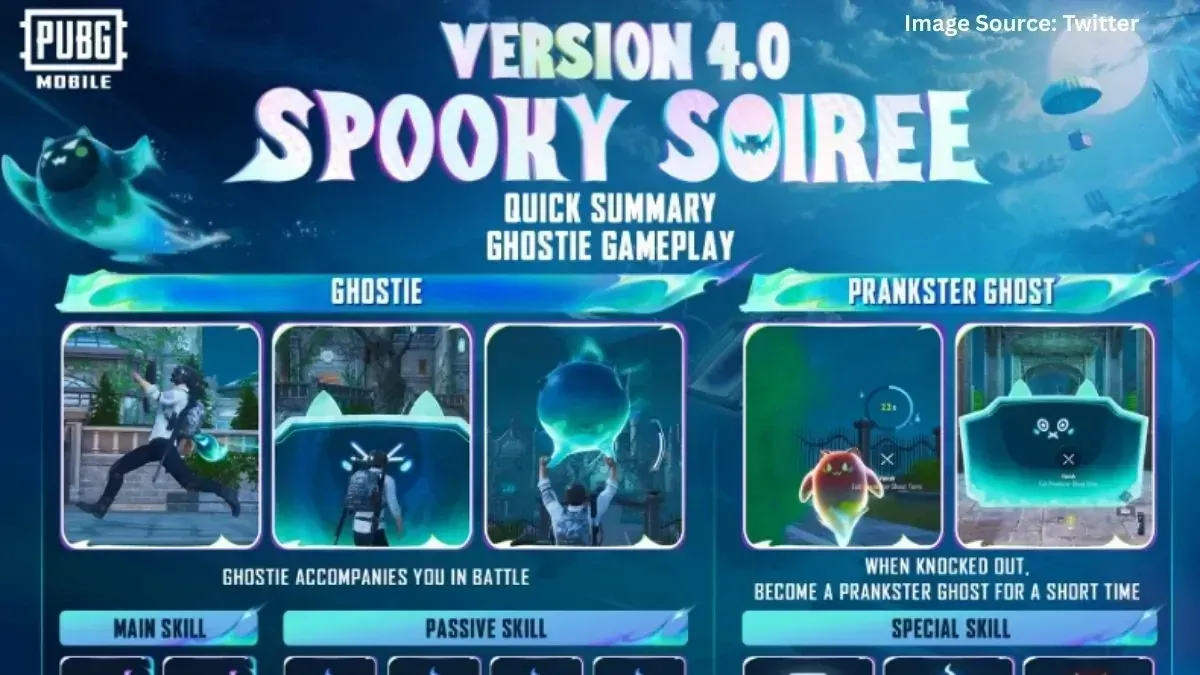
PUBG Mobile's Spooky Soiree introduces Ghosty companions with 2 primary skills (Floating Balloon, Guardian Shield) and 5 passive abilities (Boost, Ghost Helm, Armorer, Scan, Heal). Players equip 1 primary + 2 passives, upgrading via Ghost Essence to Level 3 for maximum ranked effectiveness.
Ghosty's Role in PUBG Mobile Ranked
Character Overview and Abilities
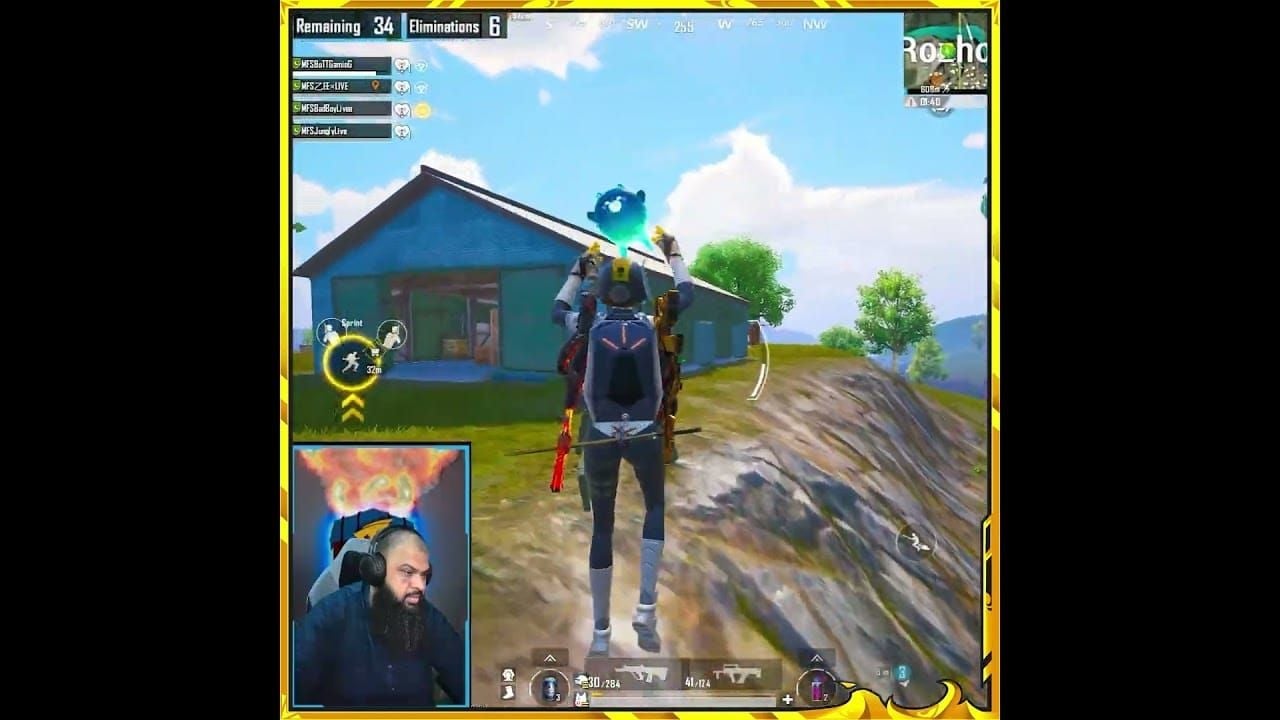
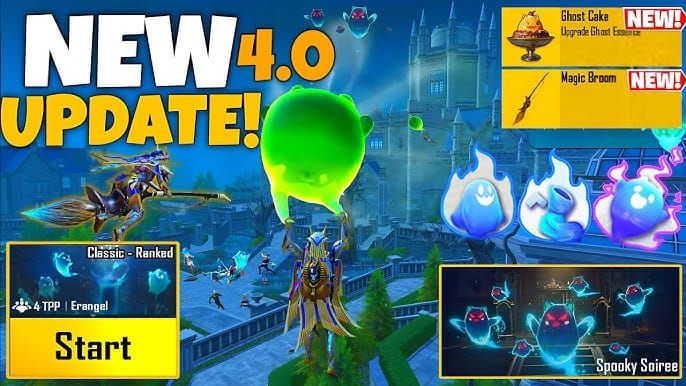
Here's the thing about Ghosty – it's not just another cosmetic addition to PUBG Mobile's Version 4.0 Spooky Soiree (September 3 - November 4, 2025). This ghost companion actually changes how you approach ranked matches. Only you can see your Ghosty unless it's actively using skills, which creates some interesting psychological warfare opportunities.
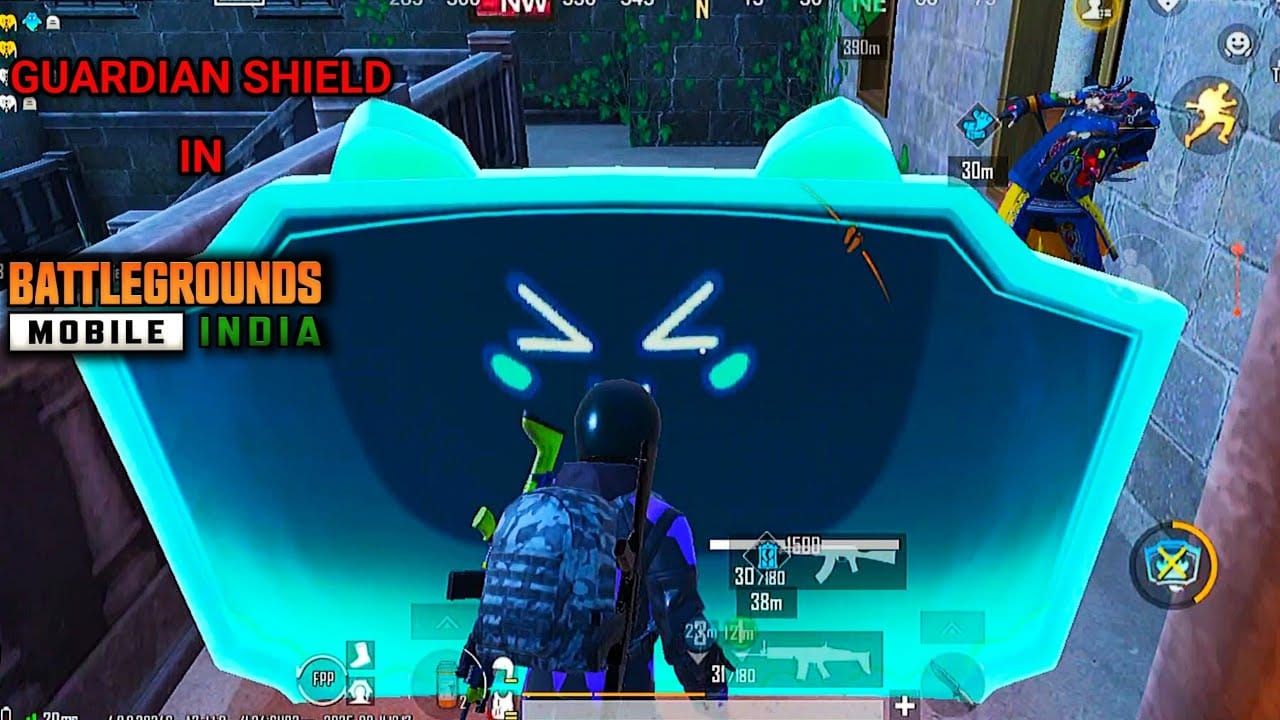
The skill system forces real decisions. You get exactly one primary skill and two passives – that's it. No running everything at once like some other games let you do. Guardian Shield gives you 1500-2500 durability protection for 20 seconds, perfect for those clutch revives or when you're stuck in the open grabbing a crate. Floating Balloon? That's your ticket to 5-7.5 seconds of aerial mobility with just a 15-second cooldown.
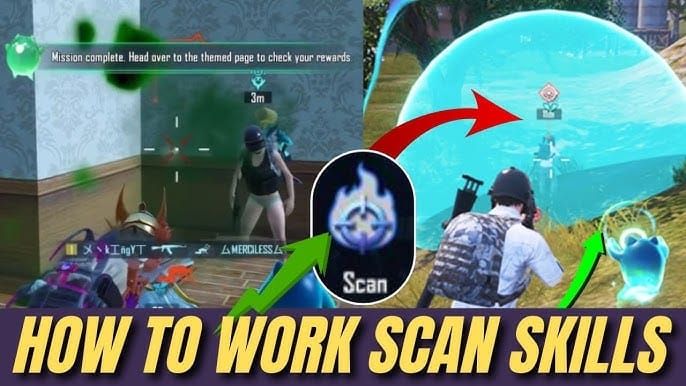
But here's where it gets tactical – the passives can completely change your playstyle. Scan reveals enemies within 15-50 meters for up to 25 seconds when you land hits (and trust me, that radius difference between Level 1 and 3 is game-changing). Armorer automatically repairs your vest when it hits certain durability thresholds, with cooldowns dropping from 50 seconds all the way down to 5 seconds at max level.
Playstyle Configurations
I've been testing different configurations, and the synergies are pretty wild. Aggressive players – you know who you are – will love Floating Balloon paired with Boost (15-30% sprint speed) and Ghost Helm (30-90 durability headshot protection). It's like having a get-out-of-jail-free card that also lets you chase down enemies who think they're safe.
Defensive anchors, on the other hand, should seriously consider Guardian Shield + Armorer + Heal. You become this immovable object that just... doesn't die. The heal passive reduces consumable usage by 40% at Level 3, which means you're spending less time looting and more time controlling zones.
For reliable UC access supporting ranked progression, PUBG Mobile UC pass upgrades through BitTopup ensures secure transactions with competitive pricing and instant delivery.
Skill Tree System Breakdown
Primary vs Passive Mechanics
Let me break down how these actually work in practice. Floating Balloon has this 2.0-2.4 second charging phase where Ghosty transforms – and yes, enemies can see this happening if they're paying attention. The trick is activating boost right at peak altitude for maximum momentum. I've seen players use this to clear entire compounds or escape third parties.
Guardian Shield's movement effects tell an interesting story about its design philosophy. At Level 1, you're slowed by 10% – it's purely defensive. Level 2 goes neutral. But Level 3? You get a 10% movement bonus while carrying mobile cover. That's when it becomes truly aggressive.
The passive abilities are where the real strategy lives. They trigger automatically, but understanding their conditions is crucial. Ghost Helm only activates on headshot attempts – body shots won't trigger it. Armorer has specific vest damage thresholds that change dramatically between levels. Scan only works when you're dealing damage, making it useless for pure support players.
Ghost Essence comes from those 3-second Ghost Crates, 4-second Soulbind Mirrors, and various haunted interactions scattered around maps. Pro tip: the opening animations can't be cancelled, so factor that into your timing.
Progression Strategy
Here's something most guides won't tell you – spreading your Ghost Essence across multiple skills is almost always a mistake. The power spikes between levels are massive, especially for certain abilities. Level 3 Scan jumps from a 15m radius to 50m while cutting cooldown from 60 seconds to 25. That's not just an upgrade; it's a completely different ability.
Same with Armorer. Level 1 triggers at 40% vest durability with a 50-second cooldown – basically useless in most fights. Level 3 triggers at 88% with just 5 seconds between uses. You're essentially running around with permanent vest protection.
The phased rollout adds another layer of strategy. September 4 launches with limited skills on specific maps, then gradually expands. Early adopters who understand this schedule have significant advantages.
Primary Skill Analysis
Combat Applications
Guardian Shield isn't just about the durability numbers (though 2500 at Level 3 is substantial). It's about the tactical flexibility. You can deploy it statically for teammate revives, then retrieve it for rotation protection. The 20-second duration matching the cooldown means you can theoretically maintain continuous protection with perfect timing.
But Floating Balloon? That's pure positioning power. Seven and a half seconds of flight time at Level 3 doesn't sound like much until you're using it to scout entire areas or create engagement angles that shouldn't exist. I've watched players combine balloon with boost to execute flanks that completely broke enemy positioning.
The psychological impact matters too. Enemies hear that balloon activation sound and immediately start looking up, often exposing themselves to your teammates.
For competitive UC resources supporting ranked grinding, PUBG Mobile UC for ranked grind via BitTopup provides reliable access with 24/7 support and secure processing.
Map-Specific Selection
Erangel and Rondo's massive open areas practically demand Floating Balloon for macro rotations. Those river crossings and mountain ranges that usually require vehicles? Balloon right over them. But Livik's tight building clusters favor Guardian Shield for those inevitable stairwell pushes.
Environmental conditions matter more than most players realize. Wraithmoor Mansion's night fog severely limits Floating Balloon's scouting value, making Guardian Shield the obvious choice for building control.
Passive Skill Analysis
Survival Skills
Ghost Helm's 30-90 durability headshot protection might seem straightforward, but the 10-second duration creates interesting timing windows. Smart players bait headshot attempts, trigger the protection, then immediately re-peek with temporary immunity.
Armorer at Level 3 is honestly broken in the right hands. That 88% trigger threshold with 5-second cooldown means you're constantly maintaining near-perfect vest protection. Combined with Heal's 40% consumable preservation chance, you become incredibly resource-efficient.
Team Support Abilities
Scan transforms individual combat hits into team advantages, but only if your team actually uses the information. That Level 3 50-meter radius with 25-second duration can reveal entire squads, but it requires coordination to maximize value.
Boost's 15-30% sprint increase multiplies through team synchronization. Four players moving 30% faster creates rotation opportunities that simply don't exist otherwise.
Meta Combinations
The current meta heavily favors Scan + Armorer for that perfect balance of information gathering and survivability. Boost + Ghost Helm creates aggressive entry potential with built-in safety nets. But Heal + Armorer? That's for teams planning extended map control with minimal looting requirements.
Optimal Build Strategies
Aggressive Ranked Builds
Floating Balloon + Boost + Ghost Helm is the premier aggressive configuration, no question. The synergy is obvious – balloon for repositioning and angle creation, boost for chase pressure, Ghost Helm for protection during those risky peeks.

Upgrade sequence matters here. Boost first for immediate mobility gains, Ghost Helm second for protection scaling, then Floating Balloon for extended flight duration. Each upgrade fundamentally changes how aggressively you can play.
Defensive Builds
Guardian Shield + Armorer + Heal optimizes for placement points and late-game scenarios. You become this resource-efficient anchor that's incredibly difficult to dislodge. Shield provides protection and revival assistance, Armorer maintains equipment integrity, Heal extends sustainability.
The upgrade priority shifts here – Armorer first for survivability, Guardian Shield second for protection scaling, Heal last for resource optimization. You're building for the long game.
Balanced Configurations
Guardian Shield + Scan + Boost creates adaptable builds for varied scenarios. Not as specialized as pure aggressive or defensive builds, but flexible enough to handle whatever the match throws at you.
Prioritize Scan to Level 3 for those information advantages, then Shield and Boost based on immediate needs.
Map-Specific Configurations
Large Maps (Erangel/Miramar)
Floating Balloon becomes essential on these massive maps. Zone rotations that would normally require vehicles or perfect timing become manageable with aerial mobility. Scan gains tremendous value through extended engagement ranges and complex terrain that can hide entire squads.
Boost isn't optional here – that 30% sprint increase at Level 3 can mean the difference between making zone and getting caught in blue.
Medium Maps (Sanhok/Vikendi)
These maps reward balanced configurations emphasizing both mobility and protection. Guardian Shield suits the varied engagement ranges, while Floating Balloon provides crucial third-party escape options.
Armorer becomes more important due to increased combat frequency. Environmental visibility challenges (Vikendi's snow, Sanhok's dense foliage) often favor close-range Guardian Shield over long-range scouting.
Small Maps (Livik/Karakin)
Guardian Shield dominates here. Building control and stairwell pushes define these maps, and mobile cover provides massive advantages. Ghost Helm maximizes value through frequent close-quarters headshot attempts.
Heal focuses more on revival timing than consumable conservation due to rapid match pacing. Games end too quickly for resource efficiency to matter much.
Common Build Mistakes
Resource Management Errors
I see this constantly – players spreading Ghost Essence across multiple skills instead of maxing their equipped abilities. It's tempting to experiment, but the power spikes from reaching Level 3 far outweigh having multiple Level 1 skills.
Premature skill switching wastes invested essence without equivalent benefits. Stick with your choices until you have excess essence to experiment.
Meta Misunderstandings
Too many players overvalue primary skills while neglecting passives. The reality? Passives often provide more consistent value throughout matches. A Level 3 Armorer affects every single engagement, while Guardian Shield might only be crucial a few times per game.
Misunderstanding trigger conditions leads to terrible selections. Scan requires damage dealing – if you're playing pure support, it's essentially useless. Meanwhile, teams running multiple Boost users get diminishing returns versus balanced skill distribution.
Pro Player Strategies
Tournament Configurations
Professional teams have largely standardized around Level 3 Scan for that 50-meter reveal radius enabling coordinated pushes. The information advantage is just too valuable in competitive play.
Guardian Shield + Armorer represents the standard support configuration for revival capabilities and survivability. Entry fraggers almost universally run Floating Balloon + Boost + Ghost Helm for aggressive positioning.
Regional Variations
Asian tournaments emphasize Guardian Shield + Heal + Armorer for placement-focused scoring systems. Western scenes favor Floating Balloon + Boost + Scan for elimination accumulation strategies.
Mobile tournaments interestingly prefer Guardian Shield due to reduced mechanical requirements versus precise aerial control on touchscreens.
Advanced Tactics
Skill Synergies
The interaction between Floating Balloon and Boost creates enhanced aerial mobility that's greater than the sum of its parts. Activating boost at peak altitude extends effective range significantly.
Guardian Shield + Scan provides area control through secure positioning and threat identification. You become this mobile information hub that's difficult to dislodge.
Team Coordination
Smart teams distribute complementary skills – entry fraggers take Scan for information gathering, support players use Heal/Armorer for sustainability, IGLs run Guardian Shield for team protection.
Synchronizing skill timing for multi-angle pushes and continuous protection requires practice but creates overwhelming advantages. Clear communication protocols for scan callouts and shield positioning separate good teams from great ones.
FAQ
What's the optimal solo queue build? Guardian Shield + Scan + Armorer, hands down. Shield enables self-revives when teammates can't help, Scan provides information without requiring team coordination, Armorer maintains survivability during those inevitable solo engagements.
How should I prioritize Ghost Essence upgrades? Focus Level 3 on your most impactful equipped skill first. Usually that's Scan for information advantages or Armorer for survivability. The jump from Level 1 to 3 Scan (15m to 50m radius, 60s to 25s cooldown) is absolutely massive.
Which primary skill works better on different maps? Floating Balloon excels on large maps like Erangel and Miramar for rotations and terrain navigation. Guardian Shield dominates small maps like Livik and Karakin for building control. Medium maps work with either based on your strategy.
What are the most common build mistakes? Spreading essence across unused skills, ignoring the phased rollout schedule, and selecting passives mismatched to playstyle. Don't take Scan if you're not dealing damage, don't take Boost if you're playing defensively.
How do pro teams coordinate Ghosty skills? Entry fraggers take Scan for information gathering, support players use Heal/Armorer for sustainability, IGLs run Guardian Shield for team protection. They synchronize timing for coordinated pushes and maintain clear communication for callouts.
When should I change builds mid-match? Honestly? Almost never. The essence investment loss isn't worth it unless you have massive excess resources and dramatic circumstance shifts. Better to adapt your playstyle to your current configuration.