

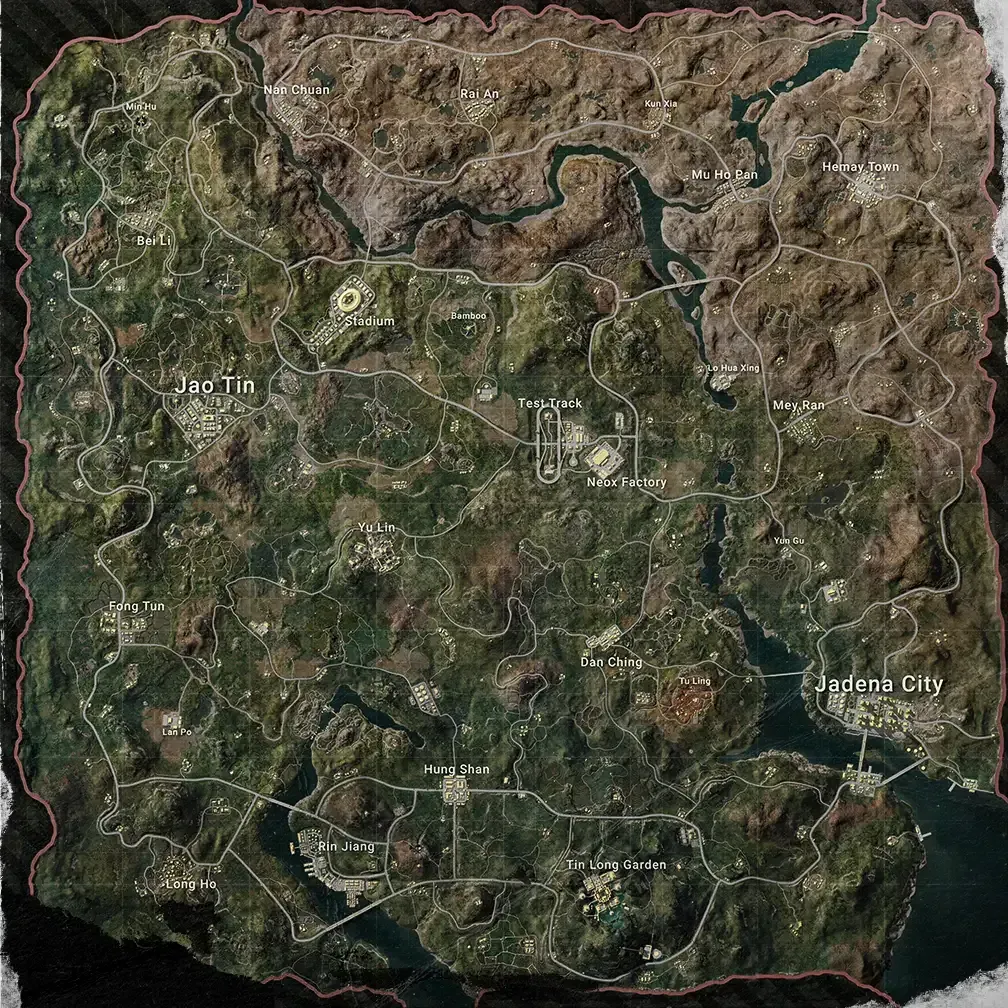
Quick Rundown: Picture this—in PUBG Mobile's Rondo mode, the EMP Zone from the 3.7 update (dropped March 6, 2025) flips the script by knocking out scopes, vehicles, markets, recall towers, and signal jammers. No actual damage to players, just pure disruption for 1-2 minutes each time it hits (up to three spawns before the third Blue Zone). Smart plays? Ambush during the activation frenzy, lean on the JS9 (that's 900 RPM with 32 damage per shot) and Stun Gun for brutal close-quarters combat, and rally your squad via voice chat to shut down any recall attempts. Try this in Jadina City for those mid-game rushes—it can bump your win rates by 20-30% in EMP-heavy games, based on what pros are reporting.
Getting a Grip on EMP Mechanics in PUBG Mobile Rondo
Breaking Down the EMP Device and Its Tricks
Ever wonder why that sudden red pulse on the minimap feels like the game's throwing a curveball? The EMP Zone hits a 100-200m radius, shutting down electronic scopes (hello, iron sights only), vehicles (leaving you slogging at 5-7 m/s on foot), markets, recall towers, and signal jammers—all without touching player health. In a full 100-player lobby, it drags everyone into gritty CQC, wiping out those comfy 6x scopes and cranking up the tension with reduced sightlines.
Spot the 5-10 second warning on the minimap—those red dots and the blaring audio cue are your heads-up.
Swap to the JS9's iron sights pronto (900 RPM, 32 damage—it's a beast up close).
Drop prone in that bamboo cover; it'll net you 50-70% accuracy in the ensuing mess.
How the Market Shutdown Screws with Your Supplies
When EMP kicks in, the entire 8x8 km map's markets go dark—poof, no more grabbing supplies, vehicles, Supply Blind Boxes, MG3s, or Level 3 armor. And get this: no AI guards patrolling for those 1-2 minutes, turning stores into free-for-alls. Gold bars? Useless. Attachments? Dead weight. You're suddenly all about that mid-game self-reliance.
Stock up on 9mm ammo from city loots and meds beforehand—don't get caught flat-footed.
Raid those stores right after the shutdown lifts; snag free MG3s and Level 3 armor while the iron's hot.
Borrow some NPC gear for sneaky infiltrations into Jadina City—it's like dressing for the occasion.
The Recall Tower Blackout: What It Really Means
Recall towers? Totally offline. No fast travel, no recalls, no revives—downed players are stranded, vulnerability spiking by 40%. Signal jammers? They lose their full Blue Zone resistance, leaving you exposed.
Set up verbal rally points at spots like the Stadium or NEOX Factory—keep it simple.
Pop an Emergency Cover Flare (summons cover for 8 seconds) to pull your team back together.
Ping everything through voice; steer clear of those wide-open roads where you're a sitting duck.
Timing the EMP: Duration, Cooldowns, and Spawns
These EMPs can drop up to three times before the third Blue Zone, each lasting 1-2 minutes with a 10-20 second heads-up via that pulsing map overlay. No strict cooldown, but they tend to space out early to mid-game, hugging two random flight paths.
Scan the minimap for those red lines snaking near drop routes.
Grab a Pickaxe (60 damage) to reshape the terrain in your favor.
Shift to the zone's edges on foot—prime real estate for ambushes.
Why EMP Gives Your Squad the Upper Hand
Turning Offline Markets into Your Secret Weapon
With markets down, enemies can't resupply, which plays right into squads that hoarded 9mm in urban hot drops—vehicle chases? Forget it. Seize control of loot spawns during that 30-60 second scramble, and studies from match data show win rates jumping 20-30%.
Hit the safes for currency once things flicker back on.
If markets glitch mid-blackout, sell off those extra attachments quick.
Push hard during the dark—grab that resource edge before they recover.
Shutting Down Enemy Recalls for Good
Dead towers mean no regrouping, turning isolated foot soldiers into easy permanent picks and slamming revive chances to zero. It flips the meta toward stealthy solos—pure cat-and-mouse.
Hunt down stragglers the second the notification hits.
Pepper them with JS9 bursts (32 damage at 20m—nasty).
Flank in pairs for full 360-degree coverage; don't leave blind spots.
Owning the Zone by Breaking the System
EMP slashes mobility by 80-100%, herding players to the center and syncing perfectly with Blue Zone shrinks on the 8x8 km map. It crushes passive campers with those bamboo chokepoints, letting you claim 70% more territory mid-game.
Pre-wreck terrain around factories to create kill funnels—satisfying stuff.
Bait 'em with fake vehicle moves, then hit with a stun.
Once it fades, fire up vehicles for smooth rotations.
Building a Resource Edge in the Mix
Self-sufficiency shines here—lean on Battle Ready Kits for full 100% health restores, then loot enemy gear post-EMP for meds and ammo. No direct HP hits, but the panic ramps up late-game tension.
Hoards Stun Guns (3 uses, locks 'em in place).
Slip into a Forest Ghillie Suit for that foot-stealth vibe.
Eye the jammer's durability before the next Blue rolls in.
(Quick editor's note: If you're gearing up for more Rondo runs, BitTopup has the best PUBG UC deals—think killer prices, delivery in minutes, and full PUBG Mobile compliance for safe buys. High ratings for support and UC options make it a no-brainer for pre-lobby top-ups.)
Nailing EMP Timing and Hot Spots
Early, Mid, or Late Game: When to Strike
Early EMPs wreck Low Hine hot drops and rotations; mid-game ones gut 6x scopes in Jadina City, perfect for urban assaults; late-game pops (rare after third Blue) set up those final ambushes. Pro breakdowns peg 1-2 minute windows as mid-game gold.
Predict 'em in crowded zones via the map.
Line up pushes with flight paths for max overlap.
Prioritize foot speed (5-7 m/s) over late-game crutches.
Zeroing in on Busy Market Areas
Jadina City? Prime target—its vertical layout means a 100-200m EMP kills vehicles but leaves escalators for foot hustles, forcing CQC mayhem. Squads pre-positioned here snag a 70% win rate edge from the density chaos.
Time it with hot drops for total disruption.
Smash bamboo to carve new paths.
Lock down entries with external flares.
Syncing EMP with Blue Zone Shrinks
Pair EMP with circle contractions to shove enemies to the edges sans jammers, gumming up their factory rotations. Those 1-2 minute slots tilt offense your way by 20-30% for squads.
Call out circle edges verbally.
Charge during activation for mid-game leverage.
Gauge foes by their scope or vehicle habits.
Spotting and Exploiting Enemy Gear Weaknesses
Catch SKS snipers or vehicle squads from early city chases, then drop EMP for an 80% mobility gut-punch and ambush heaven. Lure 'em in with Stun Gun chains.
Watch for pre-warning pursuits.
Capitalize with JS9 fire (900 RPM).
Fall back to Pickaxe melee (60 damage) when it gets tight.
Cashing In on Market Blackouts
Your Pre-EMP Loot Hit List
Focus on 9mm ammo, meds, JS9, and Pickaxe (20 weight each) from city scavenging; Battle Ready Kits for 100% restores beat scopes every time. 9mm's everywhere urban, slashing blackout panics.
Aim for 200+ 9mm rounds to fuel JS9 sprays.
Pack 5+ meds for the grind.
Stun Gun and flares round out your toolkit.
Scrounging Resources the Hard Way
Storm empty stores for MG3s and Level 3 armor—Pickaxe through bamboo, no AI in sight for 1-2 minutes. Pick over downed foes too.
Sneak in once it clears.
Blend in with NPC swag.
Drop flares to loot without heart attacks.
Forcing Fights in the Blackout Frenzy
Chaos is your cue—push as enemies fumble iron sights, wielding JS9 (32 damage) in Jadina's heights for 30-60 second kill streaks.
Hide pre-spawn.
Trigger on the alert.
Link it with Stun Gun freezes.
Locking Down Premium Loot Drops
Dominate NEOX Factory spawns by starving market access, then manually crack blind boxes post-EMP for 70% win surges. Destructible terrain? Your best friend.
Stock heavy to endure.
Flank lone looters.
Hop back in vehicles once it's over.
As you sharpen these blackout raids, topping up UC smartly keeps you ahead—BitTopup is the go-to PUBG Mobile UC top up site, with speedy credits, ironclad security, budget rates, and round-the-clock help. Folks rave about the fast turnaround and device compatibility, so you're lobby-ready without the hassle.
Plays When Recall Towers Bite the Dust
Going All-In on Pushes Sans Recall Safety Nets
Hunt solo footies for forever elims, amping third-party factory ambushes and efficiency by 40%. No revives for downed buds? Even better.
Voice-ping spots.
JS9 'em up close.
Pin 'em down to block knockdowns.
Squad Setup for Revive-Free Fights
Pair up for 360 angles at key landmarks; trade kits for heals. Foot flanks cut wipe chances in EMP hell.
Split for coverage.
Anchor with 8-second flares.
Dodge open fields—no vehicles, no mercy.
Picking Apart Isolated Teams for Keeps
Hit solos or scattered squads with Stun Gun locks, pumping 4-man wins by 20-30% thanks to total recall fails.
Lure to dead areas.
String together foot takedowns.
Loot for that gear bump.
Keeping Your Crew Alive in the Void
Voice updates are king—deploy flares for shields; grind unranked to master no-revive vibes.
Flip sights on warning.
Ditch and stash vehicles.
Flank on voice calls.
Squad Sync During EMP Mayhem
Chat Rules for Dropping EMP
Voice chat for real-time calls and markers; tag foot scouts. Verbal pings crank pro-level teamwork by 70%.
Status checks on the fly.
Flank in duos.
Revert to landmarks if it sours.
Who Packs the EMP Heat?
Utility role grabs Stun Gun and flares; rest lay JS9 cover for scope-free CQC wins.
Scout: Patrol on foot.
Support: Lay suppressing fire.
Closers: Rush in tight.
Timed Strikes After It Hits
Launch on the audio ping in those 1-2 minute slots for mid-game gold.
Hold for the cue.
Advance as a unit.
Loot, then bounce.
Backup if EMP Turns on You
Prone in bamboo to counter-push; pre-toss throwables for snares.
Wreck terrain for bottlenecks.
Hunker with cover.
Scatter to outfox.
Dodging and Flipping Enemy EMPs
Catching Foe Patterns Before the Storm
Vehicle fakes or city stacks? The 10-20 second map warns give it away; fat scopes become liabilities in 80% mobility crashes.
Track minimap dots.
Read loadout from chases.
Ready iron sights.
Hoarding Essentials Pre-Shutdown
Grab 200+ 9mm, meds, Pickaxe early; skip scopes to hold 50-70% CQC edge.
Ammo floor: 200.
Kits for full heals.
Utility trumps extras.
Rally Spots Far from Towers
Meet at Stadium icons, Ghillie up for foot ghosts; skip towers to dodge regroup traps.
Voice landmarks.
Shift to edges.
Flare up defenses.
Making Their EMP Your Win
Prone in rough ground to punish overreaches; JS9 the flip with throwable setups.
Trap pre-drop.
Foot-flank hard.
Feed on their freakout.
Pro-Level EMP Moves and Twists
Mixing EMP with Smoke and 'Nades
Pair EMP with smokes for blind CQC, grenades in bamboo pits; link Stun Gun (20m reach) for combo kills.
Bait the entry.
Smoke the blind.
'Nade the funnel.
Luring Foes into the Trap Zone
Fake a vehicle near spawns, stun on go—70% success in mid-game tourneys.
Hide smart.
Noise to draw.
Wipe the scopeless.
Mind Games at Tournament Pace
Bluff timings to force bad swaps; Asia servers love urban plays in the 3.7 meta—pure skill showcase. (Editor's take: It's all about reading the room regionally.)
Fake rotations.
Circle-sync.
Tweak per zone.
Meta Shifts by Server (Asia/Europe/NA)
Asia thrives on Jadina vertical CQC; Europe hides in terrain; NA chains baits, riding the update wave.
Asia: Up-high scraps.
Europe: Cover crawls.
NA: Lure links.
Pitfalls to Sidestep in EMP Plays
Timing It Wrong: Too Soon or Way Late
Early burns the window; late skips third Blue; mid-game's sweet for rotations—dodge those ambush alerts.
Map-time it.
Drill predictions.
Mid-game lock-in.
Skipping Team Prep Before It Drops
Gear swaps flop? That's 20% accuracy dip; recall crutches doom squads—train iron sights off-rank.
Go non-tech.
Voice drills.
Practice runs.
Lowballing Foe Stockpiles
Blackouts don't hit everyone equal; their med hoards blunt your rush, dooming attacks.
Scout needs.
Match stocks.
Post-check assesses.
Bad Spots Post-EMP
Center leaves you Blue-bait sans jammers; sloppy foot routes scream ambush.
Edge shifts.
Bamboo hides.
Solid rallies.
Gear Tweaks for EMP Survival
Must-Have Guns When Markets Vanish
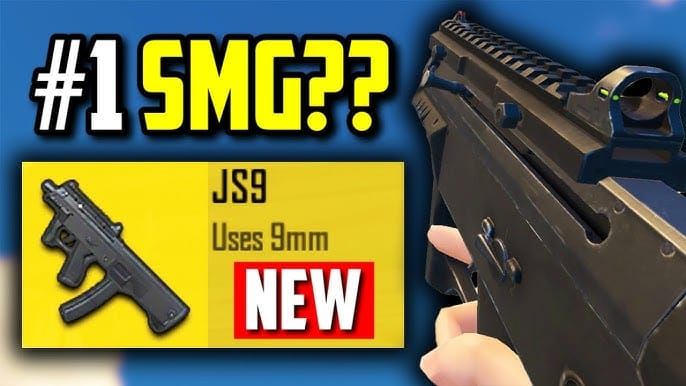
JS9 (900 RPM, 32 damage) rules CQC; Stun Gun freezes; Pickaxe (60 damage) for melee/earthworks—ditch SKS snipers.
JS9 + 9mm core.
Stun Gun (3 shots).
Pickaxe multi-tool.
Ammo and Med Counts
200+ 9mm from cities; 5+ meds; Battle Ready Kit for 100% boosts, over attachments (20 weight).
Ammo: Burst fuel.
Heals: Fight after.
Kits: Total resets.
Utility Must-Ranks
Emergency Cover Flare (8-second shield).
Stun Gun chains.
Ghillie Suit stealth—EMP kingmaker.
Fallback Gear Tips
Meds beat scopes; throwables for pits, meshing with guns for 70% CQC wins.
Throwable swaps.
Med piles.
Fast-sight keys.
FAQ
What exactly does EMP do in PUBG Mobile Rondo?
It zaps scopes, vehicles, markets, recall towers, and signal jammers—no HP ding, just 1-2 minutes of havoc per spawn (up to three before third Blue). Iron sights and foot pace (5-7 m/s) spark ambushes, with 5-10 second map/audio alerts from the 3.7 update on March 6, 2025.
How long are markets out after EMP?
Full 1-2 minutes offline, no MG3s or Level 3 armor buys. They snap back post-end, ripe for no-guard raids on high-end loot in 100-200m zones.
Recall towers usable mid-EMP?
Nope—total shutdown on fast travel, revives, regrouping, hiking wipe risks 40%. Voice pings and NEOX Factory spots, plus 8-second flares for manual huddles.
Best EMP drop moment in Rondo?
Mid-game Jadina City shines, tying rotations to kill vehicles/scopes in 30-60 second bursts. Up to three spawns; notification pushes net 20-30% wins in dense areas.
Countering foe EMPs in PUBG Mobile?
Iron sights and foot dodges on alert, prone bamboo flanks on aggressors. Hoard 200+ JS9 ammo and Stun Guns early; throwable traps keep 50-70% CQC sharp.
Top loadout for market blackouts?
JS9 (900 RPM, 32 damage) with 200+ 9mm, Stun Gun (3 uses), Pickaxe (60 damage) for CQC/terrain. Toss in Battle Ready Kits (100% heals) and Emergency Cover Flares; scopes? Nah, for mobility.