

Master Jahoda's Anemo support build with optimal weapon choices, Viridescent Venerer artifacts, and Nod-Krai team compositions. This guide covers talent priorities, Energy Recharge requirements, and strategies for maximizing her healing and resistance shred capabilities.
Getting to Know Jahoda: Your New Anemo Support Powerhouse
What Makes This Cat-Themed Support Tick?
Jahoda drops in Version 6.2 on December 1st, and honestly? She's shaping up to be one of the more interesting 4-star releases we've seen in a while. Her kit revolves around this quirky Purrfect Treasure Flask mechanic that actually makes elemental absorption feel meaningful again.
Here's the breakdown: 9,646 Base HP, 207 Base ATK, 540 Base DEF, with an 18.5% Healing Bonus ascension stat. Not groundbreaking numbers, but they work for what she's designed to do.
Her Elemental Skill—Cunning Scheme: Wealth Redistribution Plan (yes, that's really the name)—creates these dash mechanics that attune to Pyro, Hydro, Electro, or Cryo enemies. Fill up that flask completely, and you're looking at 328.3% Anemo damage versus a measly 295.5% when it's empty. The real kicker? Moonsign: Ascendant Gleam fires these Fluffy Meowballs that regenerate 2 Energy per hit every 3.5 seconds.
The Elemental Burst gets even weirder. Secret Tool: Hunter's Seven Gadgets summons two—count 'em, two—Purr-sonal Household Helper Coordinators for 12 seconds. They deal 373% initial damage and 31.1% periodic Anemo damage while healing your active character for 143.8% ATK + 1102. When your active character's above 70% HP, there's an additional heal of 55.3% ATK + 424 that targets your lowest HP ally.
For players looking to secure Jahoda on her banner, buy genesis crystals for jahoda anemo support banner through BitTopup's platform offers competitive rates and instant delivery for her December release.
Why She's Actually Different from Other Anemo Supports
Here's where things get interesting. Get-Your-Reward Plan enhances those Burst coordinators based on your team comp. Got Pyro teammates? 130% damage boost. Hydro increases healing by 120%. Electro adds an extra coordinator (because why not?), and Cryo speeds up attacks by 10%.
The priority system follows Pyro > Hydro > Electro > Cryo, but you need at least one PECH teammate to make any of this work. Berry Sweet Reward throws in +100 Elemental Mastery for 6 seconds when your Burst heals targets above 70% HP.
What sets her apart from Kazuha or Venti? Her healing scales with ATK, not EM. This creates some fascinating build decisions—do you go full support utility or lean into that sub-DPS potential?
Weapon Choices: What Actually Works in Practice
5-Star Options (If You're Lucky)
Elegy for the End remains the premium choice with 55.1% Energy Recharge and those party buffs everyone loves—60-120 Elemental Mastery plus 100-200 EM and 20-40% ATK through the sigil system. It's basically tailor-made for support characters.

Polar Star offers 33.1% CRIT Rate if you want to push her into sub-DPS territory. The 12-24% Skill/Burst damage with those 10-96% ATK stacks can actually be pretty spicy in the right team.
The Version 6.2 Bow (we're still waiting on the official name) features 45.9% Energy Recharge and a 28-56% ATK bonus for off-field characters. Seems designed specifically with Jahoda in mind.
4-Star Reality Check
Let's be honest—most of us are working with 4-star options. Favonius Warbow emerges as the clear winner here. 454 Base ATK, 61.3% Energy Recharge, and particle generation on CRIT hits. It's not flashy, but it gets the job done.
Song of Stillness provides 41.3% ATK and that 16-32% damage increase for 8 seconds after healing. Solid choice if you're focusing on her healing output.
Range Gauge offers 27.6% ATK with Unity Marks granting 3-7% ATK and 7-13% elemental damage per mark. Decent, but requires more micromanagement than most players want to deal with.
What Stats Actually Matter
Energy Recharge isn't just priority—it's everything. You want 180-200% total, no exceptions. After that, ATK% for healing scaling (aim for 2000+ total ATK). Elemental Mastery comes third (200+ EM is nice), and CRIT Rate only matters if you're running Favonius (50%+ required for consistent procs).
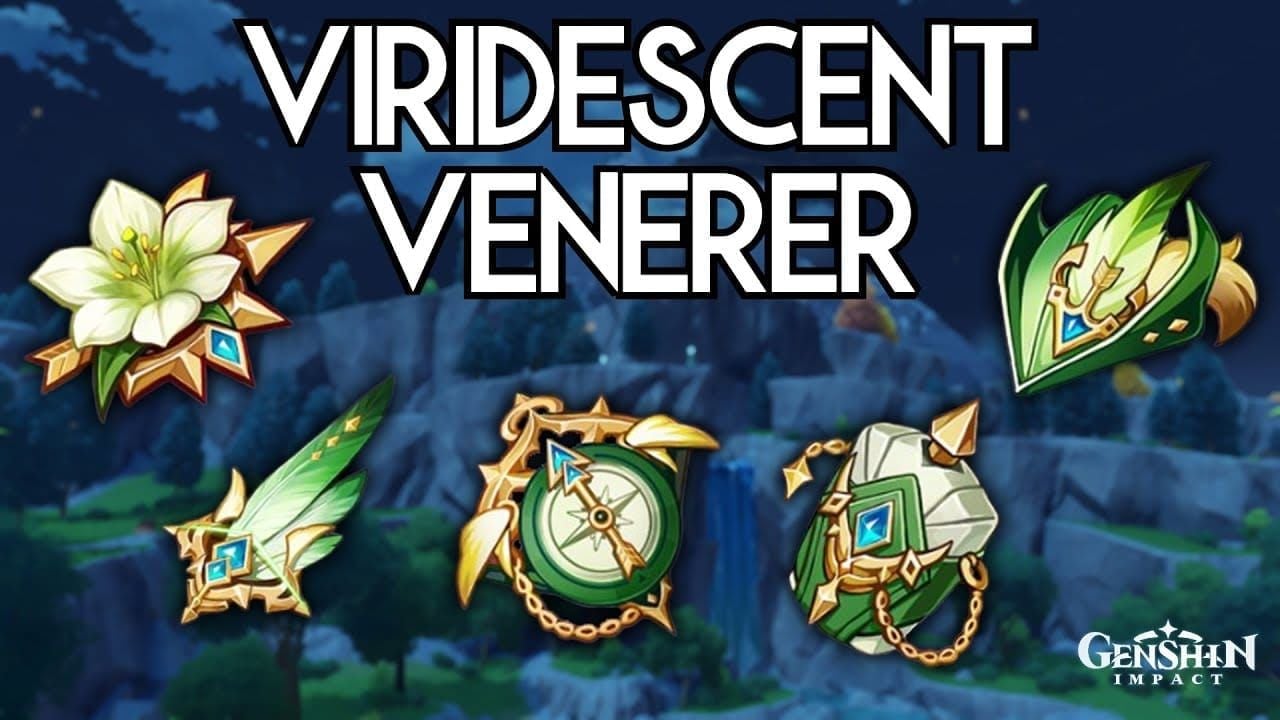
Artifacts: VV or Bust?
The Viridescent Venerer Standard
Viridescent Venerer 4-piece remains the gold standard. 15% Anemo damage, 40% elemental resistance reduction for 10 seconds, plus 60% Swirl damage increase. You know the drill.
Main stats should be ATK% on Sands, Goblet, and Circlet if you're prioritizing healing. I know, I know—ATK% Goblet feels weird, but her healing scales entirely off ATK, and that's often more valuable than the Anemo damage bonus.
Substat priorities: Energy Recharge (until you hit 180-200%) > ATK% > Elemental Mastery > CRIT Rate (only if using Favonius).
Alternative Sets Worth Considering
Instructor 4-piece gives 80 EM as a 2-piece bonus and 120 party EM for 8 seconds after reactions. It's niche, but in EM-hungry teams, it can outperform VV.
Silk Moon Serenade provides 20% Energy Recharge as a 2-piece and 120 EM plus 10% Moonlight reaction damage for Nod-Krai teams. This might become more relevant as we get more Nod-Krai characters.
For efficient artifact farming and character development, genshin jahoda nod-krai team recharge resources through BitTopup ensure you've got the materials needed for optimization.
Nod-Krai Team Building: Where She Really Shines
The Meta Compositions
Flins + Ineffa + Aino + Jahoda is shaping up to be the premier regional team. Jahoda provides VV shred and healing for Flins' Lunar-Charged phases, while Ineffa and Aino set up the elemental reactions.
Rotation looks like: Ineffa Skill/Burst → Aino Skill → Jahoda Skill/Burst (absorb elements) → Flins on-field. Clean, efficient, and surprisingly satisfying to execute.
Nefer + Lauma + Furina + Jahoda focuses on Bloom reactions. Jahoda shreds resistance and buffs EM for those juicy Dendro reactions. Furina's off-field Hydro application synergizes beautifully with Jahoda's coordinators.
Flins + Ineffa + Yelan + Jahoda is the premium damage variant. Yelan's off-field Hydro and chase mechanics create this beautiful dance of coordinated attacks.
Making the Most of Elemental Priority
That Pyro > Hydro > Electro > Cryo system isn't just flavor text—it fundamentally changes how you approach rotations. C4 provides 4 Energy recovery when coordinators perform elemental conversion, which can dramatically reduce your ER requirements.
VV application requires precise timing. You've got a 10-second resistance reduction window, so coordinate those coordinator placements with your team's damage phases.
Energy Management: The Make-or-Break Factor
How Much ER Do You Actually Need?
70 Energy Burst cost with an 18-second cooldown creates some interesting math. You need 180-200% total ER for consistent uptime in most scenarios. ER Sands (51.8%) plus weapon substats (45.9-61.3% depending on weapon) means you need 60-100% from artifact substats.
C4 changes this equation significantly—that energy recovery can reduce requirements by 20-30%. The 12-second Burst duration with an 18-second cooldown creates a 6-second energy accumulation window that you need to maximize.
EM Thresholds That Actually Matter
200-300 total EM provides meaningful Swirl damage without excessive investment. But here's the thing—Berry Sweet Reward grants +100 EM to teammates for 6 seconds, making team distribution more valuable than personal stacking.
200 EM is your baseline. 300 EM is solid contribution territory. 400+ EM starts showing diminishing returns unless you're specifically building for Swirl damage.
Talent Priorities: Where to Spend Your Books
The Leveling Order That Makes Sense
Elemental Burst first, no questions asked. Level it to 9-10 for maximum healing (143.8% ATK + 1102 at Level 10) and coordinator damage (31.1% base). This is where most of her value comes from.
Elemental Skill comes second. Level to 8-9 for those absorption mechanics and Fluffy Meowball damage (328.3% at full flask). The energy generation alone justifies the investment.
Normal Attack stays minimal. Level 6 maximum. You're not using her for normal attacks, so don't waste the resources.
Constellation Value Analysis
C1 gives 50% chance for Fluffy Meowball bounces with extra elemental damage. Nice quality-of-life improvement.
C2 enables dual passive effects by tracking the second-highest element. This means you can get Pyro + Hydro benefits simultaneously—pretty significant for team building.
C4 provides 4 Energy recovery per coordinator conversion. This is where her energy requirements become much more manageable.
C6 grants +5% CRIT Rate and +40% CRIT DMG for Nod-Krai characters for 20 seconds. Regional synergy at its finest.
Rotations and Combat Flow
Making It All Work Together
Standard rotation: Ineffa Skill/Burst → Aino Skill → Jahoda Skill (absorb elements) → Jahoda Burst → Flins on-field.
Start with Jahoda's Skill for particle generation—those 2 Energy per Meowball hit add up quickly. Position that Skill dash for the elemental absorption you want. Full flask provides 328.3% versus 295.5% damage and enables Ascendant Gleam.
Maximizing Swirl Reactions
Absorb your team's primary damage element for maximum VV effectiveness. Pyro absorption provides that 130% coordinator damage boost while maintaining the 40% resistance reduction.
C2 enables dual passive effects, so you can enhance multiple elements simultaneously. VV shred lasts 10 seconds—coordinate this with your team's damage phases for maximum impact.
Common Pitfalls (And How to Avoid Them)
Build Mistakes I Keep Seeing
Energy Recharge neglect is the big one. Insufficient ER investment creates inconsistent Burst uptime, which kills her effectiveness. Target 180-200% ER before worrying about other stats.
Wrong weapon selection happens more than you'd think. Match the weapon to your role—Favonius for support, Song of Stillness for healing focus, Elegy for team buffs.
Artifact set mixing rarely works. Complete 4-piece VV outperforms mixed sets even with perfect main stats on the mixed pieces.
Team Composition Errors
Missing PECH elements completely negates her passive enhancements. Teams lacking Pyro, Electro, Cryo, or Hydro can't trigger those coordinator effects.
Elemental priority confusion is common. Remember: Pyro always overrides other elements for coordinator effects. Plan accordingly.
Poor coordinator placement reduces effectiveness significantly. Those things need to be positioned where they can actually hit enemies.
Advanced Strategies and Meta Predictions
Spiral Abyss Optimization
Adjust builds based on floor requirements. High-damage floors favor healing optimization, while energy-drain environments need extra ER investment. Floor 12 typically favors damage-focused coordinators, while Floor 11 benefits from healing optimization.
Coordinate C6 CRIT buffs with team damage windows. That 20-second duration gives you plenty of time to set up devastating DPS phases.
Looking Ahead
The growing Nod-Krai roster increases Jahoda's value through regional synergy. Future characters like Columbina (6.3) and Varka (6.5) might provide additional synergy options.
We might see new artifact sets that shift optimal builds away from traditional VV setups. Keep an eye on those leaks.
FAQ
What's the best weapon for Jahoda's Anemo support build? Favonius Warbow for 4-stars—that 61.3% Energy Recharge and particle generation is invaluable. For 5-stars, Elegy for the End offers superior team support through EM buffs and ER.
Which artifacts should I prioritize in 2025? Viridescent Venerer 4-piece with ATK% main stats on Sands, Goblet, and Circlet. Prioritize Energy Recharge substats (180-200% total) over perfect main stats.
How much Energy Recharge does Jahoda actually need? Target 180-200% total ER for consistent Burst uptime. Teams with Electro batteries can function with 160-180% ER, and C4 reduces requirements by 20-30%.
What are the best Nod-Krai team compositions with Jahoda? Flins + Ineffa + Aino + Jahoda provides premier regional synergy. For Bloom reactions, try Nefer + Lauma + Furina + Jahoda.
Should I prioritize Elemental Mastery or Energy Recharge? Energy Recharge takes absolute priority, followed by ATK for healing. EM provides value but should never compromise ER or ATK investment.
What talent priority should I follow? Level Elemental Burst first to 9-10, followed by Elemental Skill to 8-9. Normal Attack stays at Level 6 maximum—don't waste resources there.