

Master Hayabusa in Honor of Kings S13 with expert strategies to counter mid-lane burst mages during the 2026 Ultraman collaboration. Learn optimal builds, advanced combos, and matchup tactics to dominate Season 13's meta.
Hayabusa's S13 Meta Position
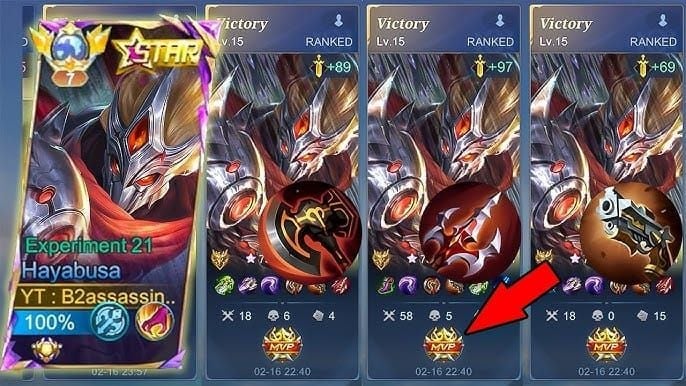
Hayabusa remains a premier assassin in Season 13, excelling against immobile burst mages. With 50.66% win rate, 1.91% pick rate, and only 0.64% ban rate, he rewards skilled execution. The S13 Global Plus Update (Nov 15, 2026) introduced jungle economy changes favoring mobile assassins like Hayabusa.
His shadow mechanics counter mage positioning requirements. Shadow Shuriken (Skill 1) provides safe poke, while Quad Shadow (Skill 2) creates repositioning options that negate skillshot-dependent abilities. Against Yve, Valentina, Pharsa, and Lylia, he engages from unexpected angles and escapes before retaliation.
60%+ shadow uptime maintains constant map pressure. His ultimate, Ougi: Shadow Kill, provides immunity frames that negate burst damage when timed correctly, disrupting mage rotations and forcing defensive positioning.
For the Ultraman event (Jan 16 - Apr 9, 2026), Honor of Kings tokens recharge global through BitTopup ensures instant access to Hayabusa's 588 token cost or discounted 294 token first-week price.
Core Strengths & Weaknesses
Strengths:
Unmatched mobility via shadow swap mechanics
Burst damage deletes squishies in one rotation
Superior map presence for split-push and objectives
Low ban rate ensures consistent availability
Weaknesses:
Vulnerable to coordinated crowd control chains
Struggles against tanky compositions (Lu Bu, Milady, Ake)
Requires gold/XP advantage to function
Limited utility when behind
Optimal S13 Build
Core Item Progression
Boots of Tranquility (710g) - First purchase for jungle clear and early gank mobility.
Hunter Strike (8-10 min) - 85 physical attack, 10% CDR, movement speed passive. Enables threats against mages without defense.
Blade of Despair (12-14 min, 2,120g) - 160 physical attack, 25% damage vs low-health targets. Ensures kills over escapes.
Malefic Roar (16-18 min) - 40% physical penetration synergizes with Hunter Strike for true damage against squishies.
Defensive Slot (situational):
Athena's Shield - 900 HP shield (30s cooldown) vs double/triple magic comps
Rose Gold Meteor - 300-1,000 shield + 5% lifesteal for balanced defense
Immortality - Second life vs heavy CC
Build Priority Logic
Rush Blade of Despair if enemies skip defense (maximizes burst vs <100 physical defense).
Rush Malefic Roar if enemies build early defense (40% penetration bypasses 150+ physical defense more efficiently).
Math: Against 200 physical defense, Malefic Roar reduces mitigation by 80 points = 15-20% damage increase.
Ultraman Event Adjustments
Accelerated gold modes: Rush Blade of Despair for early power spikes
Reduced cooldown modes: Add Fleeting Time (15% CDR, resets on kills/assists)
Enhanced objectives: Maintain standard penetration build
Combo Mastery
Basic Rotation
Quad Shadow (Skill 2) - Place 4 shadows toward target
Shadow Shuriken (Skill 1) - Deploy from all shadow positions
Shadow Swap - Close distance to nearest shadow
Basic Attack - Proc passive and item effects
Ougi: Shadow Kill (Ultimate) - Burst damage with immunity frames
Shadow Swap - Escape using preserved shadow
Execution time: 2-3 seconds. Always preserve 1 shadow for escape.
Advanced One-Shot Combo
Flicker Engagement:
Place Quad Shadow
Flicker into melee range (bypasses reaction time)
Point-blank Shadow Shuriken (all shurikens connect)
Basic attacks + Ultimate
Shadow escape
Ultimate-First Reversal:
Cast Ultimate from max range
Place Quad Shadow during dash animation
Swap to shadow behind target mid-ultimate
Cast Shadow Shuriken
Confuses enemies who expect forward shadows
Animation Cancels
Basic attack cancel: Swap shadows after each hit to eliminate recovery frames
Shuriken cancel: Swap mid-cast to reposition while shurikens deploy
Ultimate cancel: Swap during dash to dodge CC while maintaining damage
Common Mistakes
❌ Using all shadows for engagement (no escape) ❌ Casting Skill 1 before positioning Skill 2 shadows ❌ Premature ultimate before enemy uses escape abilities ✅ Always maintain 1 safe shadow position
Matchup-Specific Counters
Yve
Pre-4: Farm efficiently, avoid poke
Post-4: Engage when she uses abilities on waves (4-5s cooldown window)
Ultimate counter: Engage immediately when she channels (she's immobile)
Build: Athena's Shield 3rd item
Valentina
Bait her ultimate copy early, then re-engage during cooldown
She can't replicate your shadow positioning (her copied ultimate lacks setup)
Poke with Shadow Shuriken to deplete mana
Coordinate with team to bait copy on other targets
Pharsa
Ultimate window: Engage from side/behind while she channels (she's immobile)
Pre-4: Respect poke, farm efficiently
Build magic defense if she gains early lead
Approach from angles outside her ultimate targeting area
Lylia
Track her shadow marker (glowing indicator near her)
Force shadow use with initial combo, then re-engage during cooldown
Poke to 50% HP before all-in (burst kills through shadow escape)
Coordinate with teammates to bait shadow before you engage
Emblem & Spell Setup
Assassin Emblem Configuration
Tier 1: Max movement speed (jungle clear + gank efficiency) Tier 2: Max physical penetration (synergizes with items) Attributes: Prioritize physical attack > physical penetration
Talent: Killing Spree (standard) - Restores 15% max HP + 15% movement speed for 5s on kills/assists. Enables chain assassinations.
Alternative: Quantum Charge (4-10 physical attack after abilities, stacks 5x) - Less valuable than Killing Spree's healing/mobility.
Spell Selection
Retribution (jungle role):
Accelerates clear speed to level 4
Secures Lord/Turtle in smite battles
Default choice for jungle Hayabusa
Flicker (side lane/vs heavy CC):
Instant repositioning for engagement/escape
Essential vs multiple hard disables
Superior when not jungling
Buy HoK tokens cheap discount through BitTopup for additional spell page slots.
Early Game Strategy
Fast Level 4 Route
Start buff closest to bottom lane (request leash)
Clear adjacent small camps (use shadows for multi-camp damage)
Secure second buff (reach level 3)
Evaluate gank opportunities or farm to level 4
Timing: Reach level 4 at 2:30-3:00 (before mages get ultimates)
First Gank Execution
Approach from unwarded side (opposite enemy vision)
Coordinate with mid-laner (bait forward or save CC)
Execute combo immediately (surprise = primary advantage)
Combo: Skill 2 → Skill 1 → Shadow Swap → Basic → Ultimate → Escape
Safe Invading
Invade with lane priority (your laners rotate faster)
Target enemy buff camps (maximum value)
Coordinate with objective timings (steal camps while enemies contest Turtle)
Use shadows to check for enemies before committing
Turtle Control (2:00 spawn)
Arrive early, establish vision with shadows
Secure with numbers advantage
Assassinate enemy jungler first (removes Retribution threat)
Concede if lacking vision/numbers (avoid feeding kills)
Mid-Late Game Transition
Split Push vs Group Decision
Split push when:
2+ core items completed (12-14 min)
Team has mid-lane wave clear
Enemies visible on map
You can duel/escape 1v2
Group when:
Lord spawns
Team lacks wave clear
Enemies have strong engage tools
Team Fight Assassination
Identify priority target (mage/marksman)
Wait for enemies to use CC on frontline
Position shadows on fight perimeter
Engage from unexpected angles
Secure kill, then reassess (continue or escape)
Shadow Placement Strategy
Establish escape routes before engaging (1+ shadow toward base)
Use terrain (shadows over walls = unpursued escapes)
Avoid linear patterns (create directional uncertainty)
Refresh shadows throughout extended fights (they expire)
Lord Execution (10:00 spawn)
Secure vision with shadows on approach paths
Burn with numbers advantage (post-won team fight)
Assassinate contest attempts while team damages Lord
Push with team post-Lord to end game
Ultraman Event Optimization
Event Mode Performance
Reduced cooldowns: Chain combos in single fights
Increased gold: Rush Blade of Despair for early dominance
Special mechanics: Adapt while maintaining assassination role
Mission Completion
Kill missions: Aggressive plays for max participation
Damage missions: Constant Shadow Shuriken poke + assassinations
Win missions: Efficient farming, low-risk plays, objective focus
Currency Maximization
Play daily for first-win bonuses
Maintain high win rate + performance grades (kills, assists, damage, objectives)
Consider event items with currency bonuses if cost-effective
Exclusive Skins
Prioritize limited-availability Ultraman skins
Evaluate direct purchase vs currency exchange
Consider functional benefits (improved visual clarity)
Advanced High-Rank Tips
Vision & Map Awareness
Track enemy positions via minimap + logical deduction
Ward enemy jungle entrances
Use shadows as temporary vision tools
Communicate missing calls to team
Positioning Prediction
Mages position forward when waves push to their towers
During objectives, mages provide zone control (flank them)
Track ability cooldowns mentally (engage during windows)
Mental Game
Wait for optimal windows (don't force plays)
Accept limited opportunities vs coordinated enemies
Focus on farming/objectives when assassinations unavailable
Reset mentally after failures (avoid tilt)
Adaptive Strategy
Ahead: Pure damage to snowball
Behind: Defensive items for survival
Support fed teammates (peel or follow up)
Adjust role based on team composition needs
Common Mistakes to Fix
Overcommitting Without Escape
❌ Using all shadows for engagement ✅ Always preserve 1+ shadows in safe positions Fix: Check shadow count before engaging
Poor Ultimate Timing
❌ Casting before enemies use escapes ✅ Wait for escape cooldowns, use immunity frames to dodge burst Fix: Bait defensive abilities first
Neglecting Farm
❌ Failed ganks over guaranteed jungle gold ✅ Farm takes priority unless gank highly likely to succeed Fix: Return to jungle immediately after unsuccessful ganks
Full Damage Builds
❌ Dying before executing combos ✅ 1 defensive item ensures survival to contribute Fix: Athena's Shield or Rose Gold Meteor 4th item vs threats
FAQ
How do you counter mid-lane burst mages with Hayabusa in S13?
Use shadow mobility to engage from unexpected angles after mages use abilities on waves. Execute Skill 2 → Skill 1 → Ultimate combo during cooldown windows, then escape using preserved shadows. Build Athena's Shield 3rd if they gain early leads.
What is the best Hayabusa build for Season 13?
Boots of Tranquility → Hunter Strike (8-10 min) → Blade of Despair (12-14 min) → Malefic Roar (16-18 min) → Athena's Shield/Rose Gold Meteor → final damage item. Prioritizes penetration and burst with necessary survivability.
How to execute Hayabusa's perfect combo?
Place Quad Shadow toward target → Shadow Shuriken from all positions → swap to closest shadow → basic attack → Ultimate → escape via preserved shadow. Executes in 2-3 seconds. Always keep 1 shadow for escape.
What are Hayabusa's biggest counters in S13?
Lu Bu, Milady, and Ake (high durability + CC). Coordinated teams with multiple hard disables that chain crowd control. Avoid engaging when these threats have abilities available.
Should Hayabusa build magic defense against burst mages?
Yes, build Athena's Shield or Rose Gold Meteor 4th item vs double/triple magic comps. Allows survival through initial burst for counterattacks. Against single magic threats, mobility and timing usually suffice.
How does Hayabusa fit in S13 team compositions?
Excels with CC setup or frontline pressure enabling flanks. Pairs well with tanks who engage and absorb cooldowns. Avoid picking into compositions lacking frontline (forces unfavorable engagements).
Ready to dominate S13 with Hayabusa and unlock exclusive Ultraman rewards? Recharge Honor of Kings tokens through BitTopup for instant delivery, competitive rates, and 24/7 support. Get Hayabusa's 588 token cost or event-exclusive content fast. Power up now and join elite S13 players!