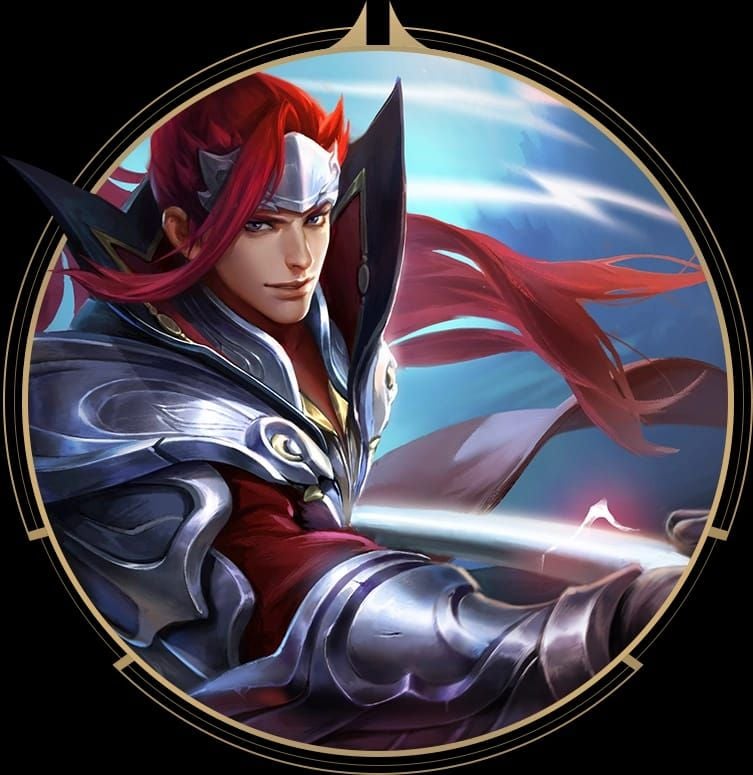
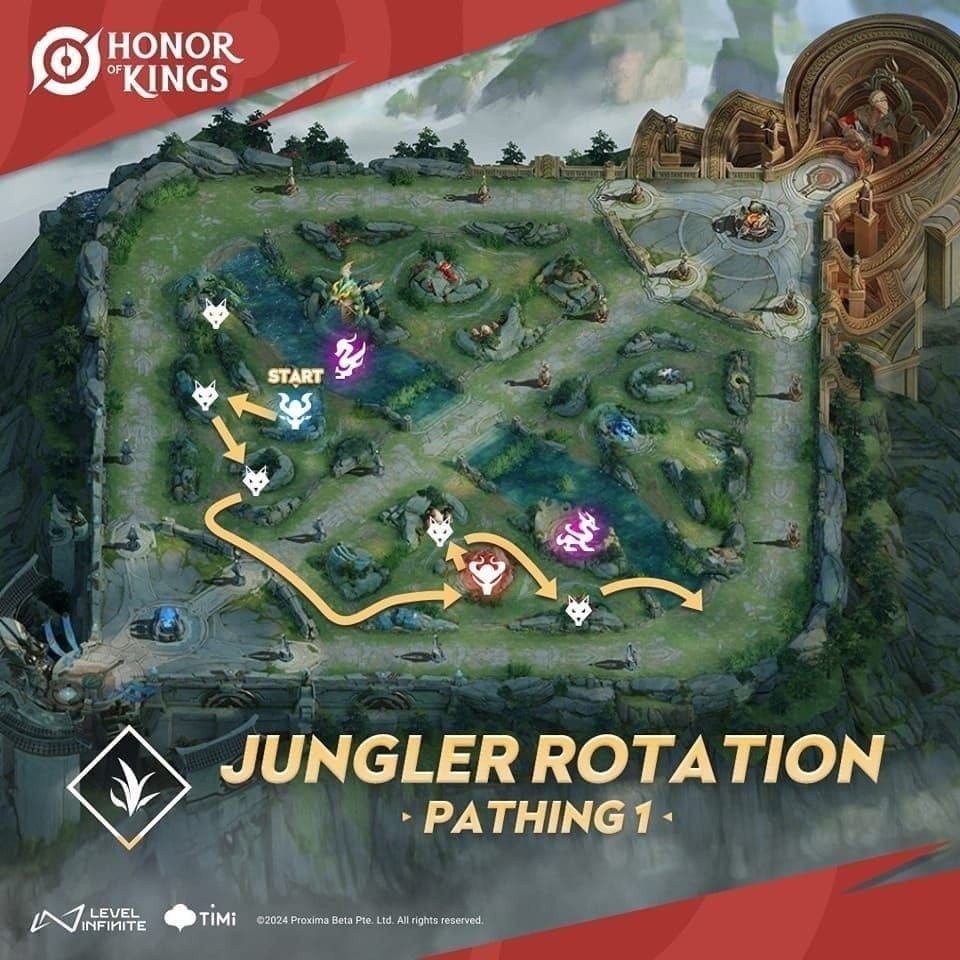
Master Haya's draft strategy in Honor of Kings KIS4 patch: ban priority analysis, mid matchups, and pro Spriteling flag techniques. Learn optimal pick timing, counter-pick identification, team synergies, and advanced flag tactics.
Haya's KIS4 Meta Position
Haya launched as a mid mage on January 22, 2026, with crystal-based combo mechanics. Season 5 stats: 50.66% win rate, 1.91% pick rate, 0.64% ban rate. This positions her as a sleeper pick—powerful but underestimated.
The 0.64% ban rate means you'll secure her in 99% of drafts. Unlike meta assassins drawing instant bans, Haya's low priority makes her exceptional for ranked climbing when you master her mechanics. Honor of Kings Tokens top up through BitTopup provides fast access to heroes and skins with secure transactions.
Her win rate improved from 47.16% (S4) to 50.66% (S5), showing growing proficiency with Moon Crystal generation. Passive Moon's Farewell consumes one crystal per Skill 1/2, releasing three magic orbs that mark enemies. This mark-detonation pattern creates skill gaps between novice and expert players.
Win Rate Analysis
The 1.91% pick rate indicates specialist choice status. Dedicated players achieve disproportionate success because opponents lack matchup experience. Enemies often fail to respect Moonscape Mirage ultimate's 50% cooldown reduction, transforming 75-second base cooldown into 20 seconds at level 12.
Haya's win rate spikes 8-12% when players maintain 60%+ shadow minion uptime through wave management. This separates casual picks from mains who understand power spikes at levels 8-9 with 3500-4000 gold through 80% CS efficiency. Completed build delivers 600-700 AP with 40% CDR and 45% magic pen, enabling 2000+ damage combos.
Role Flexibility
Haya functions primarily mid lane—crystal generation requires consistent minion interaction. Skill 1 Crescent Wave deals 200-300 base damage (24% spell attack scaling) on 7-second cooldown, ideal for wave clear and poke. Max Skill 1 first, then Skill 2 Wayward Rays for mobility and shields.
Jungle viability is limited—Moon Crystal generation needs 8-12 seconds for two crystals, too slow for efficient camp clearing. Mid provides minion density for three-crystal uptime while harassing. Early leveling: Skill 1 (level 1), Skill 2 (level 2), Ultimate (level 4).
Current Meta Dominance
Moonscape Mirage grants 2 seconds immunity, 30% movement speed, applies 10% slow to linked enemies, pulling them into 20-second dimension. This counters dive-heavy meta where assassins commit to backline access. Recast provides 700-unit dash for repositioning.
Ultimate cooldown reduction from 75 to 24/22/20 seconds (levels 4/8/12) outpaces enemy defensive cooldowns. When opponents burn Flash escaping your first ultimate, they're vulnerable 20+ seconds while Moonscape Mirage returns in under 25 seconds.
Ban Priority Guide
When to Ban Haya
Ban when facing specialists with 100+ games, identifiable through lobby stats. These players exploit her skill ceiling, maintaining 60%+ shadow uptime and executing frame-perfect combos for 2000+ burst.

Consider bans when your comp lacks hard counters: Han Xin, Hou Yi, Marco Polo, Umbrosa, Flowborn, Fatih, Sakeer, Zilong, Milady. These heroes exploit her 8-12 second crystal windows or outrange Skill 2's 1000-unit distance. Without two counters, skilled Hayas dominate.
Enemy comps protecting scaling mid laners justify bans. When opponents draft tank supports and peel junglers, Haya's 2-second immunity and 700-unit dash bypass frontlines to delete carries.
When to Leave Open
Leave open when your draft includes multiple counters. Han Xin's gap-close exceeds her escapes, Hou Yi's range negates poke, Marco Polo's sustained damage punishes cooldown windows. Two counters force reactive play.
Her 0.64% ban rate suggests most players lack mechanical proficiency. First-time picks struggle with crystal management, missing mark-detonation combos that define damage output, contributing to balanced 50.66% win rate.
When your mid specializes in lane bullies, Haya's weak levels 1-3 create exploitable windows. She needs Skill 1, Skill 2, and Ultimate (level 4) for full combo. Aggressive early mages establish 1000+ gold leads before her power spike.
Better Ban Targets
Priority bans target heroes with 55%+ win rates and 10%+ ban rates—more consistent threats than Haya's 50.66%/0.64%. Her specialist nature means underperformance in average hands.
Focus bans on heroes countering your win condition, not individual matchups. Haya's balanced stats don't warp draft like S-tier picks.
Lower ranks (Gold-Platinum) rarely justify Haya bans—players lack execution for advanced combos. Skill 2 > Skill 1 > Ultimate sequence requires precise timing. Missed combos reduce damage 40-60%.
Diamond+ sees increased proficiency where bans become matchup-dependent. But reactive banning sacrifices strategy—better to ban meta threats than niche specialists.
Draft Phase Strategy
First Pick Viability
First-picking exposes you to nine counters before assessing enemy comp. Han Xin jungle + Hou Yi marksman creates dual threats, forcing defensive itemization delaying power spikes.
The 0.64% ban rate means enemies won't waste bans, allowing later picks with more info. First priority should target S-tier or flex picks. Haya's clear mid identity provides no positional ambiguity.
First-pick becomes viable when you're a known specialist maintaining 55%+ win rates in bad matchups. Requires 100+ games and deep matchup knowledge.
Optimal Pick Timing
Third/fourth rotation maximizes value. You've identified enemy jungle and marksman—roles most likely containing counters. If Han Xin appears, pivot to alternatives. If immobile mages show, Haya becomes premium counter.
Late selection reveals comp structure. Dive-heavy comps with multiple gap-closers threaten positioning; poke teams allow control through Moonscape Mirage pull.
Coordinate synergistic picks before selecting Haya. Tank supports who peel during cooldowns or junglers enabling roaming amplify effectiveness.
Reading Enemy Comp
Identify CC density before locking. While ultimate provides 2 seconds immunity, extended fights expose you to layered chains after immunity expires. Comps with 4+ hard CC create unsafe combo windows.
Assess backline access difficulty. Double tank frontlines with peel supports require burning ultimate for repositioning rather than damage, reducing teamfight impact.
Evaluate sustain/healing. Haya's burst deals 2000+ in 2-3 seconds but lacks sustained damage. Multiple healers or lifesteal carries recover from initial burst.
Blind Pick Safety
Blind-picking carries significant risk—nine counters and matchup-dependent playstyle. Unlike generalist mages, Haya requires favorable conditions for 2000+ combos. Han Xin zones you from waves, preventing crystal generation.
Maintain 60%+ win rates across 50+ games before blind-picking. This ensures you understand defensive itemization, wave management under pressure, and roaming when lanes are unfavorable.
The 50.66% win rate suggests balanced performance when averaged, but variance remains high. Favorable matchups achieve 65%+, counters drop below 40%.
Favorable Mid Matchups
Immobile Mages
Immobile mages can't escape Skill 2 > Skill 1 > Ultimate combo. Target mages without dashes/blinks, forcing defensive Flash. Once Flash is down, you gain 120-second kill windows.
Poke combo: Skill 1 > basic > Skill 2 harasses during laning, applying marks for true damage. Crescent Wave's 7-second cooldown allows repeated cycles, forcing enemies to choose between CSing under pressure or conceding control. Maintain three crystals before engaging.
Immobile mages position aggressively to maximize poke. Punish with Flash engage: Skill 1 > Flash > Skill 2 > Ultimate. Flash repositioning closes gaps before reaction, guaranteeing Wayward Rays stun on marked targets for 2000+ damage.
Assassin Matchups
Assassin vs assassin tests execution and cooldown management. Haya's 2-second immunity provides outplay potential against burst assassins committing all abilities. Bait engagement, activate ultimate for immunity, counter during cooldown windows.
Skill 2 grants shield and movement speed on 7-second cooldown, enabling sustained trading others can't match. While they wait 10-15 seconds, you cycle Skill 1/2 rotations for consistent pressure.
Enter trades with three crystals to guarantee marks on both skills. Missing marks reduces damage 40%+ and wastes true damage conversion.
Low-Mobility Marksmen
Marksmen mid sacrifice wave clear and burst for sustained DPS. Crescent Wave out-pushes most marksman abilities, enabling wave control denying CS and creating roaming windows. Establish push priority by level 3, then coordinate jungle invades or ganks.
Low-mobility marksmen can't dodge Wayward Rays' three-orb spread. The 1000-unit range matches/exceeds most marksman auto ranges, allowing poke without retaliation. Land Skill 2 for marks, follow with Skill 1 for true damage chunking 30-40% health.
Marksmen rely on sustained damage over seconds, but Haya bursts in 2-3 seconds. Engage when they're farming with abilities on cooldown, using Moonscape Mirage to pull from tower safety. The 20-second dimension prevents team assistance.
Difficult Matchups
Hard Counters
Han Xin: Gap-close speed and burst exceed escape tools. His mobility dodges Wayward Rays while closing faster than Moonscape Mirage recast creates separation. Prioritize vision in mid bushes to spot approach angles.

Hou Yi: Range advantage keeps him outside Skill 2's 1000-unit distance while poke forces defensive Wayward Rays for shields rather than marks. This prevents crystal consumption for marks, reducing trading 50%+. Request jungle assistance before he completes lifesteal.
Marco Polo: Sustained damage punishes cooldown windows. After full combo, you have 5-7 seconds of unavailable abilities while his basics continue. Avoid extended trades—focus short burst exchanges with immediate disengagement.
Others: Umbrosa's CC chains lock you during immunity gaps. Flowborn's sustain negates burst. Fatih's tankiness prevents one-shots. Sakeer's mobility matches yours with superior teamfight utility. Zilong's gap-close bypasses defensive tools. Milady mirrors Hou Yi's advantages.
Defensive Strategies
Rush Boots of Tranquility (710 gold) for movement speed dodging skill shots and rotating safely. Delay Scepter of Reverberation until securing defensive components preventing early deaths.
Freeze waves near tower to farm safely. Use Crescent Wave to last-hit without pushing, maintaining freeze for extended periods. This allows reaching levels 8-9 without feeding kills.
Coordinate with jungler for vision control rather than solo kills. Ward river bushes and enemy jungle entrances to spot rotations. This info lets you farm aggressively when enemies show elsewhere.
Roam vs Farm
Roam when waves are pushed and crystals at max. The 8-12 second generation window means you'll regenerate while rotating, arriving with full combo potential.
Farm under tower when enemies have kill pressure and ultimate is down. Haya's 75-second base cooldown creates vulnerability without 2-second immunity or 700-unit dash. Concede mid pressure for safe farm.
Evaluate side lane gank probability before committing. If lanes are pushed toward enemy towers or lack CC setup, roaming wastes time better spent farming. Successful roams require teammate coordination.
Itemization Adjustments
Standard core: Scepter of Reverberation (8-10 min), Savant's Wrath (12-14 min), Insatiable Tome (16-18 min), Void Staff (20+ min). Against counters, delay Scepter for defensive components.

Build additional health reaching 4000+ HP, maximizing Spriteling flag shields. Solo captures grant 25% max HP shields (1000 HP at 4000 HP) for 5 seconds, enabling aggressive trades. Team captures provide 10% (400 HP).
Arcana: 10x Mutation (+64 Magic Attack, +24 Magic Pierce), 10x Harmony (+10% CDR, MP Regen), 10x Eagle Eye (+64 Magic Pierce). Totals 192 Magic Pierce and 10% CDR, reducing ultimate to 20 seconds at level 12. Don't adjust for matchups.
Spriteling Flag Mechanics
Flags provide vision, shields, and map pressure separating competitive from casual players. Buy Honor of Kings Tokens recharge at BitTopup for instant premium access with secure payment and 24/7 support.
Spawn Timing
Flags spawn at consistent intervals. Memorize timings to coordinate captures with power spikes and roaming. Arrive 5-10 seconds before spawn to position aggressively, denying enemy contests.

Track enemy captures through minimap. When opponents commit, they reveal positions creating gank opportunities. Collapse during capture animations for kills while denying benefits.
Vision Mechanics
Flags provide vision radius revealing enemy movements through fog. Position to maximize coverage, using it to extend map presence without face-checking unwarded areas.
Detection reveals stealthed enemies within radius—valuable against invisibility heroes. Maintain flag control in key jungle paths to eliminate stealth advantages.
Vision creates pick opportunities by revealing isolated enemies. When flags show single enemies farming side lanes, collapse for guaranteed kills translating to objective control.
Shadow Clone Interaction
Shadow minions at 60%+ uptime create additional bodies for captures and vision. Position near flags for early warning of enemy approach.
Use shadows to tank flag damage during captures, preserving health for subsequent fights. Minions absorb initial damage while you complete animation.
Shadows contest flags while you position for ambushes. Send minions to begin captures, drawing attention. When enemies commit to stopping, engage from unexpected angles.
Early vs Late Priority
Early captures prioritize vision over shields. The 25% max HP solo shield provides minimal value at 2000-2500 HP (levels 4-6). Focus on spotting jungle movements for safe farming.
Late captures become critical for teamfight survivability. At 4000+ HP, solo captures grant 1000 HP shields absorbing significant damage. Time captures 1-2 seconds before fights, ensuring 5-second duration covers 2-3 second combo execution.
Prioritize flags near contested objectives. Controlling these provides vision for setup while denying enemies info, creating opportunities to catch rotations.
Pro Flag Techniques
Level 2 Invades
Execute level 2 invades after clearing first mid wave. Push aggressively with Skill 1, rotate to nearest flag before enemies contest. This establishes vision dominance for next spawn cycle.
Succeeds because most mids prioritize wave clear over flags early. Your Crescent Wave's 200 base damage clears faster, creating 5-10 second uncontested windows.
Coordinate with jungler to secure enemy territory flags. Combined pressure forces enemy jungler responses, delaying clear patterns and reducing gold income.
Clone Vision Control
Shadow minions provide safe scouting without risking position. Send toward flags before approaching, using their vision to identify enemy presence. If ambushes exist, minions reveal without danger.
Clone vision enables aggressive captures in enemy territory. Position shadows in escape routes while capturing, ensuring vision of rotations. When enemies approach, you see through minion vision before engagement range.
Use shadows to maintain vision on captured flags after rotating. Minions persist 10-15 seconds, providing extended tracking even when farming elsewhere.
Jungle Coordination
Synchronize captures with jungler pathing for dual-threat pressure. When jungler clears camps near mid, rotate together for captures and invades. Combined presence forces multi-hero responses.
Captures during rotations provide shields for invades. The 25% max HP shield enables aggressive enemy jungle entry with reduced risk. Time captures before entering enemy territory.
Coordinate timing with objectives. Capture 30-45 seconds before dragon/tower attempts, ensuring shields available when teamfights erupt. The 5-second duration covers initial engagements.
Fake Retreat Ambush
Fake retreats bait enemies into flag-controlled areas where teammates wait. Begin retreating after trading, leading enemies to believe you're vulnerable. As they chase past flags, teammates collapse.
Exploits enemy aggression. Players seeing retreats commit gap-closers, leaving themselves vulnerable when your team collapses. Flag vision ensures teammates see chase developing.
Execute using Wayward Rays' movement speed to maintain distance without escaping. This controlled retreat keeps enemies engaged while navigating toward ambush positions. Use Moonscape Mirage to turn and pull into trap.
Map Pressure
Systematic flag control forces reactive enemy responses. Capture flags in sequence, creating vision networks revealing all movements. This info advantage enables avoiding unfavorable fights while taking advantageous ones.
Flag pressure creates rotation demands straining enemy resources. When you control their jungle flags, they must commit heroes to recapture or concede vision. Either creates advantages.
Maintain 60%+ flag control through mid game by timing captures with power spikes. At levels 8-9 with 3500-4000 gold, you duel most heroes for control.
Team Synergies
Tank/Support Pairings
Tanks with CC setup enable burst combos by locking enemies for guaranteed hits. Stuns/roots create windows where enemies can't dodge Wayward Rays, ensuring marks converting to true damage.
Supports with shields/heals extend survivability during cooldown windows. After combo execution, you have 5-7 seconds vulnerability while recharging. Support shields absorb damage during gaps.
Peel tanks protect from enemy divers targeting backline. While you delete carries, tanks intercept assassins/fighters attempting to reach you.
Jungle-Mid Synergy
Junglers with early pressure synergize with level 4 power spike. Coordinate ganks after unlocking Moonscape Mirage, combining pull with jungle CC for guaranteed kills accelerating gold income.
Mobile junglers matching roaming speed create dual-threat pressure. When both rotate simultaneously, enemies can't defend all objectives/lanes.
Junglers providing vision through pathing complement flag captures. When clearing camps near flags, they assist captures or provide security.
Struggling Compositions
Dive-heavy comps with multiple gap-closers threaten positioning despite mobility. When enemies have 3+ backline-reaching heroes, you can't safely execute without immediate retaliation.
Poke comps avoiding teamfights prevent burst utilization. Haya excels in 5v5s deleting targets, but poke maintains distance without committing. You struggle finding engagement opportunities.
Comps lacking frontline expose you to focus fire. Without tanks absorbing initial damage/CC, you become primary target. Your 2-second immunity provides brief protection, but extended fights expose you.
Building Around Haya
Haya-centric comps prioritize protection and enabling burst. Draft tanks with peel, supports with shields, junglers diving with you for numerical backline advantages.
Secure CC setup from multiple roles guaranteeing combo lands. When tanks/supports/junglers all provide stuns/roots, enemies can't dodge even burning mobility. Layered CC ensures 2000+ combos connect.
Avoid multiple carries competing for gold. Haya requires consistent farm reaching 600-700 AP with 40% CDR and 45% pen. Three-four carry comps dilute gold distribution, delaying power spikes.
Pre-Game Checklist
Analyzing Enemy Bans
Enemy bans reveal strategic priorities and potential comp. When banning multiple assassins, they're planning immobile carries Haya counters.
Bans targeting specific roles indicate vulnerabilities. If banning multiple junglers, their mid lacks self-peel requiring jungle proximity. Haya's roaming exploits this.
Track which heroes aren't banned to identify potential picks. If leaving strong meta picks available, they're planning first-picks.
Team Communication
Communicate Haya intention early allowing teammates to select synergistic heroes. When your team knows, they prioritize tanks with CC or junglers with gank potential.
Request bans eliminating hardest counters. If teammates ban Han Xin/Hou Yi/Marco Polo, you gain safer pick conditions.
Discuss backup picks if Haya is banned/countered. Having predetermined alternatives prevents panic picks. Communicate 2-3 heroes at similar proficiency.
Backup Picks
Maintain 3-5 mid laner pool handling Haya bans/counters. Include one safe scaling mage, one early bully, one teamfight specialist.
Practice backups to similar proficiency. If 60% Haya but 45% alternatives, enemies force weaker picks through bans.
Select backups complementing team comp when Haya unavailable. If needing wave clear, choose area damage mage. If needing picks, select single-target assassin.
Mental Preparation
After draft, analyze both comps during loading. Identify primary teamfight targets—usually low-mobility carries. Plan engagement angles and cooldown management.
Visualize early laning based on matchup. Against favorable, plan aggressive trades and roaming. Against counters, prepare defensive wave management and jungle coordination.
Set specific match goals: reach level 8 by 6 minutes, first tower by 10 minutes, maintain 60%+ flag control. Concrete objectives provide focus.
Common Draft Mistakes
Picking Into Counters
Most common mistake: locking despite enemies showing multiple counters. When opponents have Han Xin jungle + Hou Yi marksman, you face dual threats neutralizing strengths. If two+ hard counters present, select alternatives.
Overconfidence leads to believing you'll outplay counters. While possible, consistently winning counter matchups requires skill gaps not existing at similar ranks.
Track win rates in specific matchups identifying which counters you handle versus which require dodging. Data-driven approach optimizes picks.
Ignoring Team Needs
Prioritizing comfort over team needs creates imbalanced drafts. If lacking wave clear and picking Haya instead of area damage mage, you'll struggle defending siege pressure.
Communicate about comp requirements. If multiple want carries, negotiate based on proficiency and matchups.
Develop proficiency on one tank/support filling gaps when needed. Specializing in Haya is valuable, but flexibility demonstrates team mindset improving win rates.
Missing Synergistic Picks
Locking Haya without ensuring synergistic heroes reduces effectiveness. If picking early but team drafts full damage without CC setup, you'll struggle landing combos. Coordinate securing two+ heroes with stuns/roots.
Synergy extends to vision control and objective pressure. Junglers prioritizing flags complement playstyle; those ignoring force solo captures reducing farming efficiency.
Consider enemy comp when evaluating synergy. Against dive teams, need more peel. Against poke, need engage tools.
Flexibility Misconceptions
Many overestimate role flexibility, attempting jungle/side lane where she underperforms. Crystal generation requires consistent minion interaction mid provides. Jungle camps spawn too slowly maintaining uptime.
Side lane faces longer distances creating extended vulnerability when rotating. Mid's central position enables efficient roaming to both lanes and jungle.
Accept Haya as mid specialist, not flex pick. When mid claimed, select different hero instead of forcing suboptimal roles.
FAQ
Is Haya worth first picking in KIS4?
No. First-picking exposes you to nine counters before assessing enemy comp. Her 0.64% ban rate means safely waiting for later phases with more info. Reserve first picks for S-tier heroes, select Haya third/fourth rotation after identifying enemy jungle/marksman.
What heroes counter Haya mid?
Han Xin, Hou Yi, Marco Polo, Umbrosa, Flowborn, Fatih, Sakeer, Zilong, Milady. Han Xin's gap-close exceeds escapes, Hou Yi's range advantage keeps him outside 1000-unit Skill 2, Marco Polo's sustained damage punishes cooldowns. Prioritize defensive farming and jungle coordination against these.
How do Spriteling flags work with Haya?
Flags grant 25% max HP shields (5 sec) on solo captures, 10% in team fights. At 4000 HP: solo = 1000 HP shield, team = 400 HP. Time captures 1-2 seconds before engaging ensuring 5-second duration covers 2-3 second combo execution.
When should you ban Haya?
Ban when facing specialists with 100+ games or when your comp lacks multiple counters from her weakness list. Her 0.64% ban rate and 50.66% win rate indicate she's not priority in most scenarios. Focus bans on meta-dominant picks with higher stats.
What is Haya's KIS4 win rate?
50.66% win rate in Season 5 with 1.91% pick rate and 0.64% ban rate. Improved from 47.16% Season 4, indicating growing player proficiency. Balanced win rate suggests adequate performance across matchups when averaged, though individual variance remains high (favorable 65%+, counters <40%).
Which heroes synergize best with Haya?
Tank supports with CC setup, mobile junglers matching roaming speed, peel tanks protecting during cooldowns. Coordinate securing two+ heroes with stuns/roots guaranteeing combo lands, plus frontline absorbing initial teamfight damage. Avoid multiple carries competing for gold—Haya requires consistent farm reaching 600-700 AP.
Master Haya's draft mechanics and dominate KIS4 ranked through strategic pick timing, matchup knowledge, and pro flag control. Secure competitive advantage with instant token top-ups at BitTopup—competitive pricing, lightning delivery, bank-level security, 24/7 support trusted by millions worldwide.

