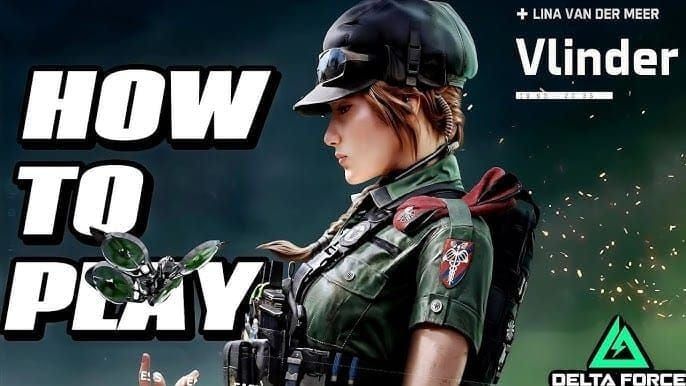
Vlinder, the Season 8 Morphosis support operator, revolutionizes objective play with her Nano Medical Dust healing drone and Butterfly Rescue Drone System. This guide covers critical healing breakpoints at 60% and 40% HP, Aftershock destruction mechanics requiring 2-3 C4 for concrete, and optimal 5-10m teammate spacing for 55m auto-revive coverage. Master drone positioning, MCX LT loadouts, and map-specific destruction to dominate competitive matches.
Why Vlinder Dominates Objective Modes
Vlinder (Lina van der Meer, G.T.C Europe Division) unlocks at Season 8 Battle Pass level 15. She's the only operator combining instant full-health restoration with automated revives. Her Nano Medical Dust heals allies to full health in 1.5 seconds within 10m range—critical during objective contests where downtime costs map control.
For quick Battle Pass progression, Delta Force credits top up through BitTopup provides instant access with secure transactions.
Core Abilities
Nano Medical Dust: Short press heals allies in line-of-sight; long press for self-heal. Auto-activates below 60% HP for teammates, 40% HP for Vlinder. This asymmetric design rewards aggressive positioning—you absorb more damage before consuming healing resources.
Remote-Controlled Smoke Grenade: Hold deployment button to steer smoke 100-150m mid-flight. 12-15 second duration, 25-30 second cooldown. Maintain near-constant smoke across two zones when timed correctly.
Butterfly Rescue Drone System: Deploys within 55m radius, auto-revives downed allies via plasma injection while intercepting one explosive. 120-second base cooldown reduces by 10-15 seconds per successful revive. Maintain 5-10m spacing for full coverage without clustering.
When to Pick Vlinder
Excels in Hazard Zone and Havoc Warfare where objective control wins matches. Her 60% threshold aligns with AR damage profiles—most ARs deal 30-40 damage per shot, triggering healing after 2-3 hits. Your team trades aggressively knowing they'll receive immediate healing.
Choose Vlinder with aggressive entry fraggers who push hard. Her 10m healing range and 60m tracking support forward operators without exposing herself. Avoid on maps with extreme verticality where line-of-sight limits drone effectiveness. Vital Signs Monitoring extends downed timers and highlights silhouettes through walls.
Drone Healing Mechanics

The 1.5-second full-health restoration creates narrow windows where positioning determines survival. 10m operational range requires deliberate positioning—too close risks AoE damage, too far and allies move out of coverage. 60m tracking follows retreating teammates if line-of-sight remains unbroken.
Deployment Process
Select ability and target ally or yourself. Drone materializes instantly with no delay—viable under direct fire. Short-press prioritizes nearest injured ally in crosshair cone; long-press guarantees self-healing regardless of teammate proximity.
Auto-activation at 60% HP for teammates means no manual triggering during chaos. However, this wastes ability on chip damage if you're not monitoring health bars. Advanced players disable auto-activation for critical matches, manually controlling every heal.
Line-of-sight demands constant environmental awareness. Drone pathfinds around small obstacles but fails when major structures block vision. During Aftershock destruction, previously viable positions become unusable as buildings collapse.
Heal-Per-Second Rate
1.5-second full-health restoration = ~66 HP/second (assuming 100 HP pools). Outpaces all DoT effects, making Vlinder the ultimate counter to incendiaries and environmental hazards. Against continuous damage, drone maintains teammates at breakpoint HP until damage source is eliminated.
Against burst weapons like snipers, healing speed determines survival. Sniper body shot dealing 70-80 damage triggers auto-heal. 1.5-second restoration completes before most snipers chamber follow-up shots, negating the first hit.
Healing persists through movement—full mobility while receiving support enables dynamic objective contests where static healing fails.
Critical Drone-Heal Breakpoints
60% teammate threshold and 40% self-healing breakpoint create tactical windows. On 100 HP pools: teammates heal at 60 HP, Vlinder at 40 HP.

Assault Rifle Breakpoints
MCX LT deals 36 base damage. Two shots (72 damage) drop full-health targets to 28 HP—well below 60% threshold. Guarantees healing after any two-shot burst, making Vlinder teams resilient against sustained AR fire.
Three-shot bursts (108 total damage) normally eliminate targets, but healing activates after second hit, restoring 72 HP during 0.3-second gap before third shot.
Lower-damage ARs (28-32 damage) need three hits to breach 60%. Healing activates mid-burst, saving allies from third/fourth shots. 1.5-second restoration completes faster than follow-up bursts at medium range.
High-damage battle rifles (45-50 damage) trigger healing after one hit. Slower fire rates (500-600 RPM vs 798 RPM MCX LT) mean healing completes before second shot—requires three hits instead of two.
Sniper/DMR Breakpoints
Sniper body shots (70-85 damage) immediately trigger 60% threshold. Critical factor: can sniper land follow-up within 1.5 seconds? Bolt-actions (1.8-2.2 second chamber) cannot—body shots largely ineffective. Only headshots bypass healing.
DMRs with faster follow-up (0.8-1.0 second between shots) potentially land two hits before healing completes. Requires perfect accuracy under pressure. Practical result: DMRs need three body shots instead of two.
40% self-healing threshold for Vlinder means she absorbs one sniper body shot (drops to 15-30 HP) before auto-heal triggers. Allows aggressive sniping positions—trade first shot for intel, heal while repositioning.
Explosive Damage Thresholds
Grenades (80-100 damage in lethal radius) drop targets below both thresholds. Butterfly Rescue Drone's explosive interception blocks one instance entirely, preventing initial HP drop. After interception, drone enters cooldown while Nano Medical Dust handles conventional damage.
RPG impacts (120+ damage direct hits) exceed healing capacity—requires interception or avoidance. Position where you see incoming projectiles, activate Butterfly Rescue preemptively. 120-second cooldown = one interception per major engagement.
Incendiaries/DoT repeatedly trigger healing as HP fluctuates around 60%, wasting ability on minor damage. Disable auto-heal in known incendiary zones, preserve for burst damage.
Advanced Drone Positioning
10m healing range and line-of-sight requirements create positioning puzzle: stay close enough to support while maintaining cover and escapes. 55m Butterfly Rescue radius allows flexibility, but auto-revive requires unobstructed pathfinding.
5-10m spacing ensures full Butterfly Rescue coverage without clustering. Single explosive can't eliminate multiple players, rescue drone reaches any downed ally. Prevents area-denial from displacing entire squad.
Objective Defense Positioning
Prioritize elevated platforms with line-of-sight to multiple approach vectors. On Aftershock's 95% destructible buildings, identify reinforced positions surviving initial destruction—concrete structures requiring 2-3 C4. Stable healing platforms as environment collapses.
Position 3-5m behind frontline defenders. When defenders drop below 60%, auto-heal activates without exposing yourself. Second-line support keeps you alive through initial contact.

Corner positions with multiple exits prevent entrapment during flanks. Remote-Controlled Smoke (100-150m) covers your retreat while healing. Deploy smoke between yourself and enemies, reposition during 12-15 second duration.
Aggressive Push Positioning
Move with vanguard while maintaining 5-10m spacing. Lead with Remote-Controlled Smoke to obscure sightlines, advance behind entry fraggers. 60m tracking heals teammates pushing ahead if line-of-sight persists.
Deploy Butterfly Rescue preemptively when initiating pushes. 55m radius covers most objectives entirely, guarantees auto-revives during initial engagement. Explosive interception blocks first defensive grenade.
Reposition between multi-stage captures. As team secures first checkpoint, advance to next support position before enemies collapse. Maintains healing coverage throughout push, prevents pre-aiming known positions.
Aftershock Destruction Mechanics
95% destructible buildings with 550 unique object types. Single C4 collapses wooden structures; 2-3 charges penetrate concrete walls. Dust clouds obscure vision 15-20 seconds post-destruction—temporary cover skilled teams exploit.
Earthquakes every 8-12 minutes (minimum 6-minute cooldown) weaken structures. Coordinate destruction timing with earthquake windows to maximize collapse while minimizing explosive expenditure.
Destruction Tool Effectiveness
C4: Most reliable. 3-second arming before remote detonation. Place at wall-floor junctions, support column bases, load-bearing beam intersections. Single charge collapses wood; 2-3 penetrate concrete.
RPG: Ranged destruction. 2-3 impacts collapse wood; single rockets compromise non-reinforced walls. 2-3 rocket capacity limits sustained destruction—better for opportunistic breaches. Metal reinforcements need 2-3 C4 or 3-4 RPG impacts.
Grenade Launchers: 4-6 hits collapse wood. Inefficient for deliberate destruction, useful for suppressive fire incidentally damaging cover.
Strategic Timing
Destroy defensive positions immediately before pushes. 15-20 second dust cloud obscures enemy vision during advance. Coordinate with entry fraggers to push simultaneously, using visual obstruction as mobile cover.
Preserve structures benefiting your setup. Collapsing buildings providing sniper elevation or removing protective cover backfires. Identify which structures support your strategy before deploying explosives.
Counter enemy destruction by repositioning before collapse. Hear C4 arming or see RPG contrails? Immediately relocate. 3-second C4 delay provides just enough warning to escape blast radius.
Vlinder Loadout Optimization
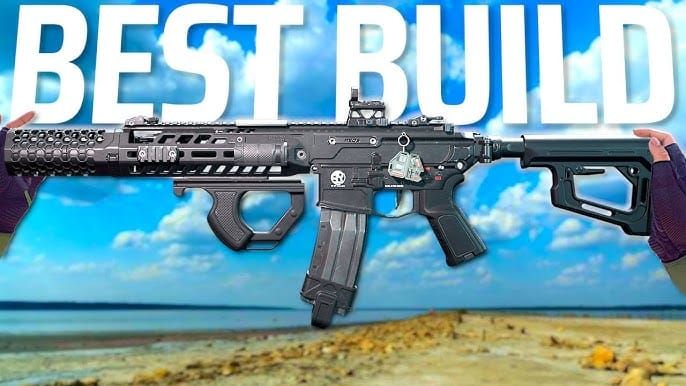
MCX LT Assault Rifle: 36 base damage, 798 RPM. .300 Blackout caliber, 30m effective range, 450 m/s muzzle velocity. Viable medium-range while supporting teammates.

55 recoil control, 63 handling speed allow rapid target acquisition. 30-round magazines sustain fire during extended defenses. 37 hip-fire adequate for CQB emergencies, though Vlinder prioritizes positioning over gunfighting.
Secondary Weapon
FS-12 Shotgun: 18x8 pellet damage = 144 per shot. 12m effective range, 87 hip-fire devastating in confined objectives. 300 RPM pump mode requires precise placement—single hits eliminate most targets.
For faster Battle Pass progression, buy Delta Force coins recharge at BitTopup for instant delivery and secure payment.
20-round magazine allows sustained defensive fire. 460 m/s muzzle velocity ensures pellets reach targets quickly. 32 handling speed, 45 recoil control make follow-ups slower—demands first-shot accuracy.
Gadget Synergies
Smoke Grenades: Synergize with Remote-Controlled Smoke, creating layered obstruction across 200+ meters. Deploy standard smoke on position while steering remote onto enemies. Combined 24-30 seconds coverage allows complete objective captures under concealment.
Flashbangs: Complement aggressive pushes with Butterfly Rescue deployment. Blind defenders before entry, knowing rescue drone auto-revives anyone downed. Turns risky pushes into calculated plays with failure recovery.
Frag Grenades: Area denial forcing enemies into firing lanes. Cook grenades to detonate as enemies round corners, dropping them below 60% where Nano Medical Dust immediately restores. Damage-and-heal cycle wins trades despite taking initial damage.
Counter-Strategies and Mistakes
Experienced opponents target Vlinder first, knowing eliminating support collapses team sustain. They use explosives bypassing healing mechanics, dealing damage exceeding 1.5-second restoration window.
Most common mistake: positioning too aggressively, assuming healing makes you invulnerable. 40% self-healing threshold means dropping to critical HP before auto-heal triggers—burst damage kills before restoration begins. Maintain conservative positioning prioritizing survival.
Drone Destruction Prevention
Enemies can't directly destroy Nano Medical Dust—it's targeted healing, not physical object. They break line-of-sight by destroying cover or forcing retreat. When Aftershock buildings collapse, viable positions become unusable.
Butterfly Rescue appears as physical object but auto-revive activates faster than most can locate/destroy. Primary counter: prevent downs through overwhelming burst or explosives exceeding single interception.
Prevent counterplay by varying positioning unpredictably. Don't heal from same corner—enemies pre-fire/pre-nade known spots. Use Remote-Controlled Smoke's 100-150m range from unexpected angles.
Ability Timing Mistakes
Butterfly Rescue too early: Wastes 120-second cooldown before fights begin. Wait until team commits to push, activate as they enter contested zone. 55m radius covers most objectives—timing matters more than placement.
Nano Medical Dust on chip damage: Wastes ability before critical fights. Disable auto-activation, manually trigger only below 40% HP or anticipating burst damage. Ensures availability during decisive moments.
Poor smoke placement: Obscuring your team's sightlines helps enemies. Deploy smoke blocking enemy vision while preserving firing lanes. 12-15 second duration means poor placement handicaps team through entire engagement.
Performance Tracking
Measure beyond kills/deaths. Monitor healing delivered per match, drone revives, objective time maintained. Top Vlinder players average 800-1200 HP healed per match, 3-5 drone revives during extended contests.
Track survival rate as primary metric—dead support = zero value. Aim for 70%+ survival, indicating conservative positioning to outlive engagements while aggressive enough to impact fights. Above 85%? Too passive, missing healing opportunities.
Key Metrics
Objective time: Should average 90-120 seconds in Hazard Zone, showing presence during critical contests. Lower suggests dying early or positioning too far.
Healing efficiency: HP restored vs ability cooldown. Optimal = healing activates on burst damage that would eliminate teammates, not chip damage regenerating naturally. Divide total healing by activations—higher values = saving for impactful moments.
Drone revive success rate: 60-80% means most deployments result in ≥1 successful revive. Lower indicates premature deployment or positioning preventing drone from reaching allies.
Skill Milestones
Beginner: Focus on basic execution—activate Nano Medical Dust when teammates take damage, deploy Butterfly Rescue during pushes. Prioritize survival and line-of-sight. Achieve 500+ HP healing per match.
Intermediate: Master breakpoint awareness, recognize 60% HP drops, predict burst damage triggers. Position proactively before fights develop. Milestones: 800+ HP healing, 2+ drone revives per objective.
Expert: Manipulate enemy behavior through healing, bait pushes by keeping teammates low HP before burst-healing during commits. Coordinate destruction with pushes, use Remote-Controlled Smoke obscuring advances. Benchmarks: 1200+ HP healing, 70%+ survival, consistent competitive victories.
FAQ
What are Vlinder's exact drone healing breakpoints? Auto-activates at 60% HP for teammates (60 HP on 100 HP pools), 40% HP for Vlinder (40 HP). Heals to full in 1.5 seconds within 10m range, 60m tracking distance.
How to use Vlinder on Aftershock effectively? Position on elevated concrete structures requiring 2-3 C4 for destruction. Maintain 5-10m spacing for 55m Butterfly Rescue coverage. Deploy Remote-Controlled Smoke (100-150m) to obscure sightlines, time destruction with 15-20 second dust clouds for visual cover.
Best weapons for Vlinder? MCX LT (36 damage, 798 RPM) for medium-range support. FS-12 Shotgun (144 total damage) for close-quarters defense. Both defend position without requiring aggressive dueling.
Does healing work through walls? No. Nano Medical Dust requires unbroken line-of-sight. Walls, obstacles, destruction sever healing connection. Tracks up to 60m but only with direct vision.
Butterfly Rescue Drone cooldown? 120-second base, reduces by 10-15 seconds per successful revive. Extended contests with multiple revives decrease to 90-95 seconds.
Which operators synergize with Vlinder? Aggressive entry fraggers pushing objectives. Pair with operators creating space and drawing fire. 5-10m spacing ensures healing coverage without clustering to AoE damage.
Master Vlinder with premium resources at BitTopup. Instant CP top-ups, Battle Pass progression, exclusive bundles through secure transactions with 24/7 support. Competitive pricing and fast delivery for professional-grade support play.

