

Vlinder, the Season 8 Morphosis Support Operator unlocking at Battle Pass tier 15, revolutionizes Delta Force combat with her Butterfly Rescue Drone System and Nano Medical Dust healing capabilities. This guide delivers expert loadout configurations optimizing her 55-meter radius revival drone, Remote-Controlled Smoke Grenade, and tactical positioning strategies. Master the Aftershock map's 95% destructible environment using MCX LT Assault Rifle (798 RPM) and FS-12 Shotgun combinations for 15-75 meter engagements, while leveraging destruction mechanics requiring single C4 on wood or 2-3 charges on concrete structures.
Vlinder's Core Abilities in Season 8 Morphosis
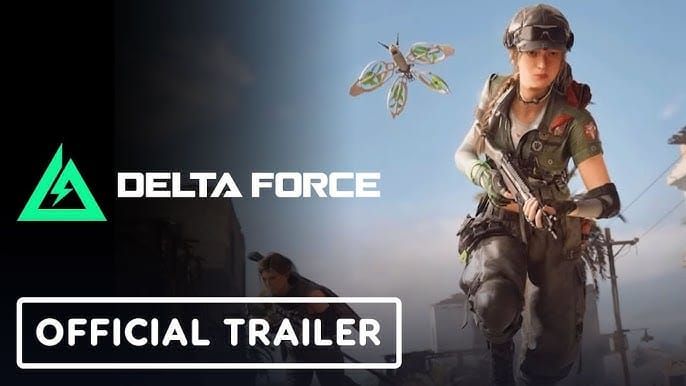
Vlinder (Lina van der Meer, G.T.C. Europe Division) launches February 3, 2026 at 02:00 UTC with 28.6 GB PC update and 1.04 GB mobile patch. China servers got early access January 29, 2026.
Butterfly Rescue Drone System: 55-meter radius plasma injection revival. 120-second cooldown reduces 10-15 seconds per successful revive. Drone intercepts one explosive damage during deployment. Deploy when multiple teammates down simultaneously for maximum cooldown efficiency.
Nano Medical Dust: Dual-function system tracking allies within 60 meters. Short-press heals teammates in line-of-sight; long-press self-heals. Activate short-press when squad health drops below 60%, reserve long-press for personal health under 40%. No cooldown but requires line-of-sight—position behind cover.
Remote-Controlled Smoke Grenade: Mid-flight steering across 100-150 meter ranges. Hold deployment button to adjust trajectory. 25-30 second cooldown. Vary deployment angles to maintain unpredictability.
Vital Signs Monitoring: Passively extends downed ally timers while highlighting teammate silhouettes through walls. Enables preemptive positioning before engagements conclude.
For faster Battle Pass progression to unlock Vlinder's tier 15 position, Delta Force credits top up through BitTopup provides secure, instant delivery with competitive pricing.
February 2026 Update Impact
Season 8 introduces 150 Battle Pass tiers with Vlinder at tier 15—accessible within 8-12 hours focused gameplay. Aftershock map features 95% destructible buildings across 550 object types. Environmental destruction creates temporary sightlines, eliminates cover, generates 15-20 second vision-obscuring dust clouds. Deploy Nano Medical Dust during dust cover to heal exposed teammates without enemy targeting.
Optimal Primary Weapon Selection
MCX LT Assault Rifle (Premier Choice):
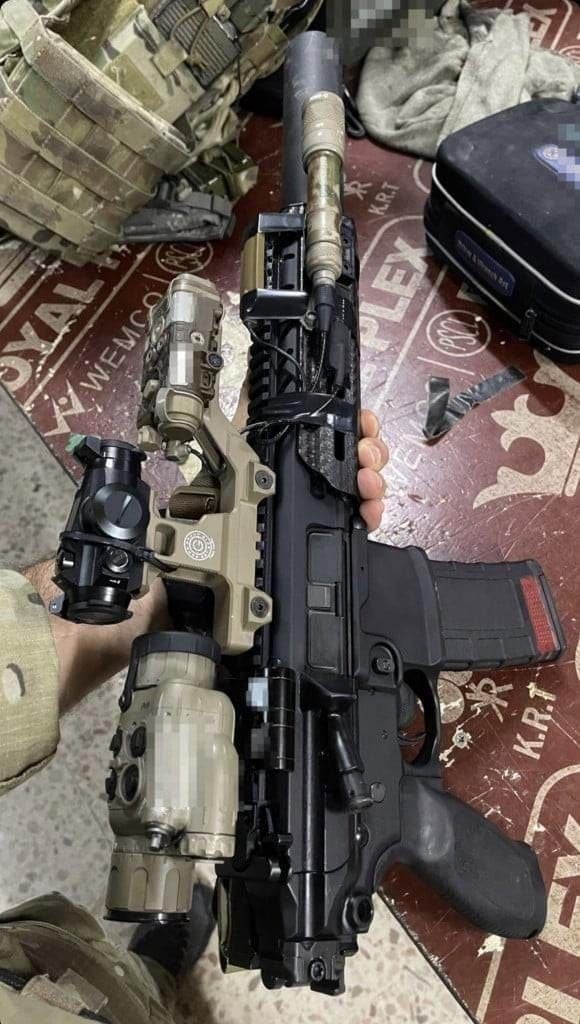
36 base damage per shot
798 RPM
30-meter effective range
30-round magazine (40-45 extended)
450 m/s muzzle velocity
Excels in 15-75 meter engagements
Position 3-5 meters behind assault operators. The 798 RPM balances ammunition conservation with threat elimination. Extended magazines sacrifice mobility but prove invaluable during prolonged objective defenses.
SMG Configurations: High-mobility players favor 900+ RPM with hipfire accuracy attachments. Sacrifice range for close-quarters dominance in urban Aftershock sections with destructible wooden structures. Extended magazines mandatory—900+ RPM depletes standard capacities within 2-3 seconds. Effective range under 20 meters requires aggressive positioning conflicting with support role.
FS-12 Shotgun Secondary:
144 total damage per shot (18x8 pellets)
12-meter effective range
300 RPM
20-round magazine (25 extended)
87 hipfire accuracy
Transforms Vlinder into zone-control specialist. Extended 25-round magazine supports prolonged objective defenses, particularly on destructible wooden structures where single C4 creates instant close-quarters zones.
Attachment Optimization
MCX LT Configuration:
Mid-range optics (2x-3x magnification)
Recoil-reducing barrel over damage enhancement
Vertical recoil muzzle devices for headshot potential
Extended magazines (40-45 rounds)
Standard ammunition (armor-piercing reduces damage against 60-70% unarmored targets)
Underbarrel & Stock:
Vertical grips reduce horizontal recoil (critical during Butterfly Rescue Drone deployment)
Angled grips for faster ADS (aggressive players)
Heavy stocks maximize stationary healing accuracy
Lightweight stocks support mobile support
Tactical stocks provide balanced performance
Aftershock Destruction Mechanics

Destruction Requirements:
Wooden structures: Single C4 (3-second arming)
Concrete walls: 2-3 C4 or equivalent RPG impacts
Dust clouds: 15-20 seconds, 20-30 meter radius
Deploy Nano Medical Dust during obscured periods, healing exposed teammates without enemy targeting. Remote-Controlled Smoke extends dust cloud duration, creating 35-50 second vision denial when combined with structural collapse timing.
Tactical Positioning:
Maintain 3-5 meter distance behind assault operators
Stay within 60-meter Nano Medical Dust tracking range
Avoid primary blast radiuses
55-meter Butterfly Rescue Drone radius covers most single-building footprints
Position perpendicular to anticipated breach directions
For premium currency to unlock optimal attachments, cheap Delta Force recharge online through BitTopup delivers instant account crediting with 24/7 support.
Equipment Strategy
Lethal Equipment:
Proximity mines near Butterfly Rescue Drone zones (10-15 meters from deployment)
Frag grenades for room clearing
Avoid thermite/molotov (conflicts with healing role)
Tactical Equipment:
Smoke grenades (dual smoke with Remote-Controlled = 40-50 second denial)
Flashbangs for emergency escapes
Field Upgrades:
UAV synergizes with Vital Signs Monitoring
Trophy systems protect stationary healing positions
Map-Specific Adjustments
Urban Sections: FS-12 Shotgun primary. 144-damage close-range dominates indoor engagements. Extended 25-round magazines for sustained corridor defense.
Open Terrain: MCX LT with 3x-4x optics. 798 RPM and 450 m/s muzzle velocity enable 40-50 meter suppression.
Mixed Environment: MCX LT primary + FS-12 secondary provides 15-75 meter coverage.
Mode Optimizations:
Domination/Hardpoint: Heavy stocks, extended magazines, trophy systems. 55-meter drone radius covers most objectives.
Search & Destroy: Lightweight attachments, SMG loadouts. Single-life format reduces drone value.
Team Deathmatch: Aggressive SMG (900+ RPM) with hipfire attachments, self-healing focus.
Counter-Meta Strategies
High-Mobility Operators: Deploy Remote-Controlled Smoke into rush routes, forcing predictable paths. Butterfly Rescue Drone negates pick-focused playstyles.
Tank Operators: Nano Medical Dust enables sustained pressure without retreating. Position 3-5 meters behind assault operators engaging tanks.
Snipers: Use destructible environment to create new sightlines. Remote-Controlled Smoke's 100-150 meter range denies sniper effectiveness.
Team Coordination:
Communicate Butterfly Rescue Drone cooldown (120 seconds, -10-15 per revive)
Position behind shield operators during pushes
Synchronize Remote-Controlled Smoke 1-2 seconds before flashbangs (35-40 second combined denial)
Performance Metrics
Target Benchmarks:
Healing output: 2,000-3,000 per 15-20 minute match
Personal eliminations: 8-12 per match
Drone revives: 4-6 per match
Average cooldown: 90-100 seconds
Death positioning: 3-5 meters behind assault operators
Testing Methodology:
10-match samples per configuration
Isolate single variable changes
Track healing output, eliminations, deaths, objective time
MCX LT: 60-70% eliminations within 15-40 meters
SMG: 70-80% eliminations under 20 meters
Progression Acceleration
Unlock Priority:
MCX LT recoil-reducing barrel
Extended magazine
Mid-range optic
Stock and underbarrel attachments
Currency Farming: Objective-focused modes (Domination, Hardpoint). Target 1,500-2,000 score per match through healing assists, objective captures, drone revives. Generates 200-300 currency per hour.
Season 8 Challenges:
Revive 50 allies with Butterfly Rescue Drone
Heal 10,000 health with Nano Medical Dust
Awards premium currency and exclusive attachments
Advanced Techniques
Animation Canceling: Initiate Butterfly Rescue Drone deployment, sprint-cancel, redeploy. Reduces activation time by 0.3-0.5 seconds.
Predictive Positioning: Monitor Vital Signs Monitoring silhouettes for health deterioration. Position for healing before teammates request.
Chain Destruction: Coordinate structure collapse with Butterfly Rescue Drone deployment. 15-20 second dust cloud obscures drone, preventing enemy interruption.
Competitive Loadouts:
Maximum recoil reduction over damage
Heavy barrels, vertical grips, stability stocks
Smoke grenades + trophy systems
Dual smoke capabilities for 40-50 second denial
FAQ
Best primary weapon for Vlinder? MCX LT Assault Rifle: 36 damage, 798 RPM, 30-meter range. Extended magazines and recoil-reducing attachments maximize sustained fire during healing.
How does Butterfly Rescue Drone cooldown work? Base 120 seconds reduces 10-15 seconds per revival. Deploy when multiple teammates down for 90-100 second average cooldowns.
Best attachments? MCX LT: Recoil-reducing barrel, extended magazines (40-45 rounds), 2x-3x optics, vertical grips. FS-12: Extended magazines (25 rounds), hipfire enhancements.
Is Vlinder competitive? Excels in Domination, Hardpoint, Search & Destroy. 55-meter drone and sustained healing provide critical survival advantages. Avoid pure elimination modes.
How to unlock Vlinder quickly? Battle Pass tier 15: 8-12 hours objective-focused gameplay or premium currency. Focus high-score modes like Domination.
Best maps for Vlinder? Aftershock's 95% destructible environment and 15-75 meter ranges suit MCX LT/FS-12 combination perfectly.
Unlock Vlinder faster! Get premium currency and operator bundles at BitTopup—secure, instant delivery, competitive prices. Level up your Aftershock loadout today!