

Quick Answer: Nod-Krai's got 112 Lunoculus scattered across three islands: Hiisi Island (34), Lempo Isle (53), and Paha Isle (25). These little glowing orbs upgrade three Statues of the New Moon, netting you 500 Primogems, Adventure EXP, and Luna Sigils. Fair warning though - finish the main Archon Quest and key World Quests first, or you'll be staring at locked doors all day.
Nod-Krai Lunoculus Overview: What You Need to Know
Total Count and Distribution
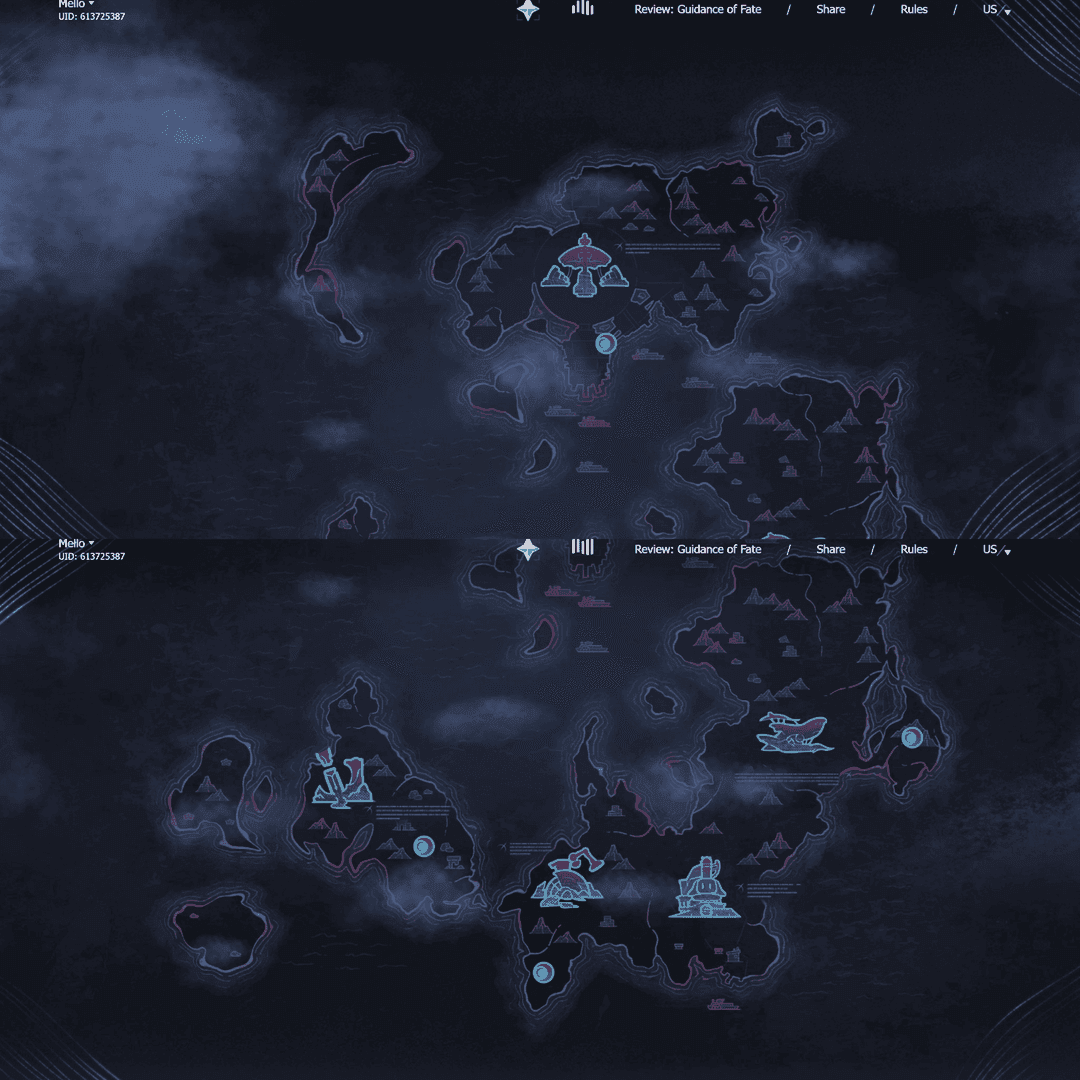
So here's the deal with Nod-Krai (dropped in Version 6.0 on September 10, 2025) - you're looking at 112 Lunoculus spread across three distinct islands. The breakdown? Hiisi Island houses 34, Lempo Isle takes the crown with 53, and Paha Isle rounds out with 25.
What's interesting is the distribution pattern: 92 are sitting pretty on the surface where you can spot them easily enough, but 20 are tucked away underground in caves and quest domains. Trust me, those underground ones will test your patience.
For those marathon collection sessions, Genshin Impact Genesis Crystals top up through BitTopup offers competitive pricing and instant delivery - because let's face it, you'll probably need those resin refreshes when you're spending 8+ hours hunting these things down.
Prerequisites and Requirements
Here's where things get a bit... involved. You can't just waltz into Nod-Krai and start collecting. The game demands you complete the Archon Quest first - specifically 'Song of the Welkin Moon: Act I' and 'Reunion Beneath the Moonlight'.
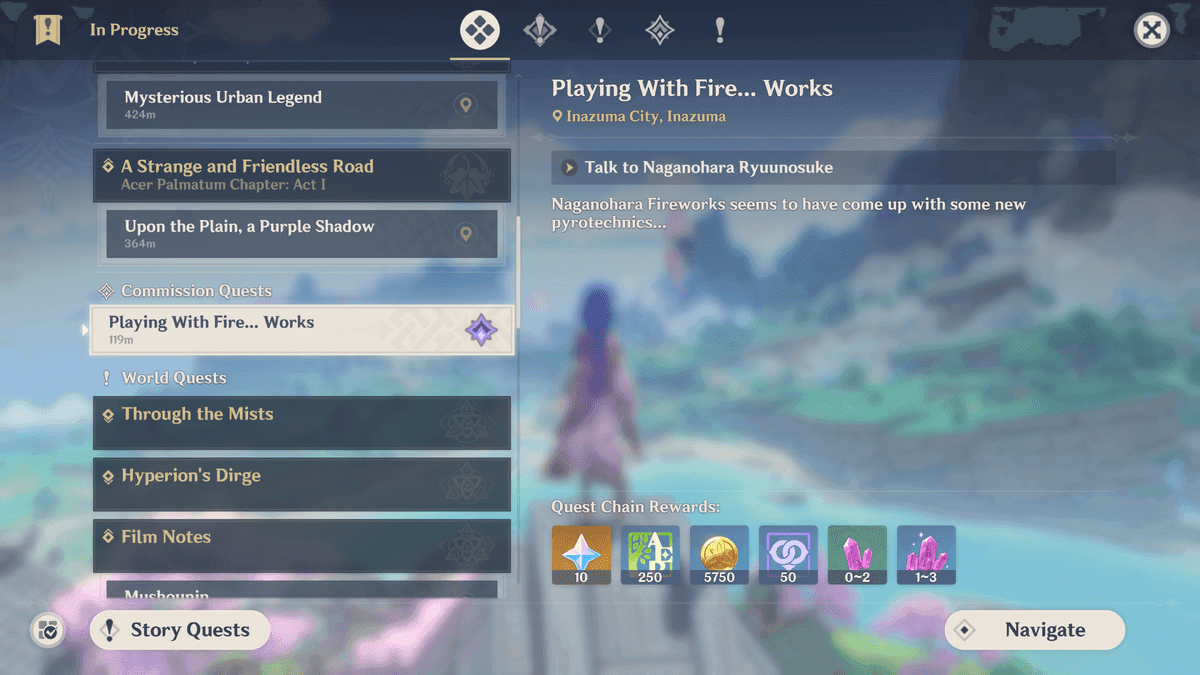
But wait, there's more! (I know, I know.) Essential World Quests include 'The Mirrors, the Maze, and the Tsar', 'For a Green Island', 'Whisper Beneath the Waves', 'Team Rigor, or Team Intuition?', 'Echoes of an Unfinished Past', 'The Shoemaker's Children Go Barefoot', and 'Polka Beneath the Moon Oracle'.
Yeah, that's a lot of quest names. The payoff? Access to unique mechanics like Kuuhenki transformation (basically flight via specific plants), Moonlanes (those shiny light paths), and the Kuuvahki energy system. Those Atapetra Conches you'll find? They're your key to breaking barriers and destroying those annoyingly colorful rock walls.
Rewards Summary
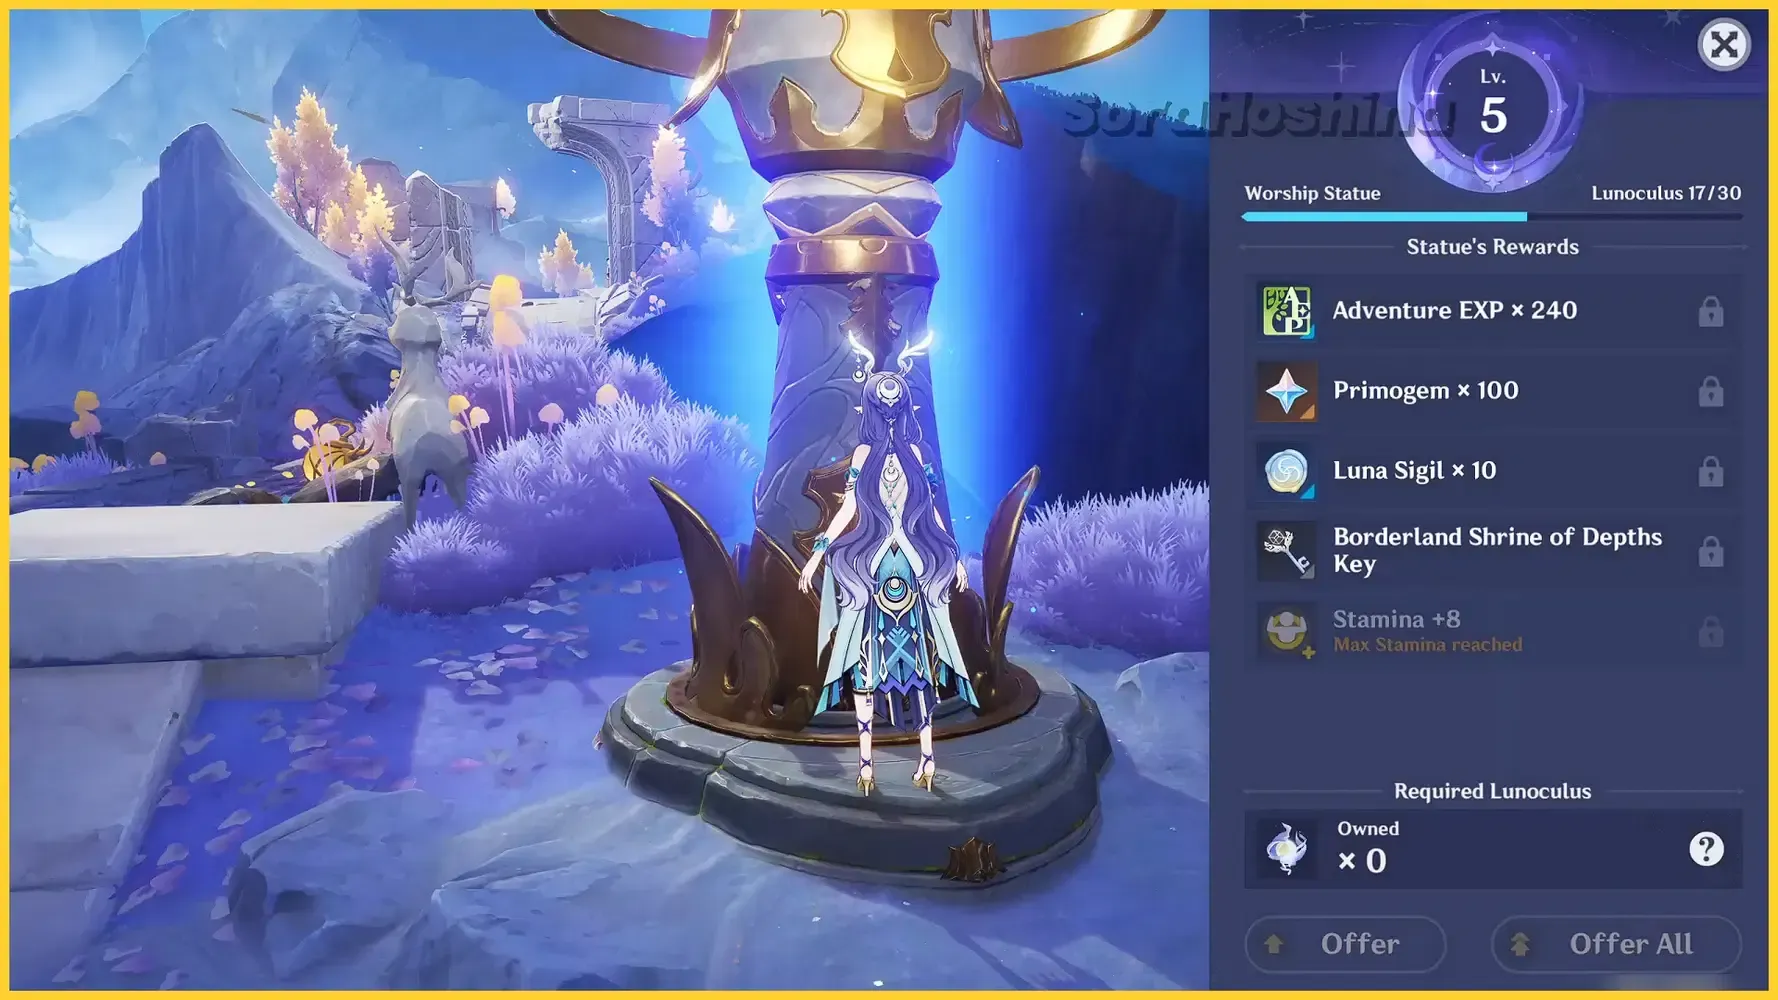
Each of the three Statues of the New Moon caps out at Level 5 with the current 112 Lunoculus (leaving you with 17 extras - future-proofing, perhaps?). The reward structure's pretty straightforward: Level 2 needs 20 Oculi and gives you 100 Primogems, 80 Adventure EXP, 5 Luna Sigils, and a Borderland Shrine Key. Level 3 wants 22 more Oculi for another 100 Primogems, 120 Adventure EXP, 5 Luna Sigils, and an Acquaint Fate.
Keep climbing and Level 4 demands 25 additional Oculi, rewarding 100 Primogems, 160 Adventure EXP, 5 Luna Sigils, and another Borderland Shrine Key. Finally, Level 5 requires 28 more Oculi and pays out 100 Primogems, 200 Adventure EXP, 10 Luna Sigils, and an Acquaint Fate.
Bottom line? You're looking at 1,500 Primogems total from maxing all three statues. One thing to note - unlike Mondstadt and Liyue, these don't boost your stamina. Bit of a letdown, honestly.
Essential Tools and Preparation for Lunoculus Collection
Interactive Map Setup
The Luna Treasure Compass is your best friend here, but you'll need to unlock it through the Meeting Point reputation system using Luna Sigils. Level 1 shows basic treasures (meh), Level 2 displays Oculi locations (up to 10 clues at a time), and Level 3 reveals everything - all Oculi and most treasures within sub-regions.
Here's something that caught me off guard: faction-specific reputation actually affects detection range. The Frostmoon Enclave controls Hiisi Island, so building rep there pays dividends.
Your statue locations are pretty spread out - Nasha Town on Lempo Isle, Frostmoon Enclave on Hiisi Island, and southeast of the Kuuvahki Experimental Design Bureau on Paha Isle. Do yourself a favor and unlock every Teleport Waypoint before you start seriously collecting.
Recommended Team Compositions
Mobility is king here. Mona, Ayaka, and Sayu's alternative sprint abilities will save your sanity (and stamina). Anemo characters excel at environmental puzzles with their grouping abilities, Geo characters give you those crucial elevated positions, and Electro characters shine in Paha Isle's industrial puzzle sections.
But honestly? Master the Kuuhenki transformation system. It provides way better vertical mobility than traditional climbing, and you'll need every advantage you can get.
When you need to buy Genesis Crystals online, BitTopup's got secure transactions with 24/7 support and multiple payment options - perfect for those Original Resin refreshes during marathon farming sessions.
Hiisi Region: Complete Lunoculus Locations Guide
Hiisi Route 1: Northern Settlements (12 Lunoculus)
Start at the Frostmoon Enclave Statue and work your way toward the coastline. Lunoculus #34's sitting pretty in Columbina's Statue hand at the Light-Bathed Platform - just requires some basic climbing, nothing fancy.
Now, the Crab Tsar's Palace? That's where things get interesting. Multiple Lunoculus are locked behind 'The Mirrors, the Maze, and the Tsar' World Quest. Three of them specifically require you to navigate maze corridors and solve mirror puzzles. Fair warning - these aren't your typical hit switch, door opens affairs.
Hiisi Route 2: Central Landmarks (14 Lunoculus)
This section features what I like to call Seelie-equivalent puzzles using Kuuhenki creatures. You'll guide these little guys to their courts, just like the old days. Lunoculus #63 in Nothing Passage demands a three-part Kuuhenki puzzle - guide each creature to its corresponding court to unlock Moonlane access.
The underground caves here contain 6 Lunoculus, all accessible via Kuuvahki energy mechanics. Use those Atapetra Conches for energy charges, then break through the red and blue colored walls. Simple concept, but the execution can be tricky.
Hiisi Route 3: Southern Boundaries (8 Lunoculus)
Lunoculus #47 in Barrowmoss Barrens threw me for a loop initially. It's a 10-bot collection puzzle where you gather scattered 'amazing bots' at a central assembly point. Complete it, and you'll create Patches of Mist for elevation access.
The coastal areas use Unipolar Fields - those red jumping pads - for cliff-face access. You'll need to chain jumps in sequence, and timing matters more than you'd think.
Lempo Region: All Lunoculus Locations and Routes
Lempo Route 1: Eastern Districts (18 Lunoculus)
The Eye of Kratti features underwater Lunoculus that'll test your oxygen management skills. Kuuhenki transformations become essential for finding air pockets. Three Lunoculus are actually submerged beneath ice sheets - break 'em with Pyro attacks.
Blue Amber Lake's crystalline formations respond to elemental attacks in specific ways: Electro reveals hidden passages, Cryo creates ice bridges. The central island requires simultaneous activation of four elemental monuments. Bring friends or prepare for some creative character swapping.
Lempo Route 2: Western Territories (20 Lunoculus)
Starsand Shoal demands extensive Kuuvahki charges to clear sand dune barriers. Multiple Lunoculus are buried beneath sand that's only removable via Atapetra Conch energy. It's tedious, but systematic clearing works best.
Barrowmoss Barrens features those assembly module puzzles again - lure 'amazing bots' between positions to create Patches of Mist or activate Moonlanes. The mechanics are consistent once you get the hang of it.
Lempo Route 3: Hidden Underground Areas (15 Lunoculus)
Clink-Clank Krumkake Craftshop (yes, that's really the name) features industrial puzzles with conveyor belts and mechanical assemblies. Activate production lines for elevated platform access - it's like a mini-factory simulation.
Nasha Town's underground network connects cave systems through breakable walls and hidden passages. Your Luna Treasure Compass becomes crucial here for finding concealed entrances.
Paha Region: Comprehensive Lunoculus Collection
Paha Route 1: Mountainous Areas (10 Lunoculus)
The Kuuvahki Experimental Design Bureau houses 4 Lunoculus, but you'll navigate through Fatui-filled corridors and mechanical puzzles to reach them. Defeat the guards for restricted area access, then solve Unipolar charge box puzzles to power elevators.
Mountain peaks utilize wind currents and Kuuhenki transformation for summit access. The verticality here is no joke - plan your routes carefully.
Paha Route 2: Coastal Regions (8 Lunoculus)
Tidal cave systems contain Lunoculus accessible during specific tide conditions or through underwater entrances. Monitor environmental changes and use Kuuhenki transformations for air pockets when needed.
Offshore platforms require precise gliding from mountain peak launch points. Miss your landing, and you're swimming back to shore.
Paha Route 3: Interior Valleys (7 Lunoculus)
Final Night Cemetery contains Lunoculus locked behind the 'Raskolnikov' local legend encounter. Cemetery crypts feature hidden chambers accessible via tombstone interactions - some require riddle solving or memory sequences.
Valley locations hide beneath environmental camouflage. Use elemental sight for visibility - trust me on this one.
Optimized Fast Routes for Maximum Efficiency
Speed Run Route Planning
Here's my recommended collection order: Lempo Isle first (central position, highest count), then Hiisi Island, finishing with Paha Isle. Prioritize surface-level locations before diving underground.
Surface routes require 2-3 hours per island for experienced players. Create checkpoint saves before complex puzzles - failures often require complete restarts, and nobody has time for that.
Teleport Waypoint Optimization
Strategic waypoint usage cuts collection time by 30-40%. For Lempo Isle, use a hub-and-spoke approach centered on Nasha Town. Hiisi Island works best with northern and southern waypoints as dual starting points. Paha Isle benefits from coordinating coastal and mountain waypoints.
Seriously - unlock all waypoints before you start serious collection efforts. The time investment pays off immediately.
Time-Saving Tips and Tricks
Master Kuuhenki transformation timing: transform near cliff edges for maximum altitude, use Moonlanes and Patches of Mist to extend flight duration. Batch similar puzzle types together for mental focus - switching between puzzle styles constantly kills efficiency.
Co-op mode works wonders for complex puzzles requiring simultaneous actions. What takes minutes solo often reduces to seconds with coordination.
Statue of the Seven: Complete Rewards Breakdown
Level Progression and Requirements
Each statue follows identical progression: Level 2 needs 20 Oculi, Level 3 requires 22 additional (42 total), Level 4 wants 25 more (67 total), and Level 5 demands 28 additional (95 total). Maximum Level 10 would require 270 total Lunoculus, but Version 6.0's 112 Lunoculus only reach Level 5 with 17 remaining.

Primogem and Material Rewards
Each statue level provides 100 Primogems - that's 500 total per statue at Level 5. Three statues generate 1,500 total Primogems, which isn't bad for exploration content.
Adventure EXP scales nicely: 80 at Level 2, 120 at Level 3, 160 at Level 4, and 200 at Level 5. Luna Sigils start at 5 per early level, jump to 10 at Level 5, and hit 15 at Level 8. These are essential for Meeting Point reputation and compass upgrades.
The lack of Stamina increases still bugs me. Focus upgrade decisions on immediate material benefits - Primogems and Luna Sigils provide more tangible value.
Troubleshooting Missing Lunoculus
Common Hiding Spots
Underground locations account for the majority of missed Lunoculus. Check every cave entrance requiring Kuuvahki energy access - many caves feature multiple chambers connected by breakable walls that aren't immediately obvious.
Quest-locked areas get overlooked frequently. Double-check completion of required World Quests. Elevated positions accessible only through specific transformation sequences often hide the trickiest Lunoculus.
Using Resonance Stones Effectively
The Luna Treasure Compass replaces traditional Resonance Stones with comprehensive detection. Level 3 compass provides the most reliable detection, showing all Lunoculus within sub-regions. Focus on reputation building for this level before hunting down final missing collectibles.
Use systematic grid patterns for complete area scanning. Random searching wastes time.
Tracking Progress Methods
Maintain detailed collection logs using external tools or screenshots. Cross-reference multiple guide sources for location discrepancies - not every guide catches every detail.
Create personal waypoint markers for complex puzzle locations requiring multiple visits after quest completion. Future you will thank present you.
Advanced Collection Strategies and Pro Tips
Co-op Collection Benefits
Cooperative play dramatically reduces completion time for multi-step puzzles. Assembly module challenges become trivial with coordinated actions. Host sessions maintain your collection progress while helping others.
Voice communication makes transformation timing and Moonlane navigation coordination much smoother. Text chat works, but voice is faster.
Character-Specific Advantages
Anemo characters like Venti, Kazuha, and Sucrose excel at managing multiple 'amazing bots' during assembly puzzles via grouping abilities. Geo characters provide backup climbing when Kuuhenki's unavailable - Zhongli's pillar and Albedo's elevator are lifesavers.
Electro characters interact effectively with Paha Isle's industrial mechanisms. Bring at least one for that region.
Post-Collection Optimization
Continue Luna Sigil farming through chest collection and daily activities for Meeting Point reputation benefits. Plan strategies for upcoming content updates - Version 6.1+ will likely introduce additional Lunoculus requiring updated optimization.
Document successful puzzle solutions for future reference and community sharing. What seems obvious now won't be in six months.
Frequently Asked Questions
How many Lunoculus are in each Nod-Krai sub-region? 112 total across the region: Hiisi Island has 34, Lempo Isle contains 53, and Paha Isle holds 25. 92 are surface locations, while 20 hide underground in caves and quest domains.
What are the fastest routes to collect all Lunoculus in Nod-Krai? Three-phase approach works best: start with Lempo Isle (central position, highest count at 53), move to Hiisi Island (34), then finish with Paha Isle (25). Always prioritize surface locations before underground. Expect 2-3 hours per island, 8-10 hours total with efficient waypoint routing.
What rewards do you get from maxing Nod-Krai Statue of the New Moon? 500 Primogems per statue at Level 5 (current maximum), plus Adventure EXP, Luna Sigils, Keys, and Fates. Three statues generate 1,500 total Primogems. Unfortunately, no Stamina increases like the original regions.
Can you collect Lunoculus in co-op mode? Absolutely, and it significantly improves efficiency for complex puzzles. Assembly challenges become much easier with coordinated actions. The host maintains progress while helping others, making it win-win.
What Adventure Rank is required to access Nod-Krai? Around AR 35-40 gets you access, but full collection requires completing the region's Archon Quest and numerous World Quests that unlock underground areas. Don't rush it.
How do you track missing Lunoculus in Nod-Krai? Luna Treasure Compass at Level 3 provides comprehensive detection via Meeting Point reputation. Use systematic grid scanning, maintain detailed logs, and cross-reference multiple sources for quest-locked and underground locations. The compass is worth the reputation grind.